
A Solar-powered EV at Burning Man 2024
Sep 2024A Solar-powered EV at Burning Man 2024
For burning man 2024, I had two goals which sadly remain kind of unusual in 2024:
- Drive my EV there
- Power my camp with solar panels
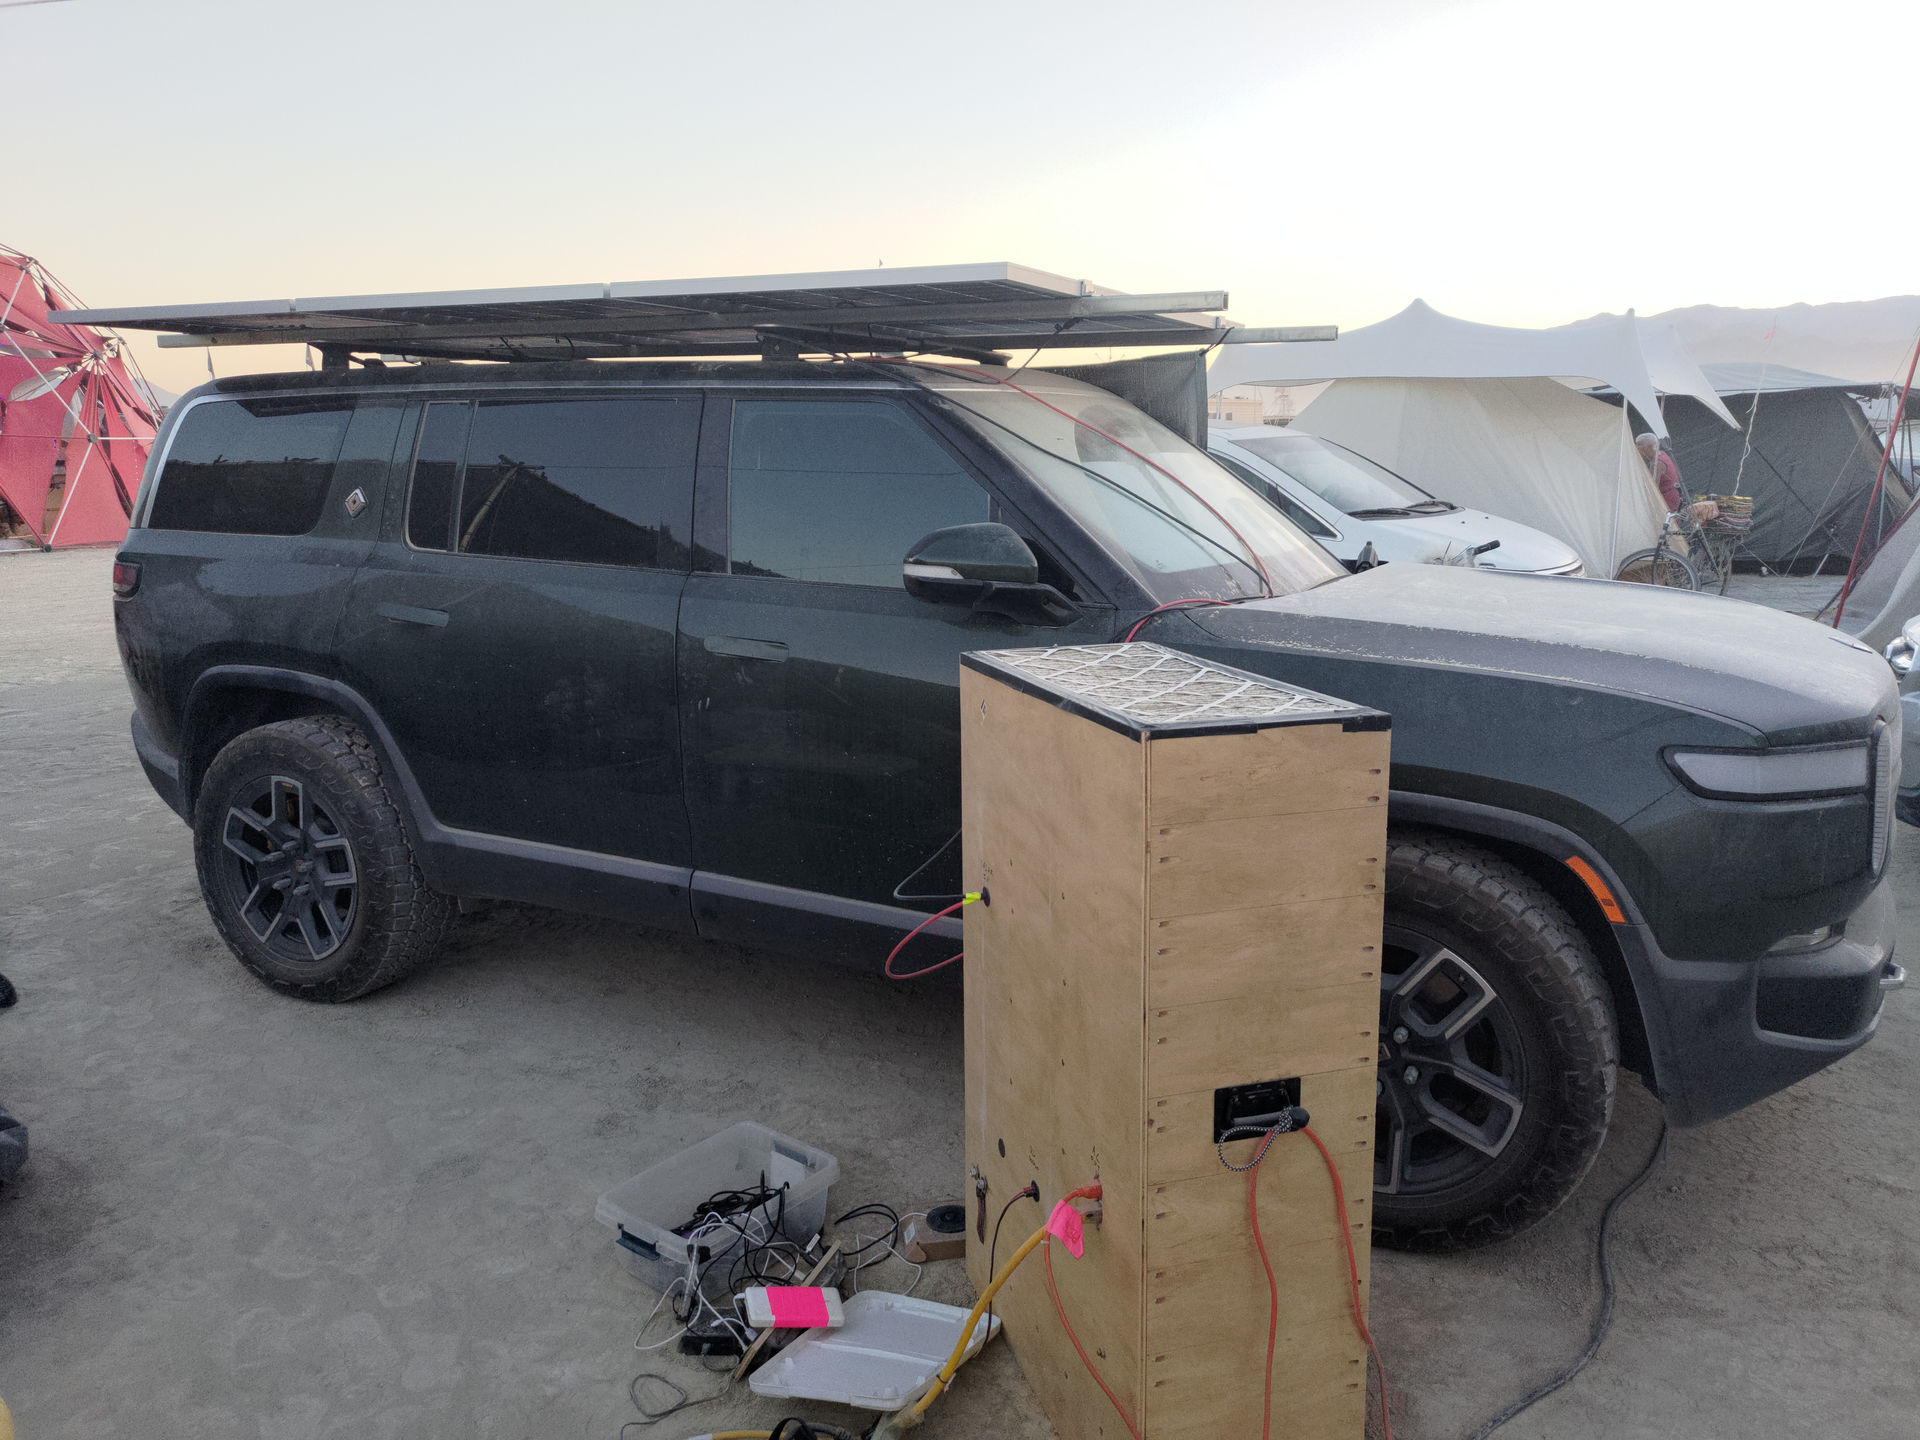
As an auxiliary goal, remembering the crippling heat of 2022, I was hoping to be able to run the AC in the EV for a few hours a day to provide an air-conditioned hidey hole. I was able to accomplish all of these goals -- sort of! Here's some photos of my system. Read on to learn about the process and all the choices and pieces that went into the project.
Panel Mounting
The Rivian R1S has a glass roof, and is thus a greenhouse. As an experiment, I parked in a sunny spot in my driveway and ran the AC on max. The car remained somewhere north of 85, and the AC was clearly struggling.
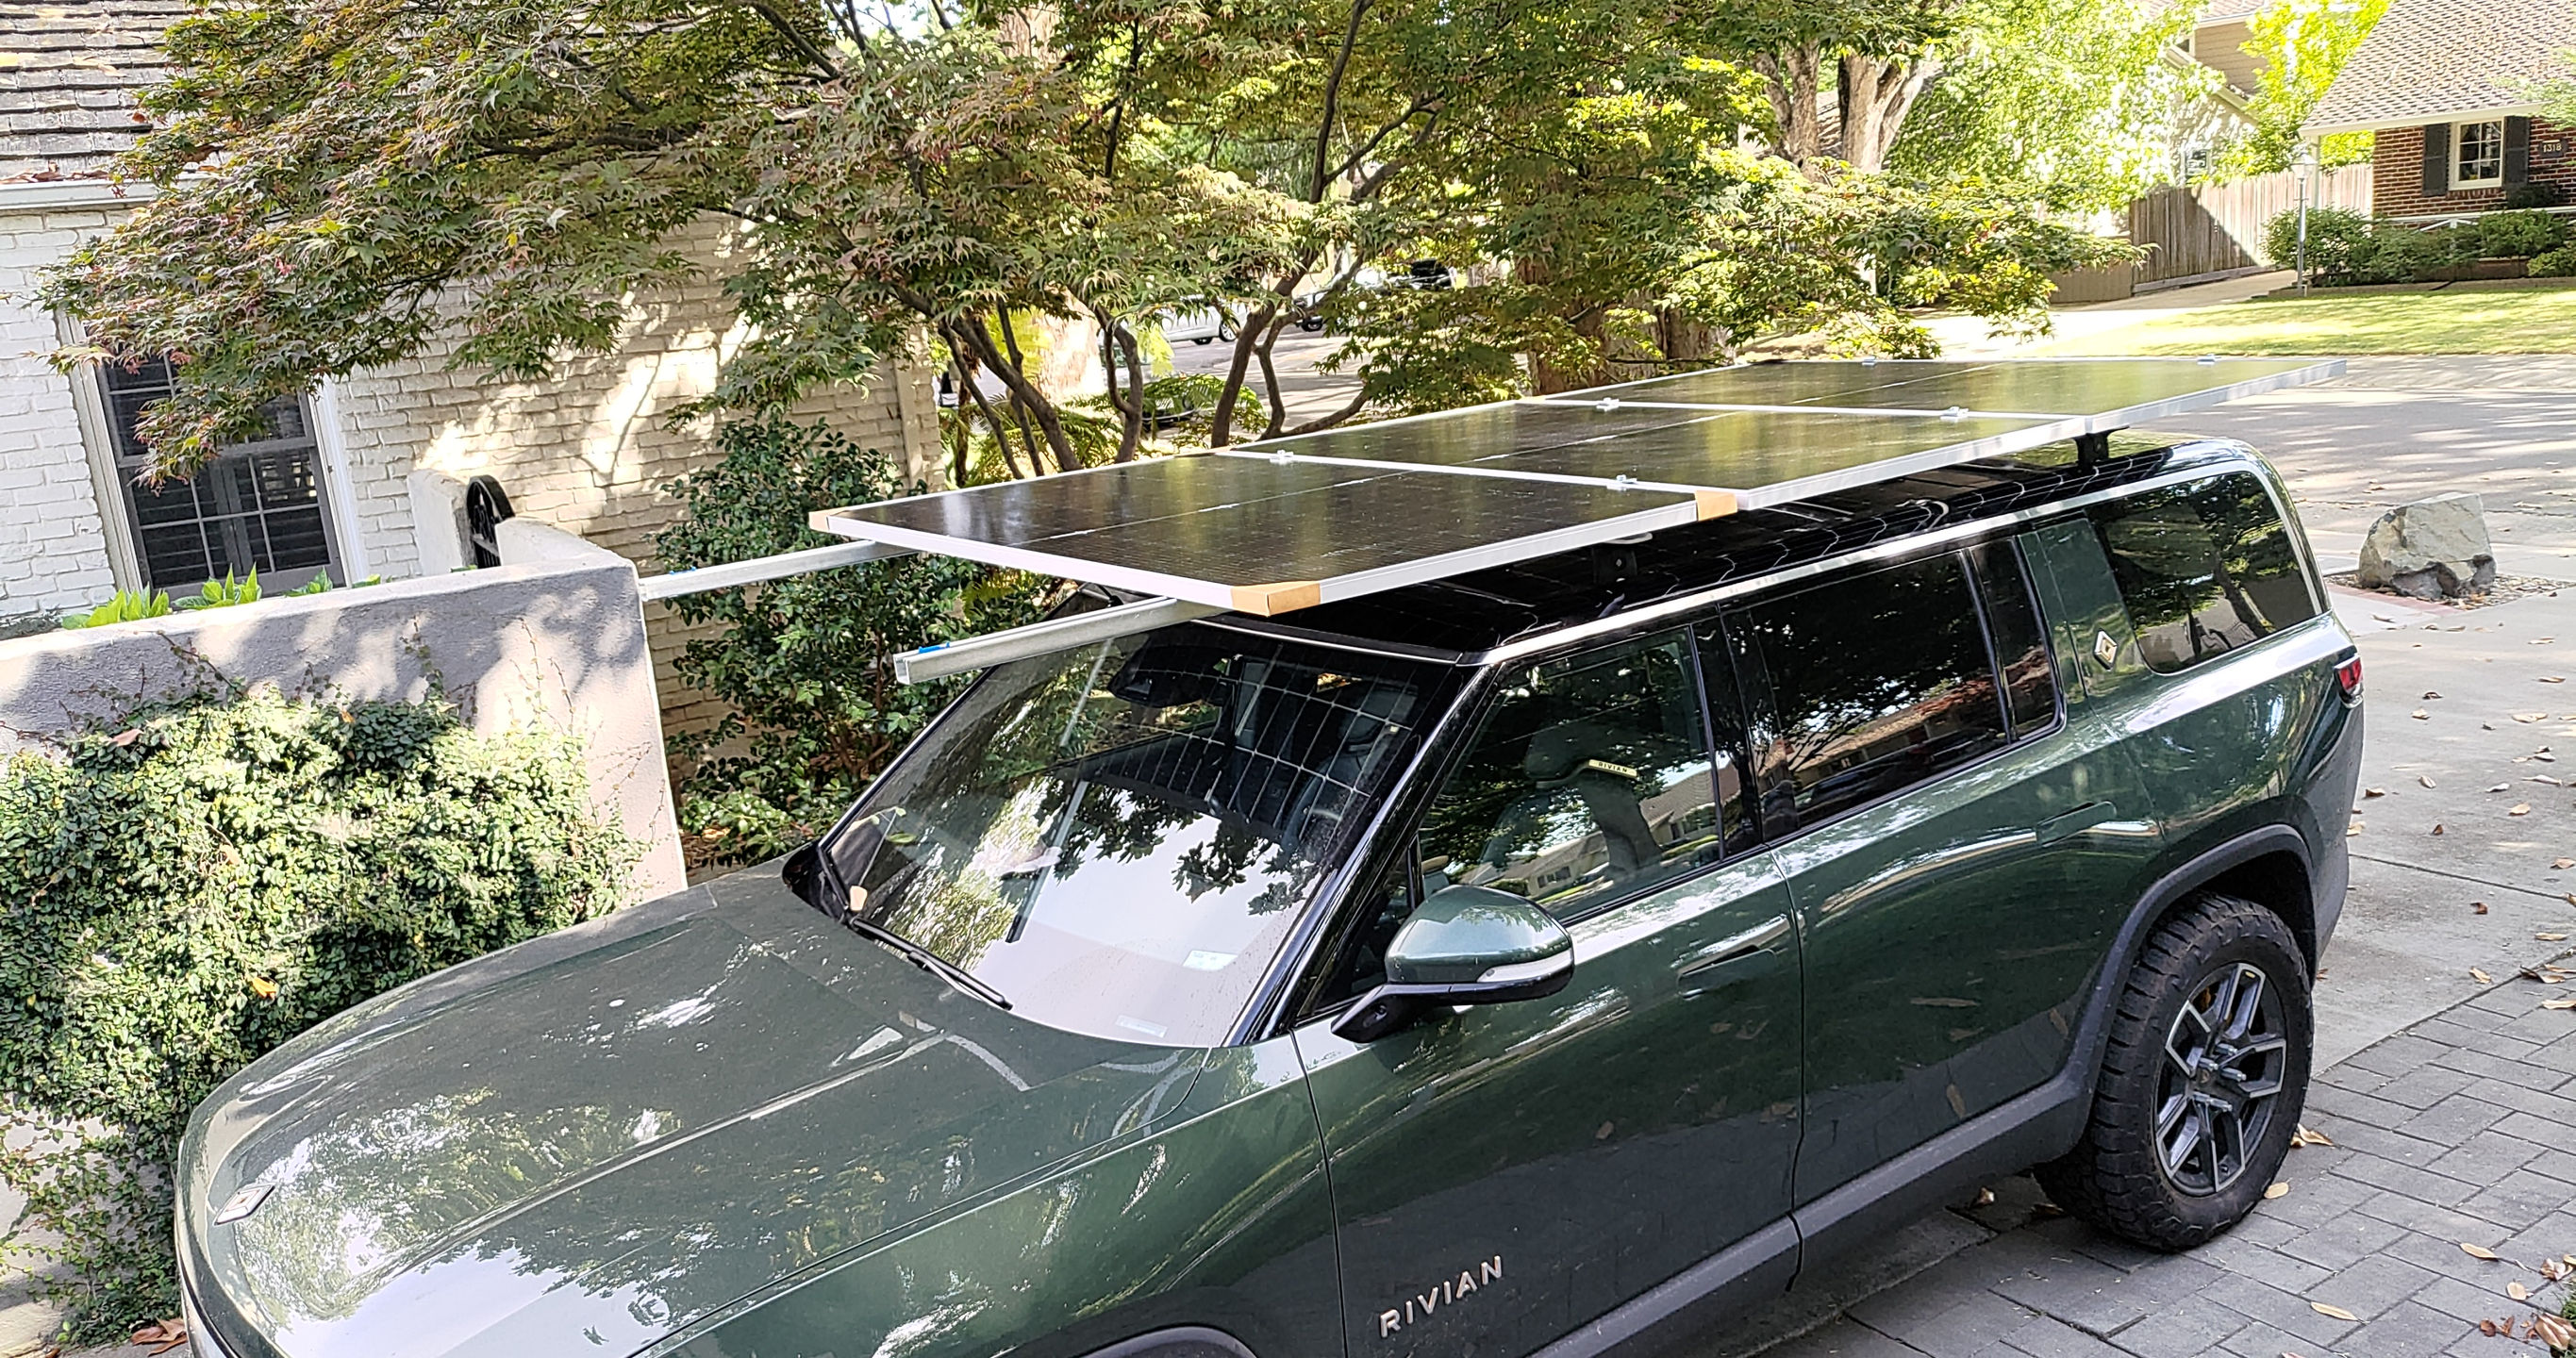
It made sense to use the solar panels to shade the car, which then further implies just mounting the panels on the roof. Solar panel mounting is somewhat of a black art, so far as my internet research went. I eventually discovered unistrut, which is available at my local Home Depot. I could mount it to my cargo cross-bars using t-channel bolts. It comes in 10' lengths, and I needed somewhat more, but it was easy to get the necessary hardware to join a 2' length to the 10' length.
All the hardware for this at Home Depot was 3/8", including these square washers which I could use to hold the panels to the strut where two panels abutted. However, I could not use the square washers to hold the end of the panel -- they slipped off when not supported on both sides. I needed solar-panel specific end-clamps.
As solar panels are all made in China, most solar hardware is metric, and I could only find those clamps with 8mm bolts. To make life "simpler" for myself, I wanted to minimize the variety of fasteners. I "imperialized" the metric hardware by drilled out the holes out for a 3/8" bolt. I also had to use a dremel to grind away some of the metal around the hole, so I could get a hex-head bolt to rotate in the tight space.
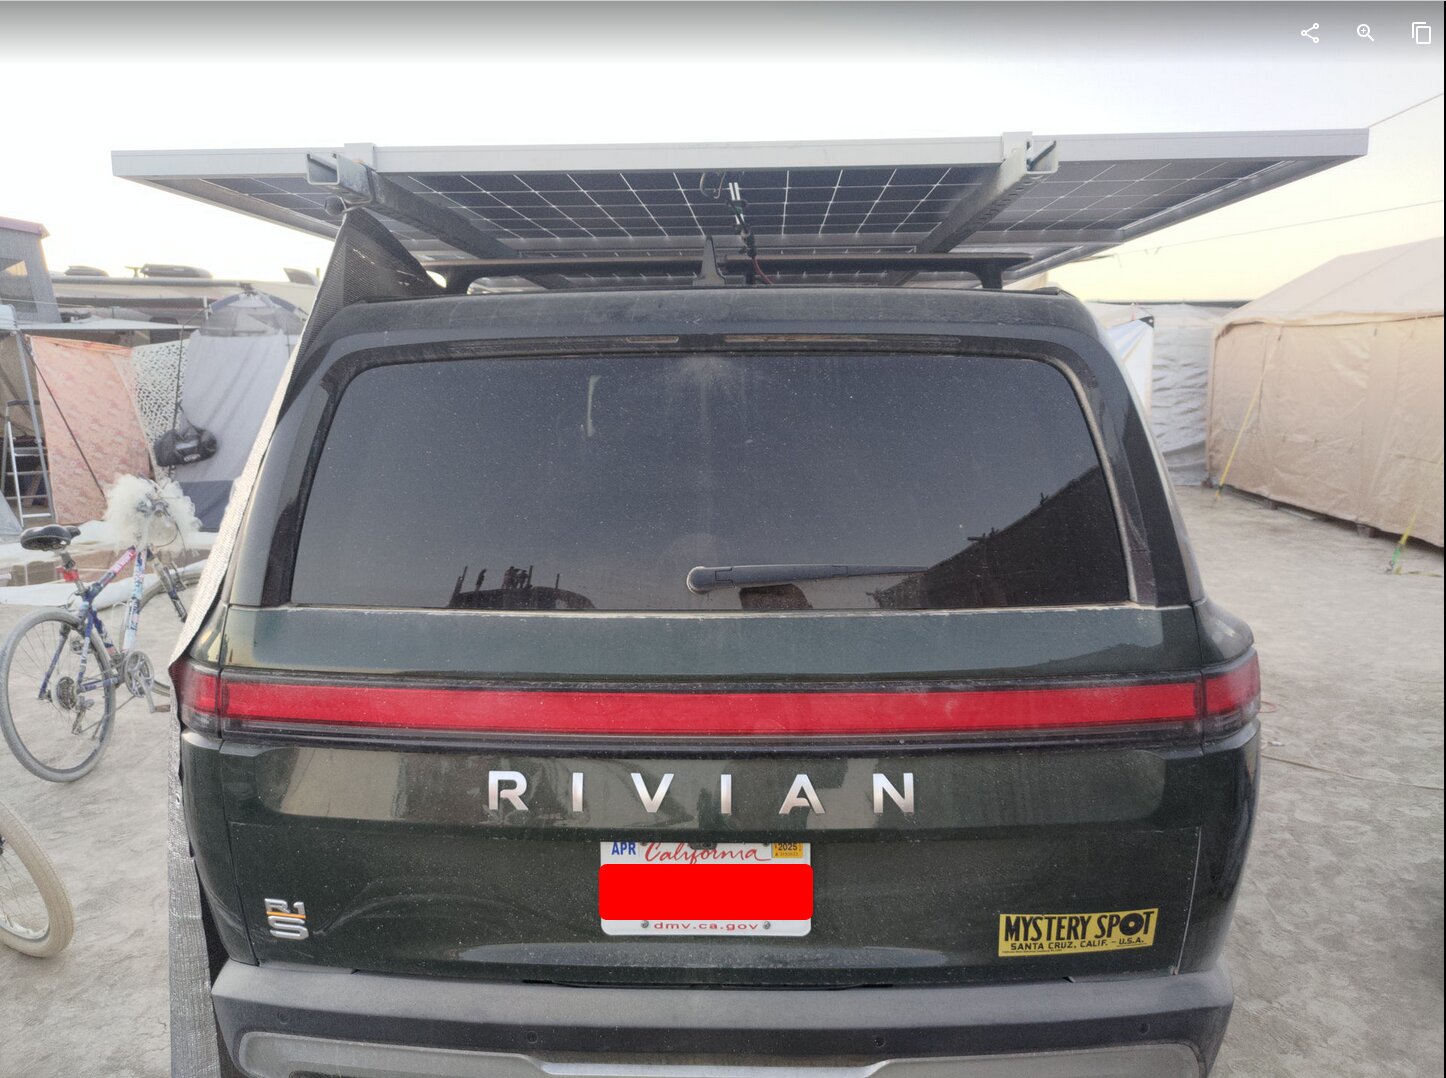
The end result looks like this:
Solar Panel Selection
Craigslist is a great place to get solar panels. My original plan was to buy used panels, which tend to be quite cheap in $/watt, but also have a lower efficiency and so are larger for a given system wattage. Since I was constrained on space on the top of the car, I ended up getting new panels from a CL reseller. I ended up with some pretty nice modern bifacial panels at 20.9% efficiency at about $0.31/watt. Here's the datasheet for the panels I used.
I wish I could have found panels that were longer and narrower. This would have enabled me to put more panels on the roof, but also to have the panels shade the side of the car. Alas, panels seem to come in generally squarish dimensions. I ended up with a piece of aluminet hanging off the unistrut for side-shade.
I also wish I could have had thinner, lighter, more flexible panels. Besides trying to save space and weight, I'm also pretty nervous about breaking those big sheets of glass. However, the glass panels with aluminum mounting borders are most common for industrial installations, and so are cheapest. The flexible panel market is more for hobbyists, and those panels tend to be higher cost per watt, lower watts per m2, and less readily available for purchase.
Calculating Power Needs
I estimated that, if I wanted to run the AC in the Rivian for a few hours a day, that would be my biggest power draw, far dwarfing any other loads I might need (e.g. lights, charging personal batteries, etc...). How much power did I actually need? This is not an easy question to answer. Rivian studiously avoids any mentions of watts, volts, or amps in the in-car UI. All battery displays are in %, with the total capacity of the battery (in kWh) nowhere to be found, or in miles, which are a meaningless unit only peripherally correlated to actual road miles given the wildly differing efficiencies given terrain, tires, driving style, and a thousand other factors.
So, how much power would I use keeping the AC on? I did a bunch of hacky tests, keeping the AC on in my driveway and checking the differences in % with my eyeballs every period of time. But I was only really able to answer the question when I learned about a secret RiDE menu.
Using this menu, I was able to learn that when awake, my Rivian R1S uses about 500W of power baseline, just sitting there. With the AC on, the usage goes to about 2500W. That was more than double the amount of solar I planned for, meaning that for every hour of running the AC, I would need about 2.5 hours of charging to keep the same SoC. It's actually slightly worse because, when charging at L1/120V, the Rivian seems to put only about 60% of the power into the HV battery. Presumably, the rest is going into some combo of staying awake (500W!) and keeping a built-in inverter running.
Inverters and Batteries
I spent a LOT of time researching solar inverters. The first annoying part is that I had to get a battery. This is frustrating, because my Rivian is already basically a giant battery on wheels. Why did I need another battery?
One reason is that the R1S is a 400V architecture, and I didn't really see any inverters running at those voltages. Another is that, while Rivian continues promising V2G and bi-directional charging, this so far remains vaporware. Without bidirectional charging, there's no way to way to use power when the sun is not shining. So I would need a battery if we wanted to run any loads at night. But also, most inverters need either a battery or grid power to function. There do seem to be some off-grid solar EV chargers that don't require an intermediate battery, but these are rare. I found this one, but it's in pre-order only and not yet generally available.
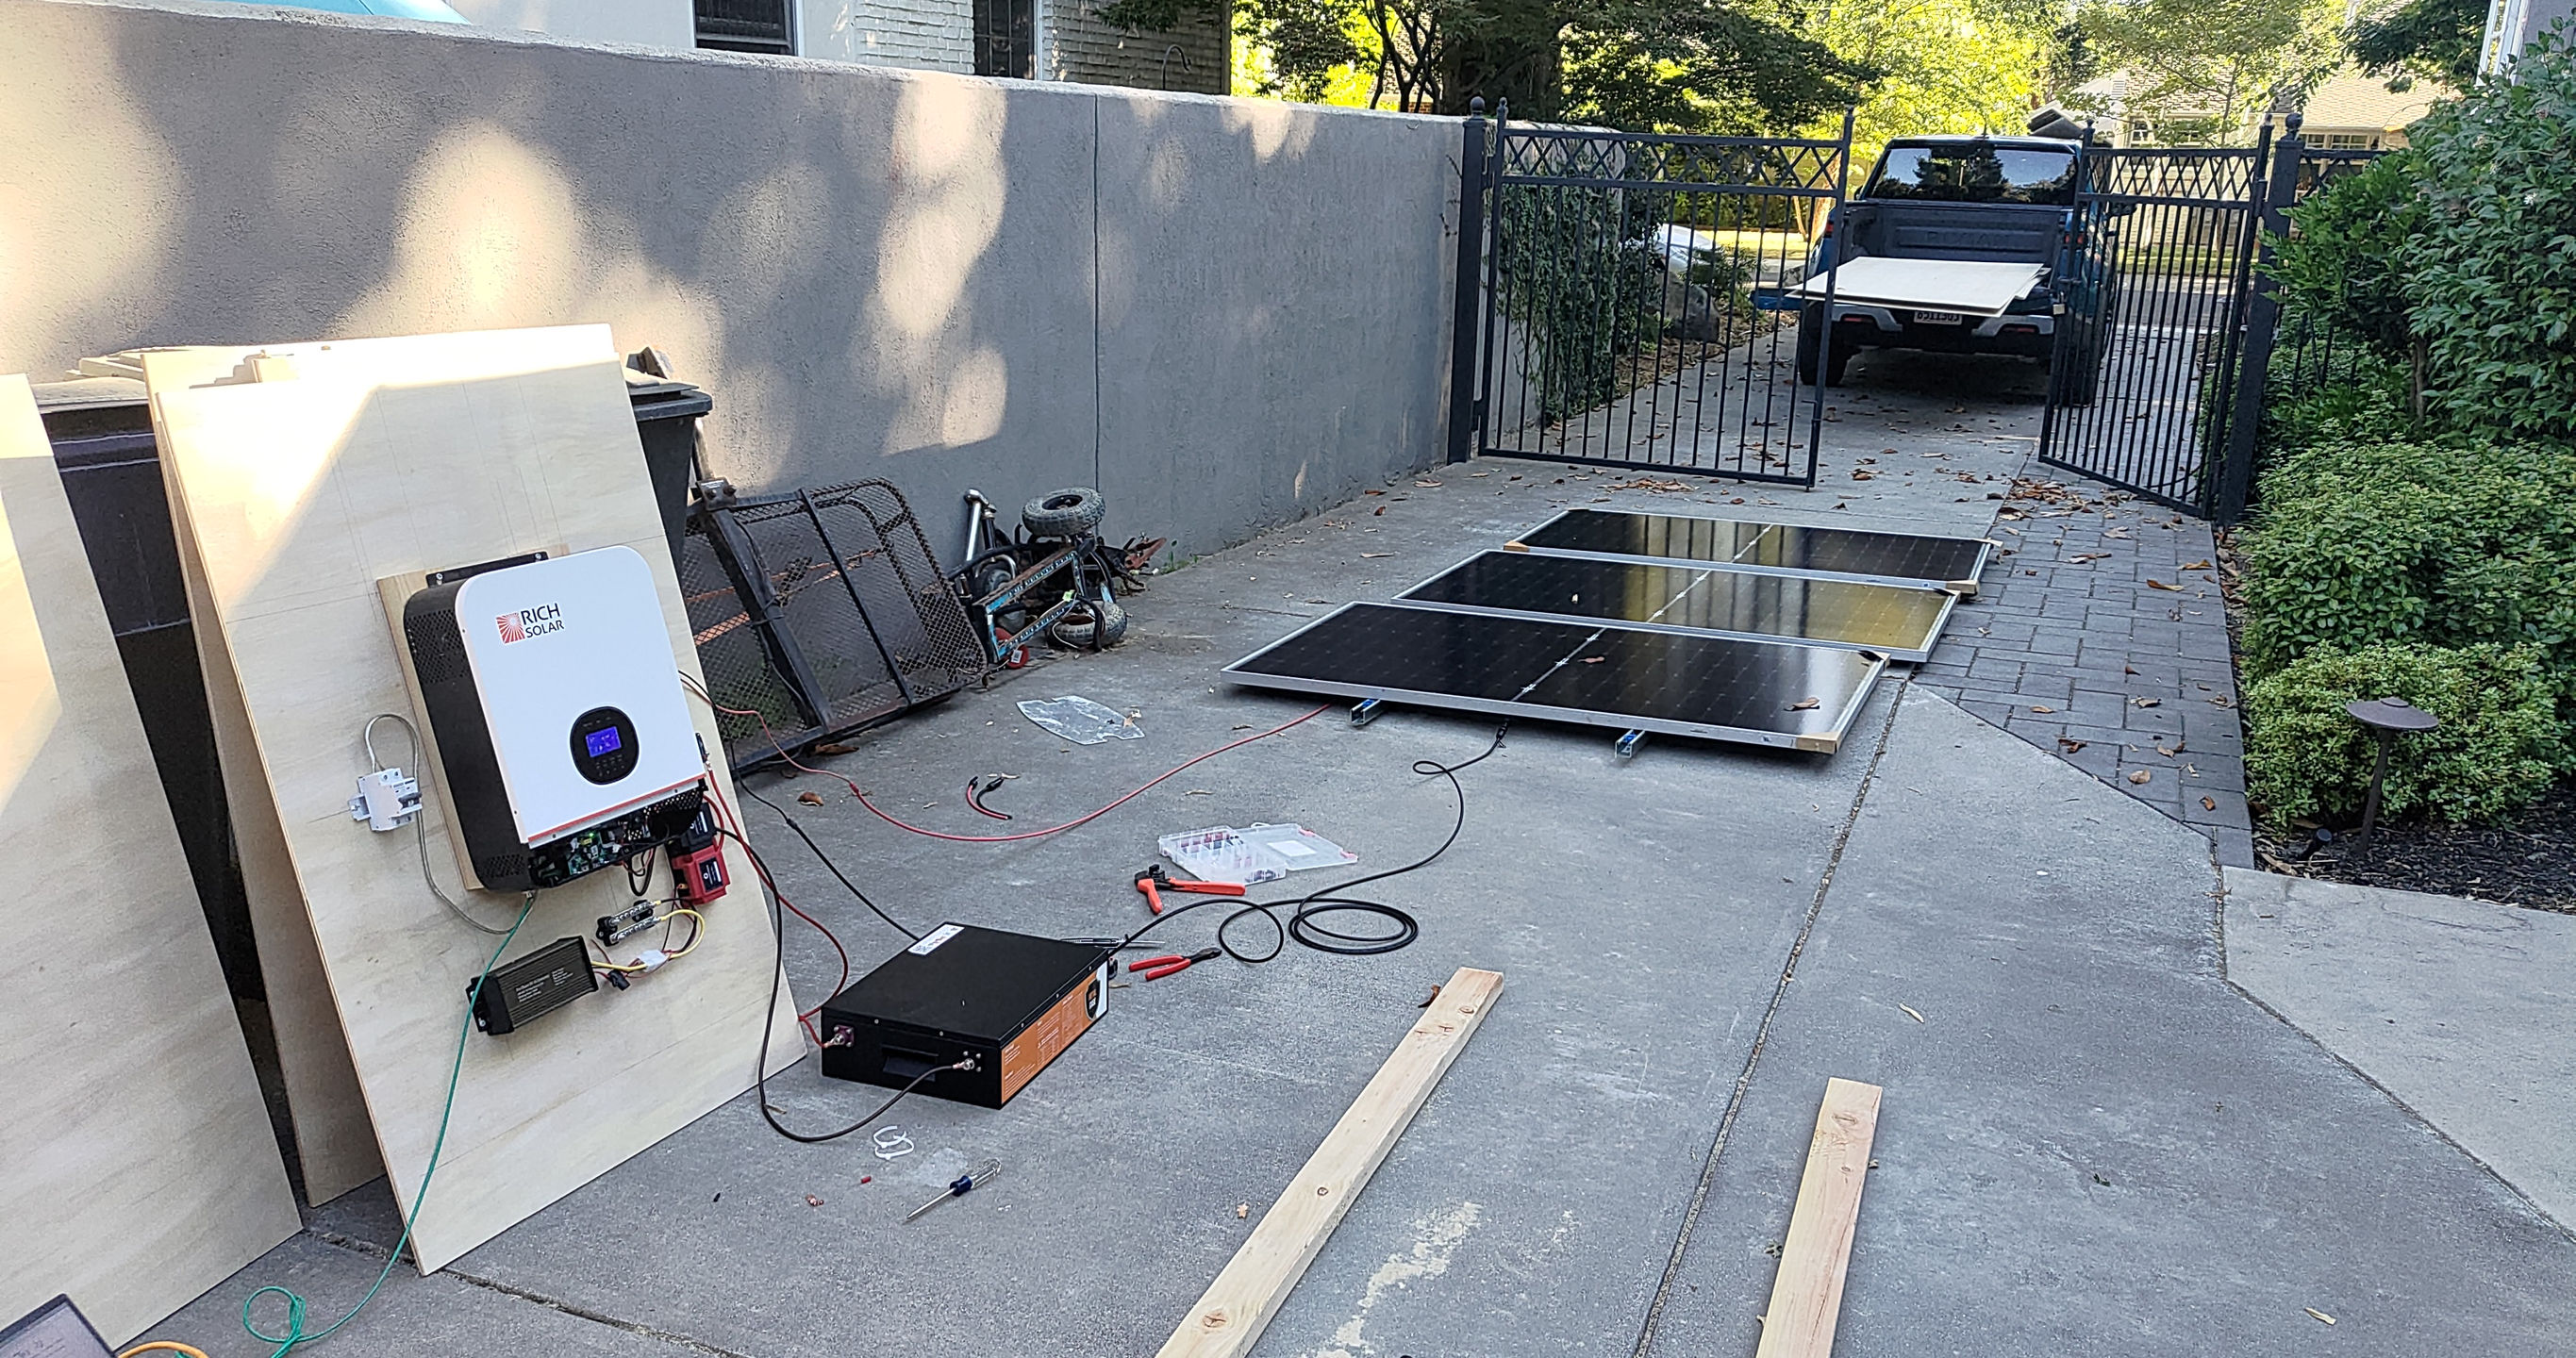
In the end, I went for this solar inverter, which was temporarily available from ShopSolarKits for only $400. I also snagged this battery for about $500. Finally, it seemed like the inverter didn't have a good way of showing the power in/out of the battery, so I last-minute purchased this little power meter to install on the battery. This last purchase was incredibly clutch, allowing me to track power consumption at a glance.
Wiring and Dust
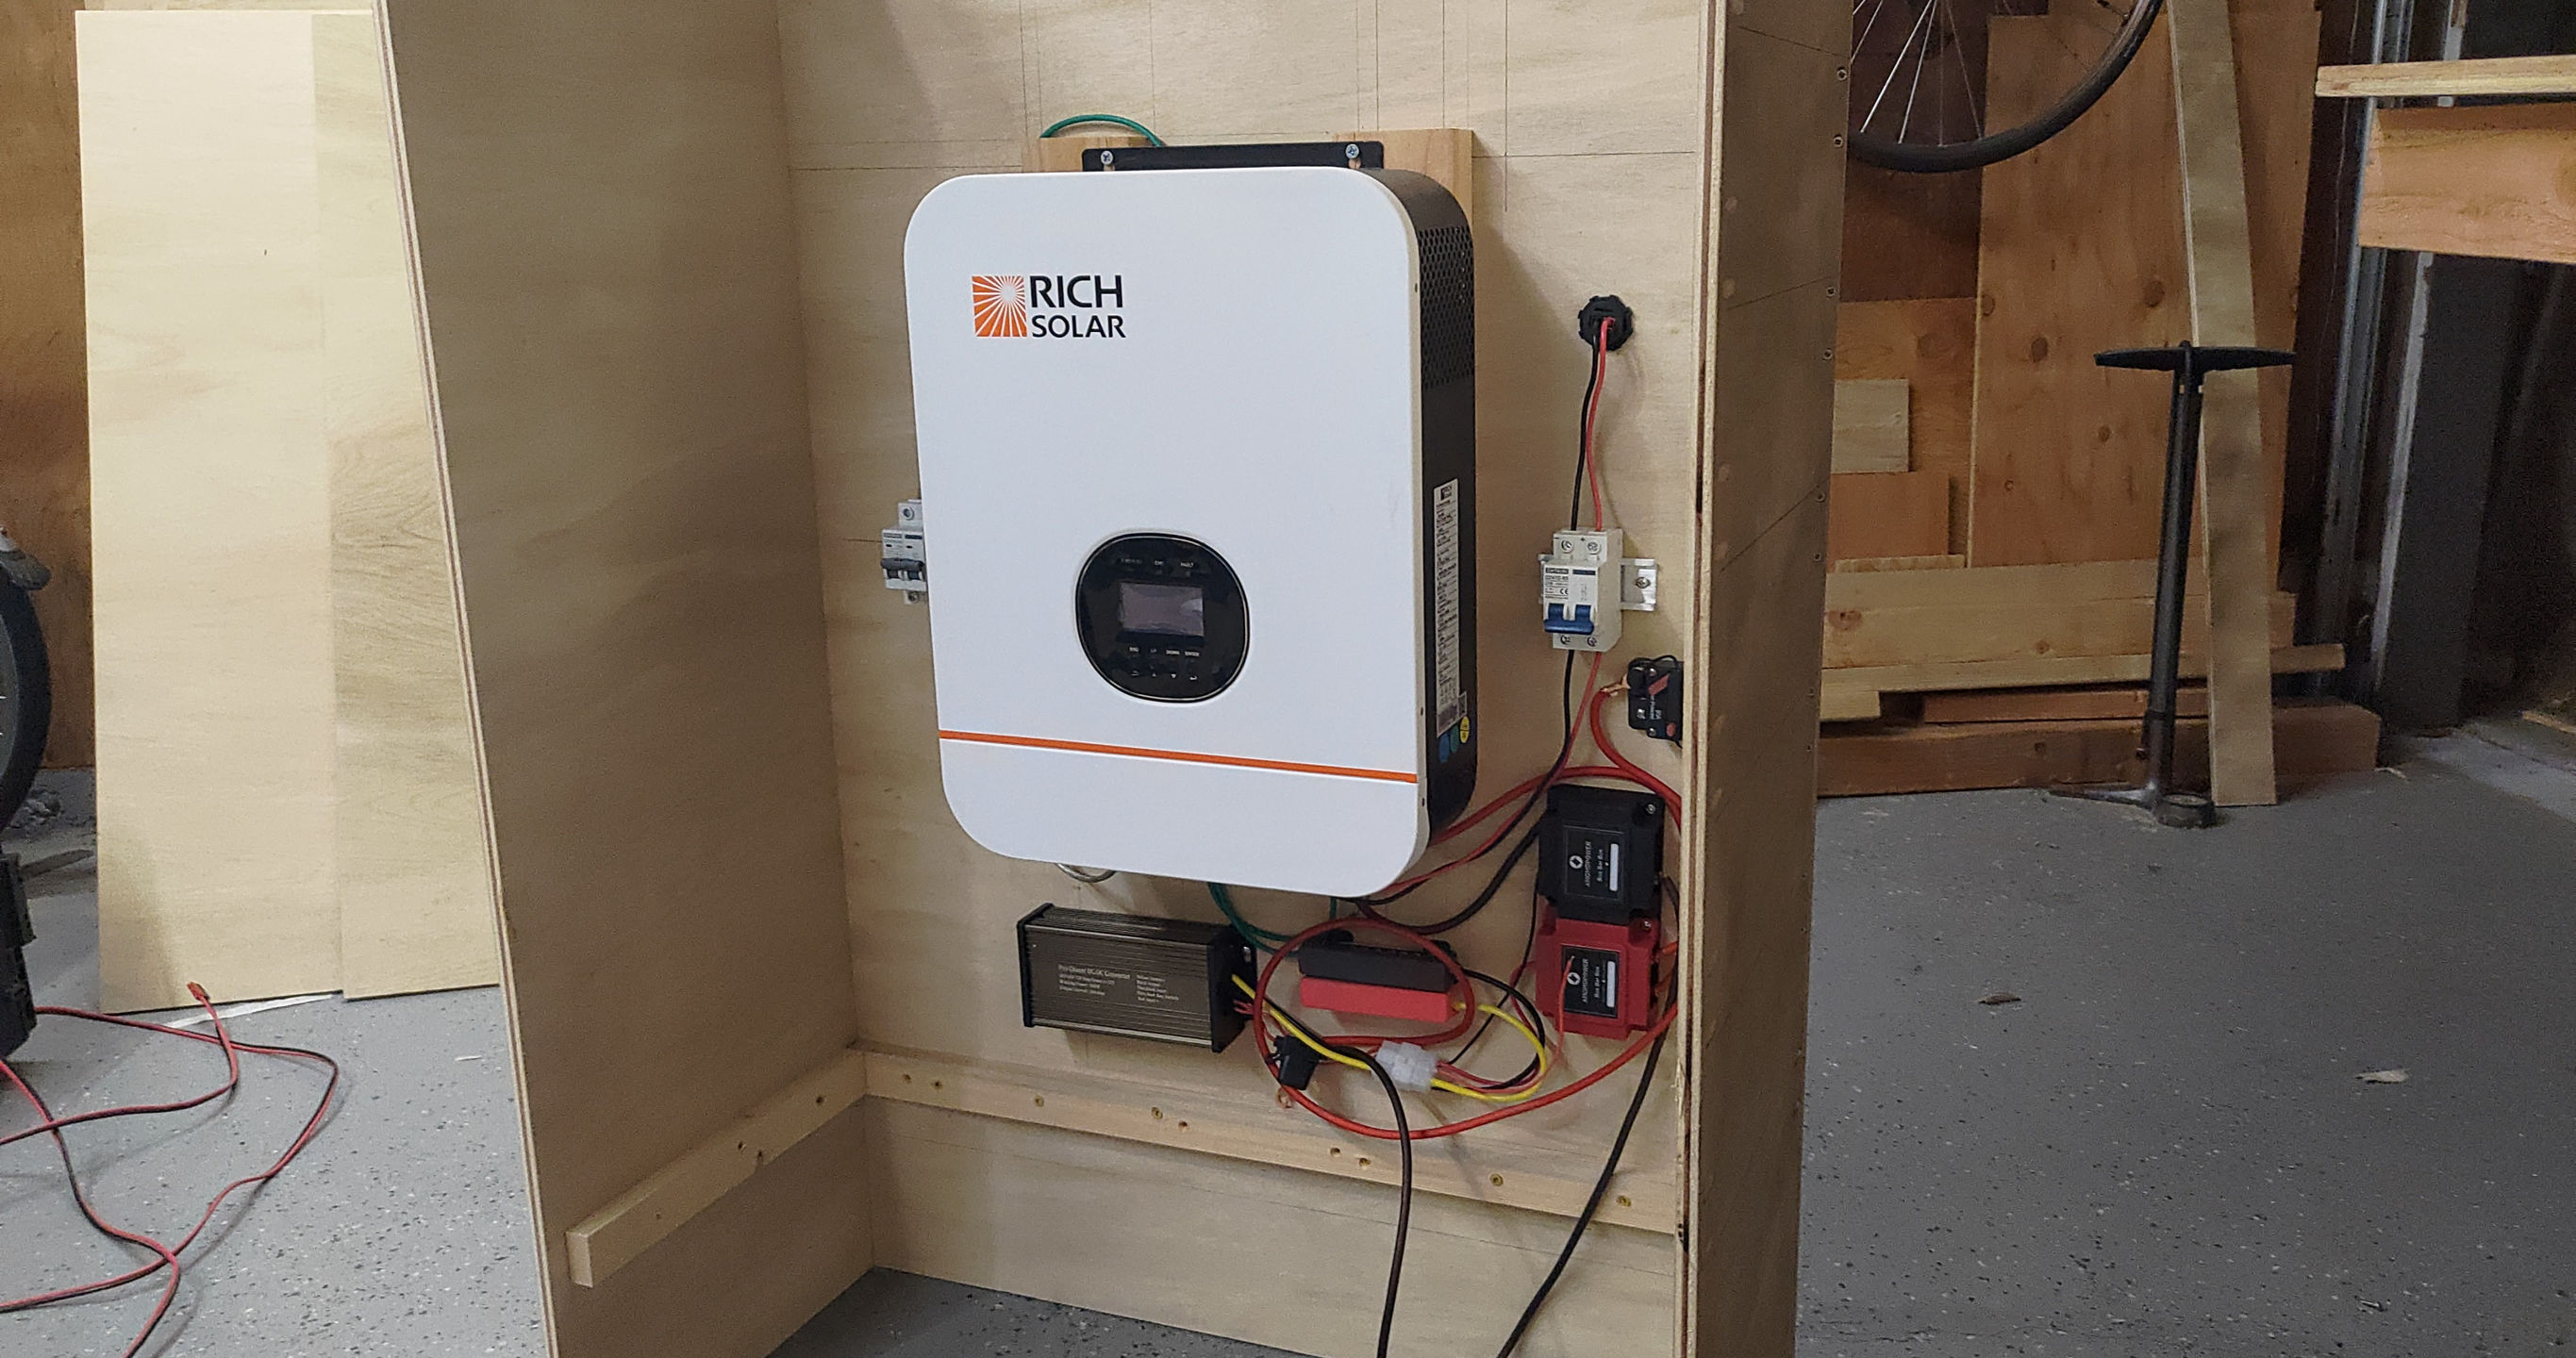
The inverter I got was not rated for dust, and I didn't want it failing half-way through the burn. I decided to build an enclosure for it, with air filters on top and bottom and an auxiliary fan so it could shed heat while not getting too dusty. I began by mounting all the components on the back -- a friend helped with this.
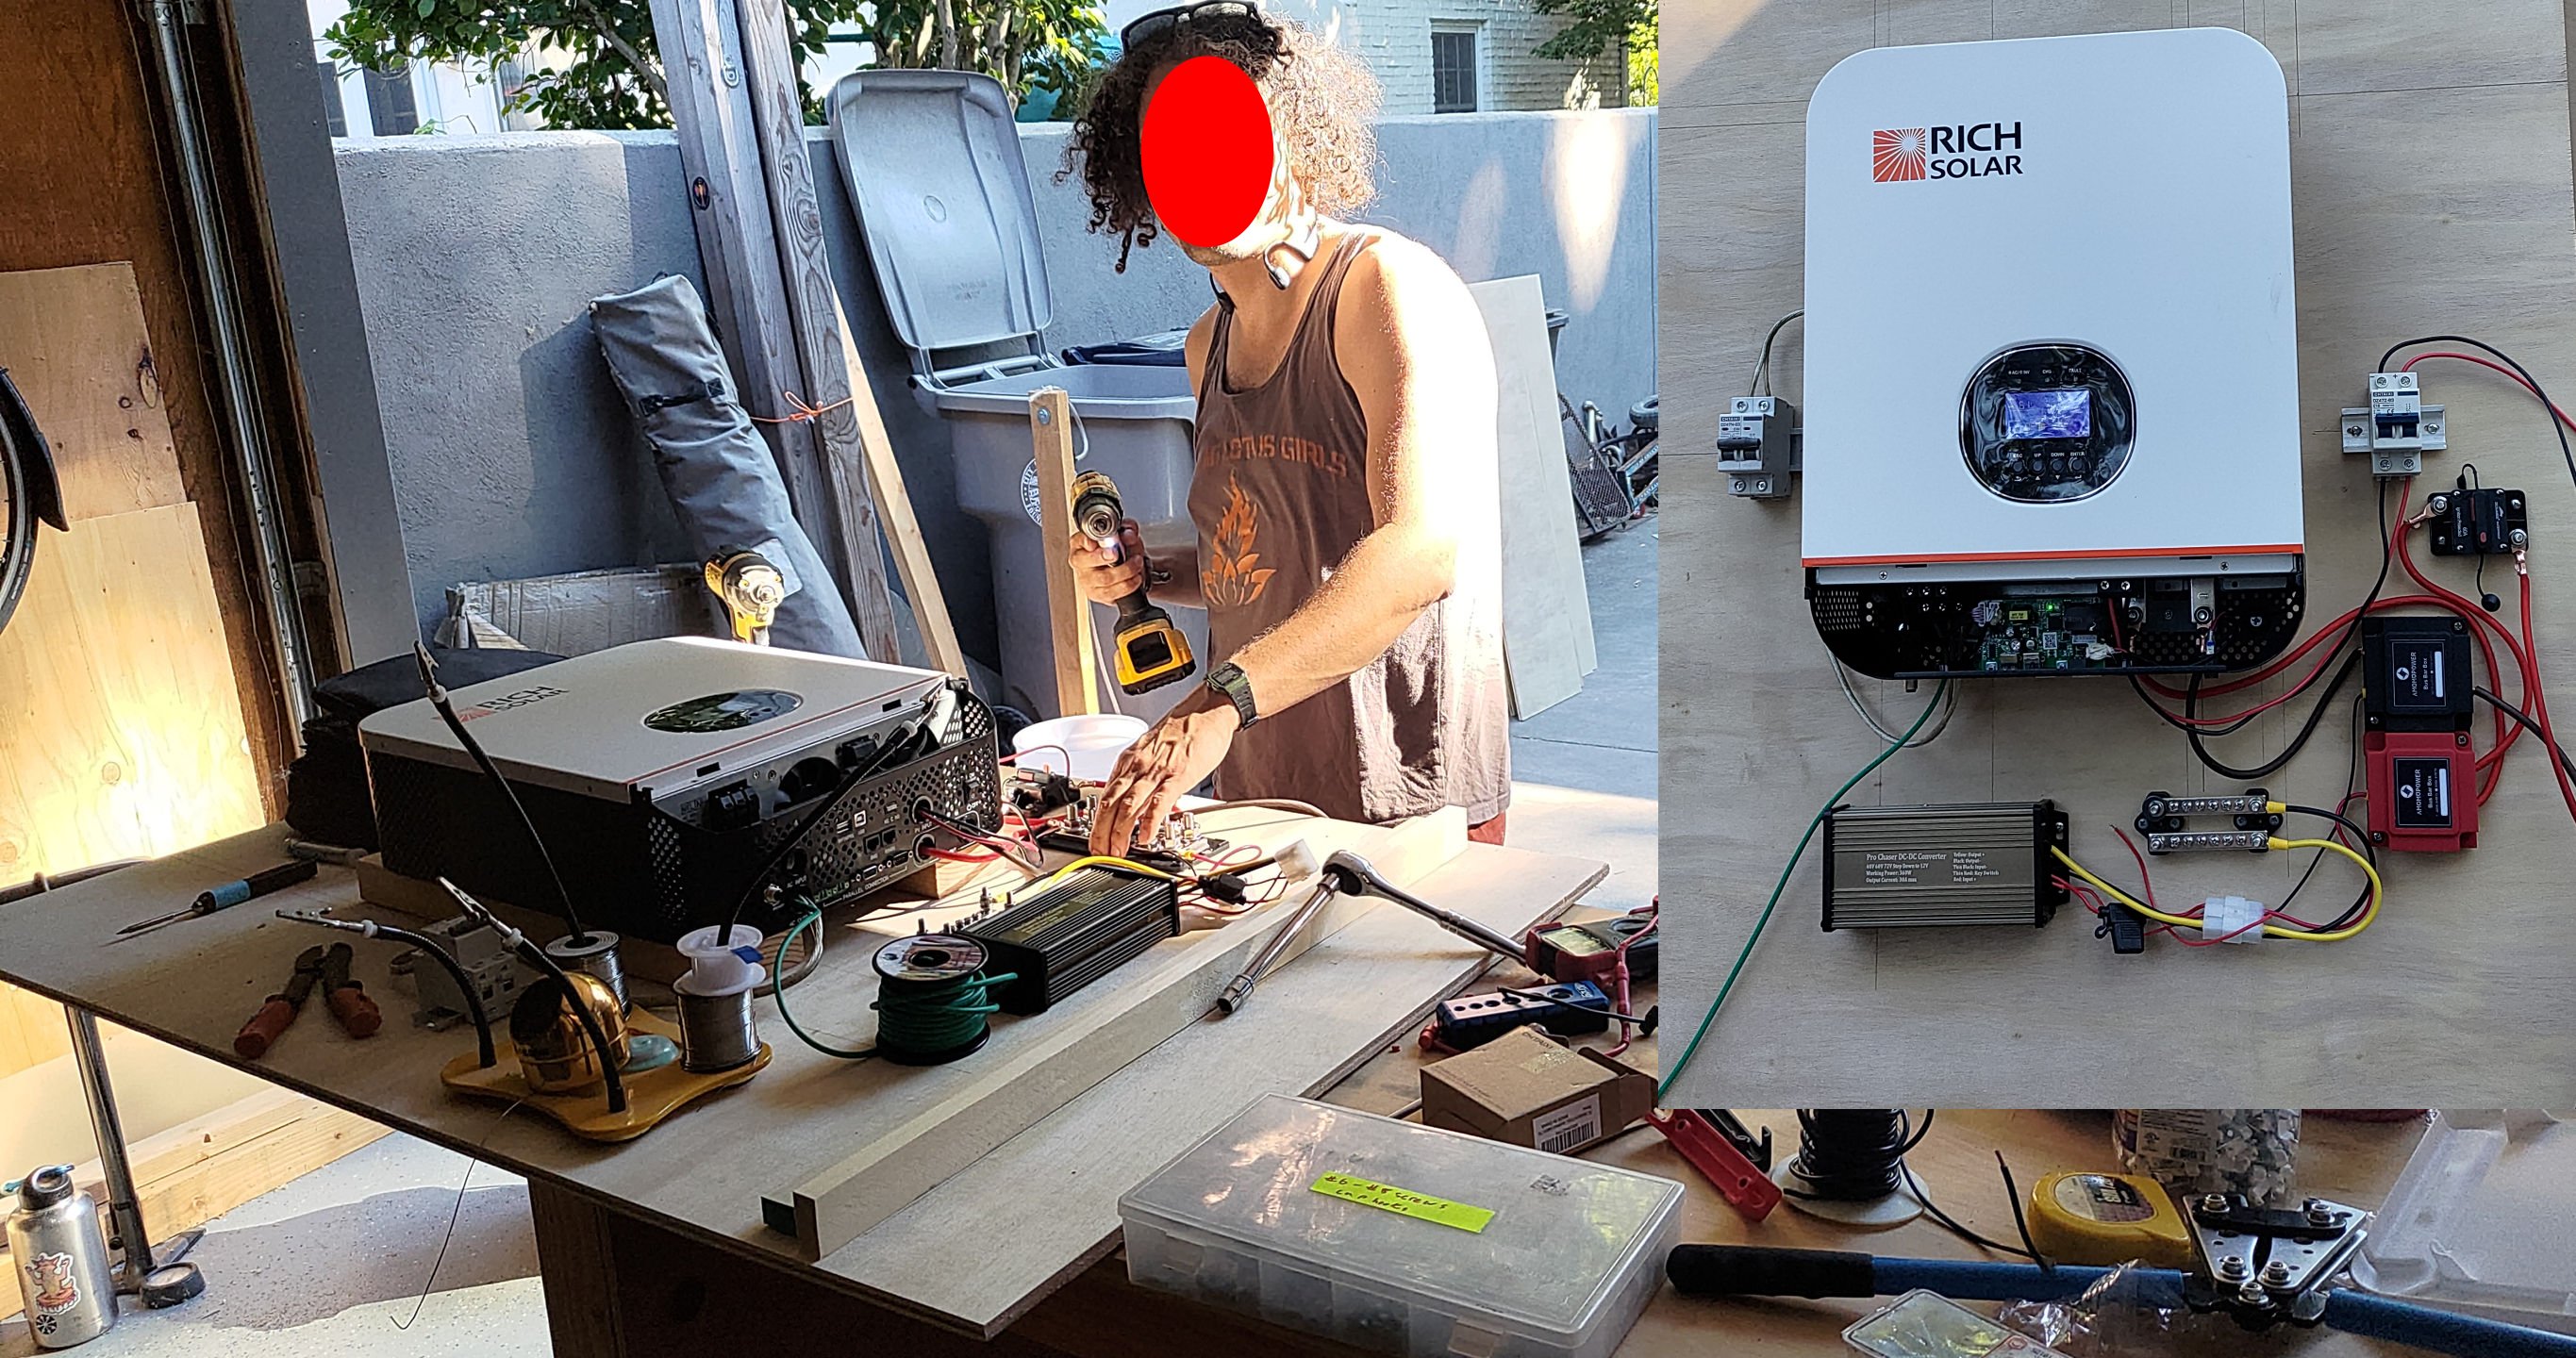
This allowed me to do the full system test. Nothing exploded!
I used three breaks -- one as a battery disconnect, one for the HVDC solar, and another for the inter AC output. There are not a lot of devices that run on 48V, so I added a 12V step-down regulator meant for golf carts. In hindsight, I wished I had gotten a larger one so I could power more USB-C ports in parallel, but this one was okay.
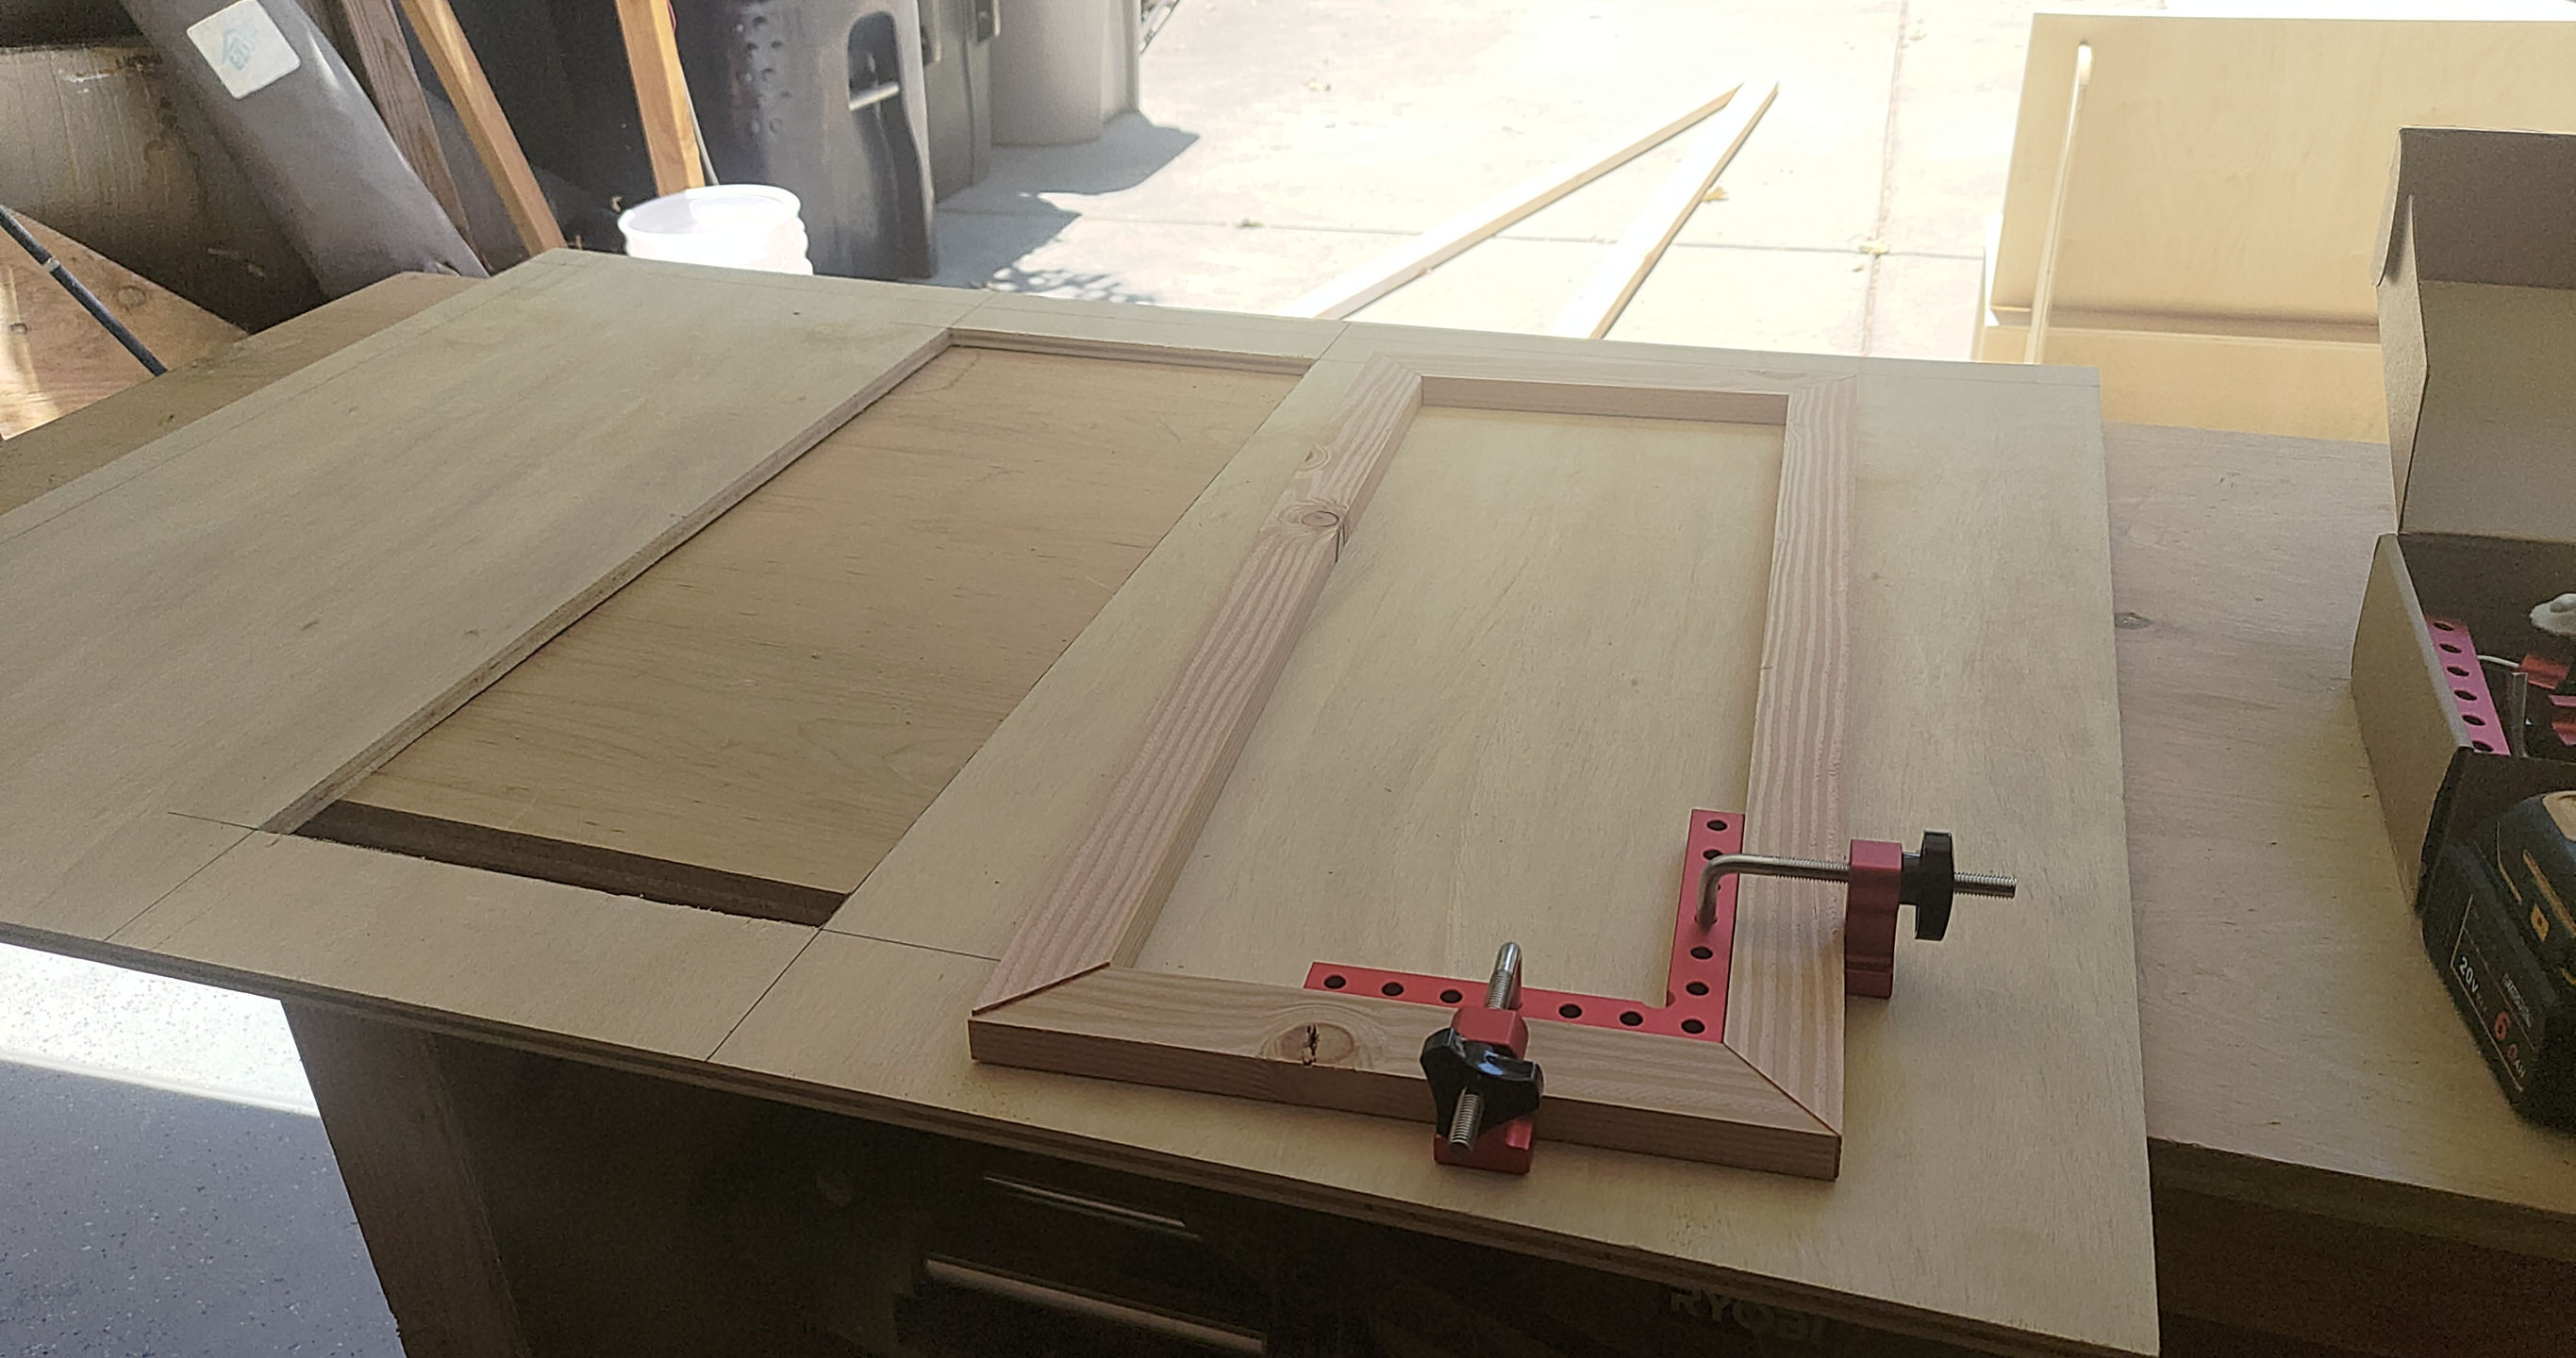
Next, I built a plywood box around the back plate. I used a pocket hole jig to join all the sides. The molding you see on the bottom in this photo is where the bottom air filter is meant to rest.
On the front of the enclosure, I wanted a door so I could turn switches on/off and see inverter status. I routed an opening out of the front panel, and added molding so the door would have something to sit against as a dust barrier. I used velcro to keep the door closed.
I also routed out openings for the 120V outlet, and for handles on the sides of the box. I used bolts through the back panel to bring out battery power, as well as a ground connection which I didn't end up using. I brought PV in and 12VDC out using Anderson power pole panel mounts. Here's a final walkthrough of the system I made for the camp:
So ... How Did It All Work Out?
On the whole, the system worked well. Mounting the panels on the car was easy, and they felt secure. Nothing died, and my air filters kept the dust out of the enclosure (although it wasn't a very dusty burn). I got surprisingly good power production, more than 1kW at peak.
It wasn't a very hot year, and we didn't end up needing the Rivian's AC. However, a lot of folks in camp had swamp coolers, and we ran a swamp cooler grid off the solar. It's always convenient when your biggest loads run when the sun is shining!
We also had several morning when we made "solar waffles" using electric waffle irons powered by the solar system. I found this incredibly satisfying, though opinions differed on whether this made the waffles taste any better.
On the other hand, some things didn't work well, mostly having to do with the Rivian. First -- we pulled a pretty heavy trailer, which really affected my range.
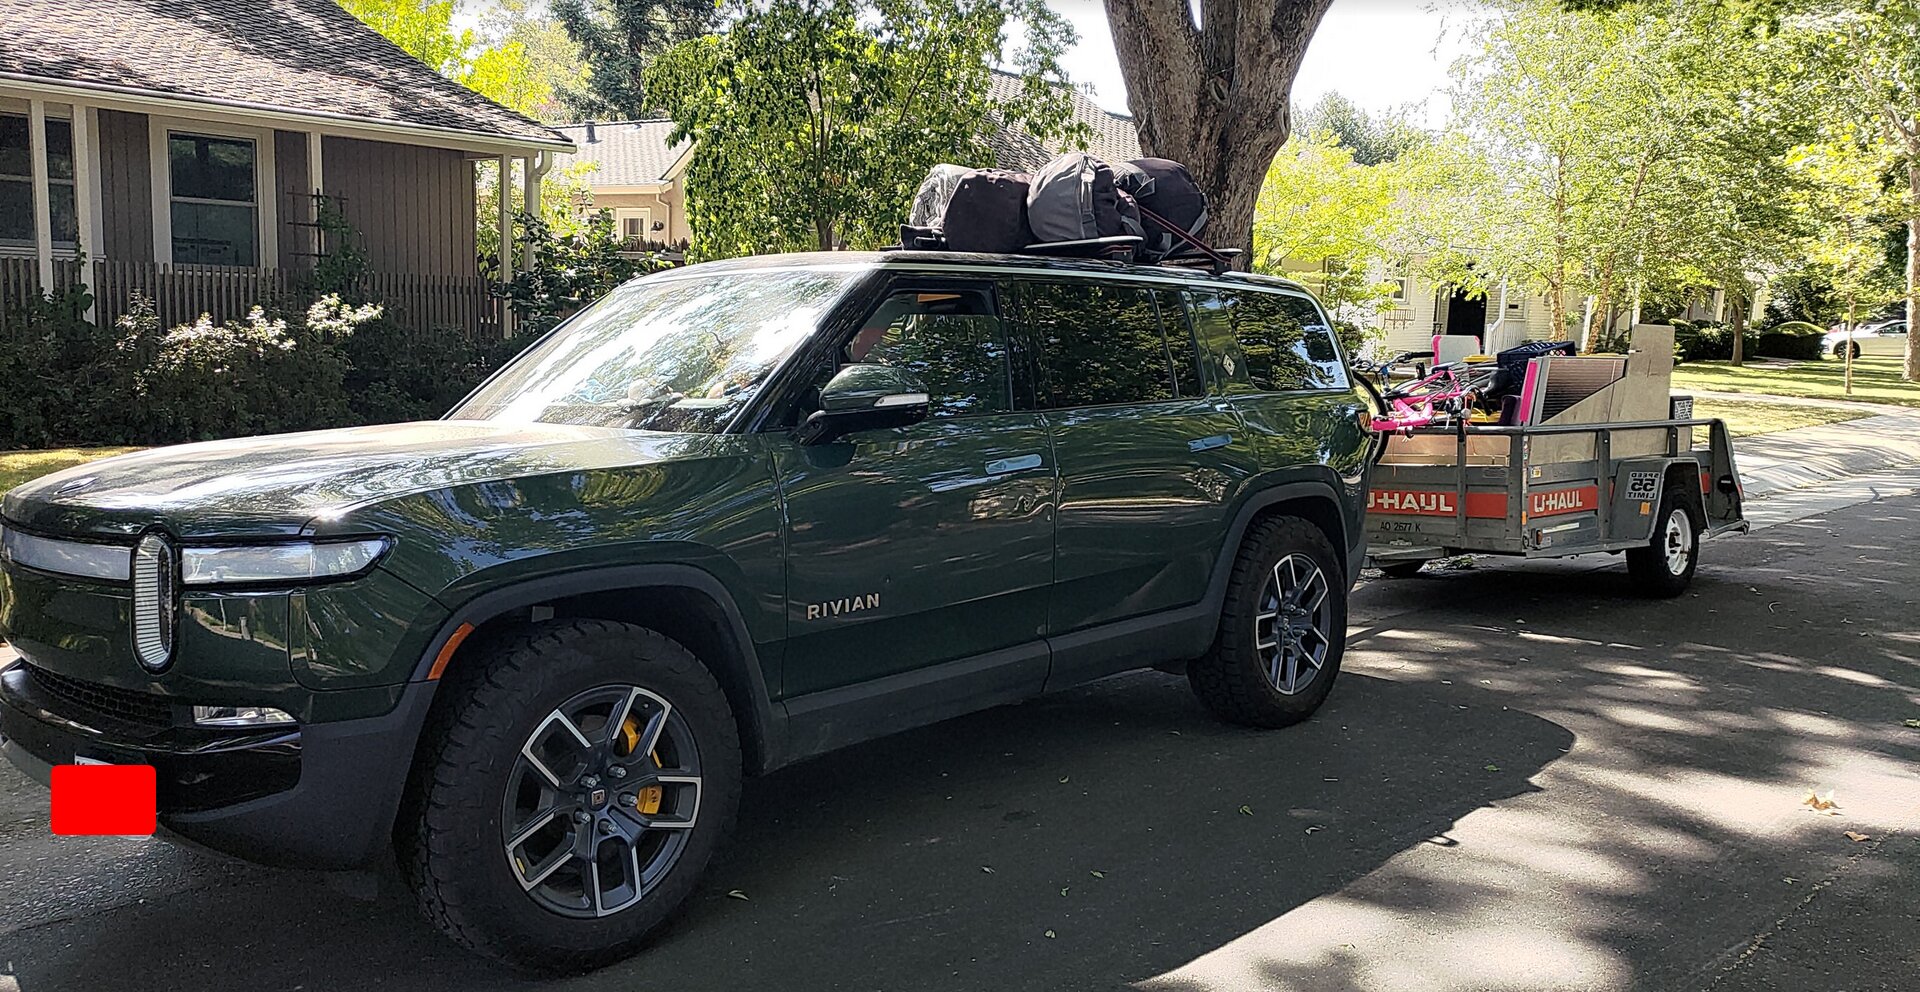
As a result, we arrived to camp with about 49% range -- clearly not enough to get back to a charger in Fernley.
All week long, I kept trying to charge up the Rivian off solar, but all I managed to do was keep it at 47%.
One reason was that, although I set the Rivian to stay off mode, I failed to turn off an AC schedule that was set up around my partner's daily commute, and which cooled the car down for her in the mornings and afternoons.
I discovered this on Thursday, when I went into the Rivian to grab something and found it refreshingly cool.
Chalk another one up to the Rivian's counter-intuitive UI!
The Rivian's portable charger, in 120V mode, allowed me to set the charge rate between 8A (960W) and 12A (1500W). Even at 8A, I would be draining the battery somewhat. Whenever I plugged the Rivian in, I had to remember to unplug it, which I sometimes forgot to do until too late in the day to fully re-charge the 48V battery.
As a result, on two morning I found the 48V battery totally dead in BMS undervolt protection mode. This is is when I learned that my inverter wouldn't turn on without battery power. I ended up having to "jump-start" the inverter. This, I did by wiring two 20V DeWalt batteries in series (40V total, sufficient to meet the inverters 36V min-voltage threshold) and connecting them to the battery terminals long enough for the inverter to boot, and then disconnecting the jump starter once the solar kicked in.
My conclusion was that 1kW of solar is enough to either run camp, or to charge my EV, but not both. On the final day of the burn, I ended up plugging the Rivian into the Silicon Village grid, where a few plugs had freed up once a few of their RVs had left. In hindsight, I would have had a better time with the system if I hadn't attempted to charge the Rivian off the solar at all.
What's Next
I think the basics of the system are solid, but I definitely need MOAR SOLAR. With another 5 panels, I could have enough power to charge the EV at max 120V speed, and still keep the camp fully powered. The big question for me then is, how to mount 8 solar panels, ideally in a way that also makes use of the shade they cast.
I honestly think that building the mounting structure on playa is the biggest obstacle to adoption. Looking at a few big solar camps, systems varied wildly, mostly using steel tubing with some kind of panel mount clamps. My experience locating the correct hardware even just for my unistrut helps me realize just how much work is involved in the hardware selection.
I wonder if there's a market for easy plug-and-play systems for camps, including all the components -- panels, structural members, mounting hardware, inverter, and battery. This is like a black rock hardware for in-camp solar. If you're interested, let me know -- maybe I can put this together?
Overall, it was pretty encouraging to see much more solar at the burn this year, and commensurately fewer loud, smelly generators. However, there's still a lot of work to do. Also, bringing an EV to the burn continues to be fairly challenging. I'm excited to keep iterating on the problem with my fellow burners!