
The Belden Spa Summer 2017
Jan 2018The Spa was a project for False Profit's Priceless event in 2017. As in past years, we (meaning myself, Jered and Abi) wanted to create a space where participants could interact in a quiet setting (no loud music) that wasn't someone's camp (so, there's opportunity for a chance encounter).
The Spa was a two-part project -- a Finish-style dry sauna, and an accompanying welcome space. The concept for the welcome space was a fancy spa-type lobby -- think soft white lighting, comfy furniture, and cucumber water dispenser. We ended up spending most of the time on the sauna, and the spa itself ended up being a last-minute cobbled-together afterthought.
The Sauna

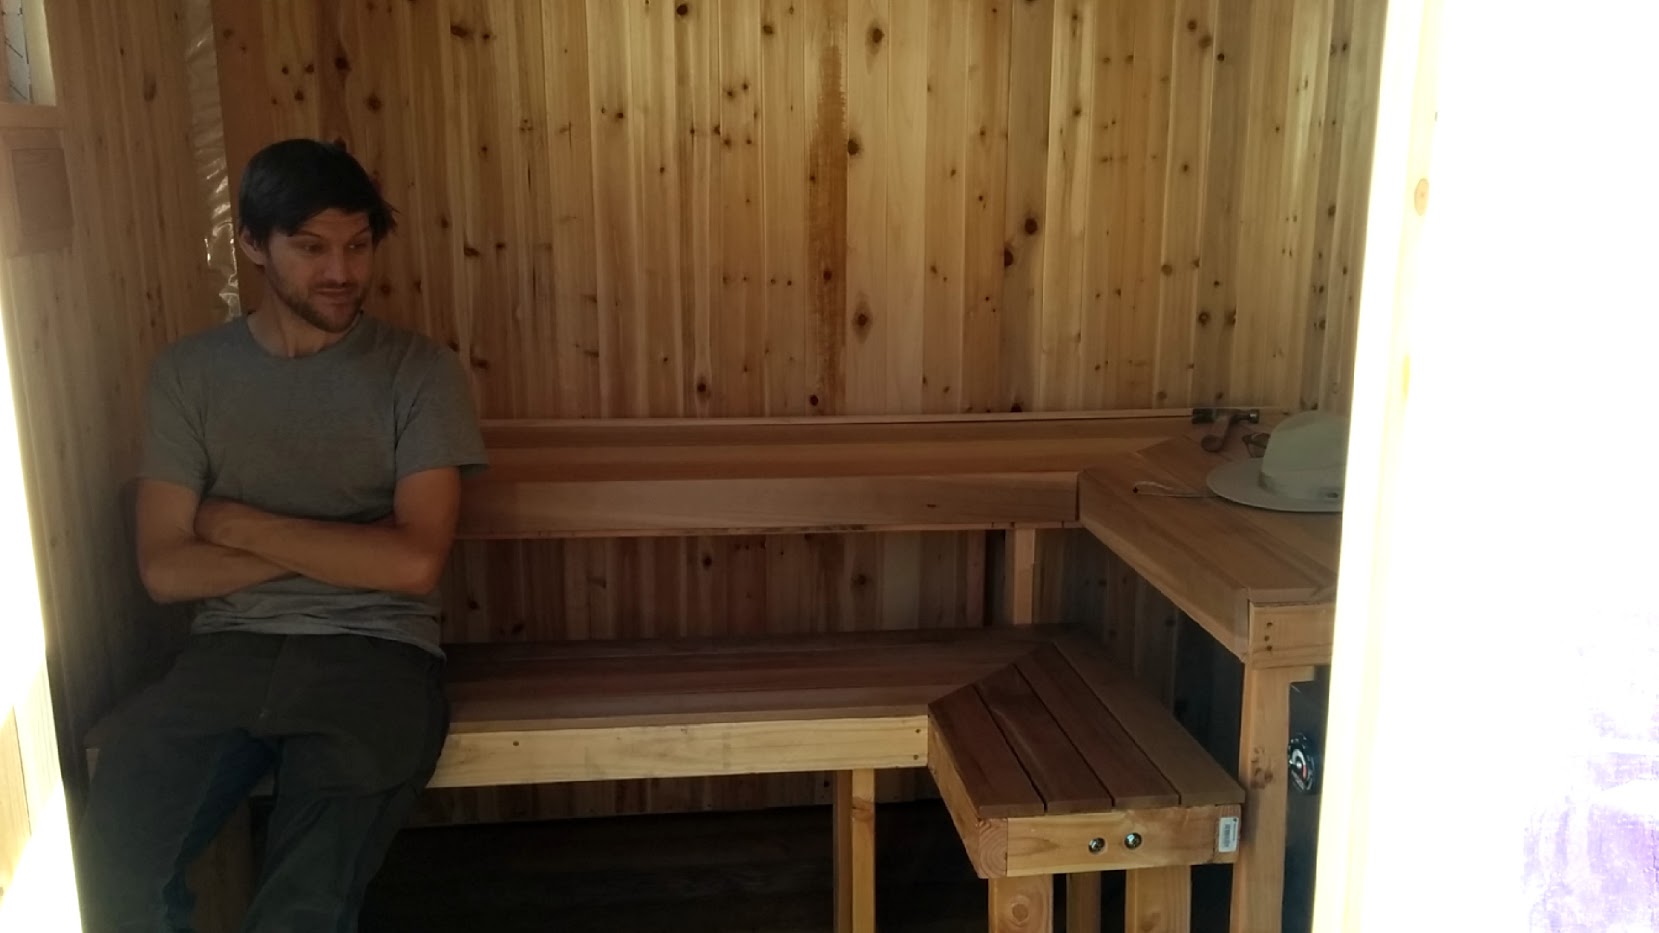
This is a photo of the completed sauna, currently set up in my back yard. It's a small wooden building, with a floor plan of 8' by 8'. The construction is fairly standard, with the added constraint that the building is modular and can be disassembled, transported, and re-assembled on-site. It is also meant to be installed in uneven terrain, and so should be somewhat-level-able.
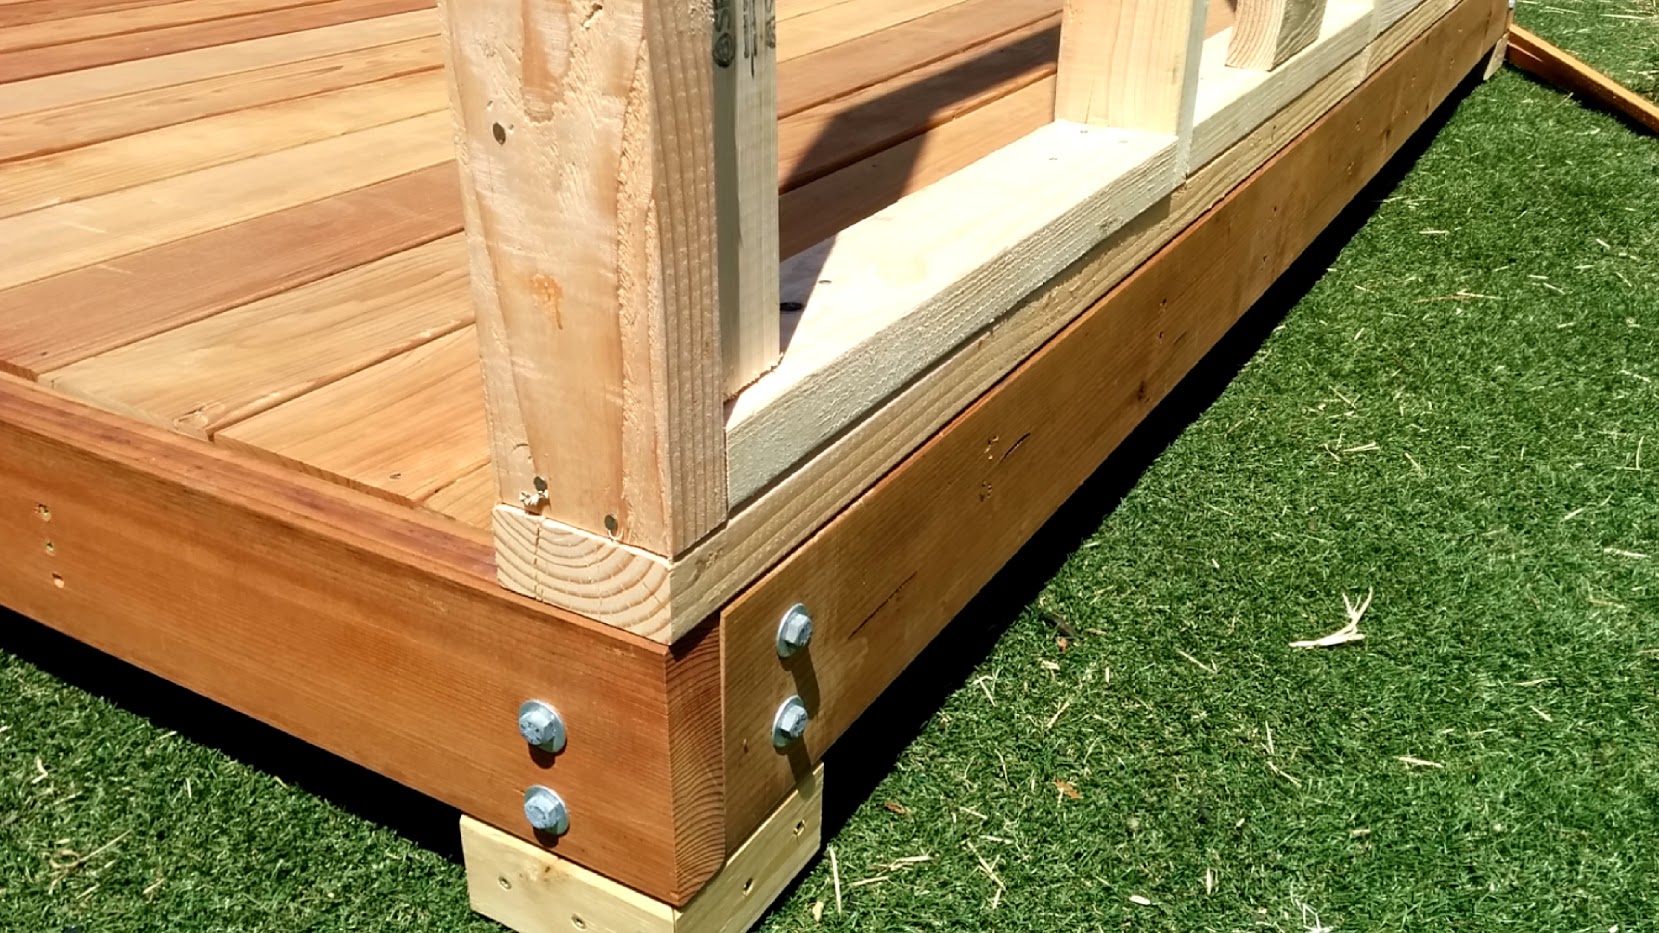
I spent much time agonizing over the floor. I wanted it to be unfinished wood, but it was going to get a lot of water and sweat spilled on it, and I wanted to be able to hose it off to clean it. I eventually settled on building a little patch of deck, and I chose untreated redwood for the material. Redwood is relatively inexpensive, rot and mildew-resistant, and looks and smells good.
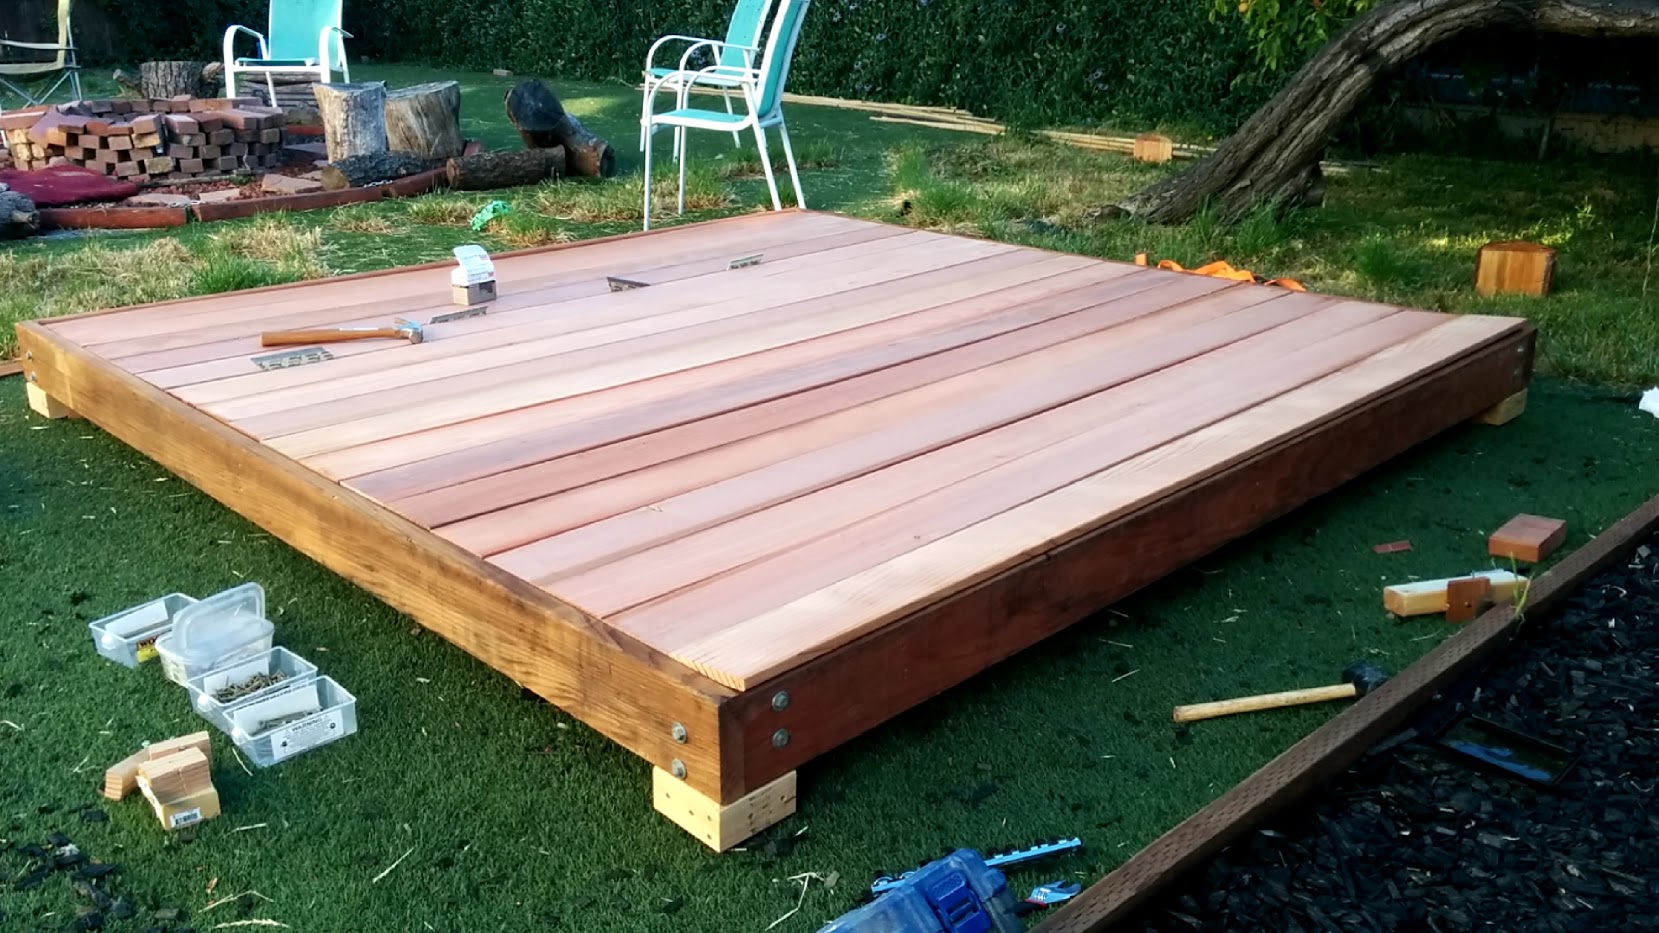
This is a photo of the deck somewhat-finished (the floor boards are not yet nailed down here). I used 2x6s for the structural outside components. I raised them off the ground on short segments of 4x4, to allow for leveling and to create airflow underneath that would allow the boards to shed water and to dry.
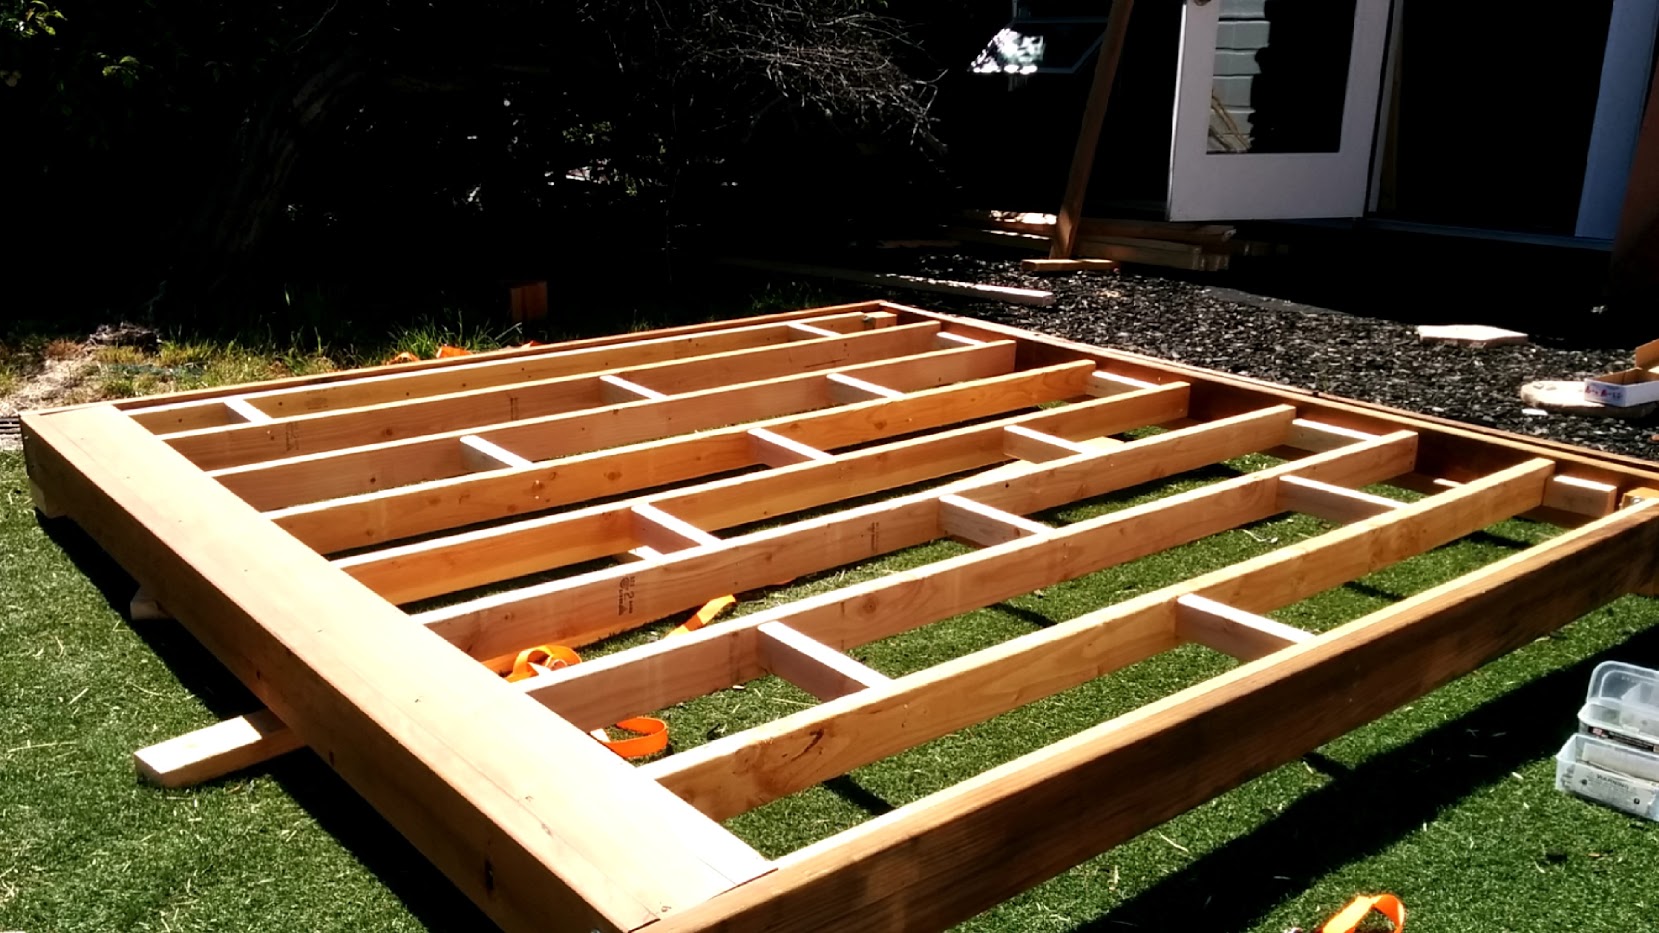
I read a lot of advice on the internet to not use 1x4s for decking, since it's too flexy and feels unstable. I decided to use them anyway, because it's much less expensive and I was worried about weight (remember, this is meant to be moved to different parties). I used a fairly dense grid of 2x3s to give a rigid support for the deck:
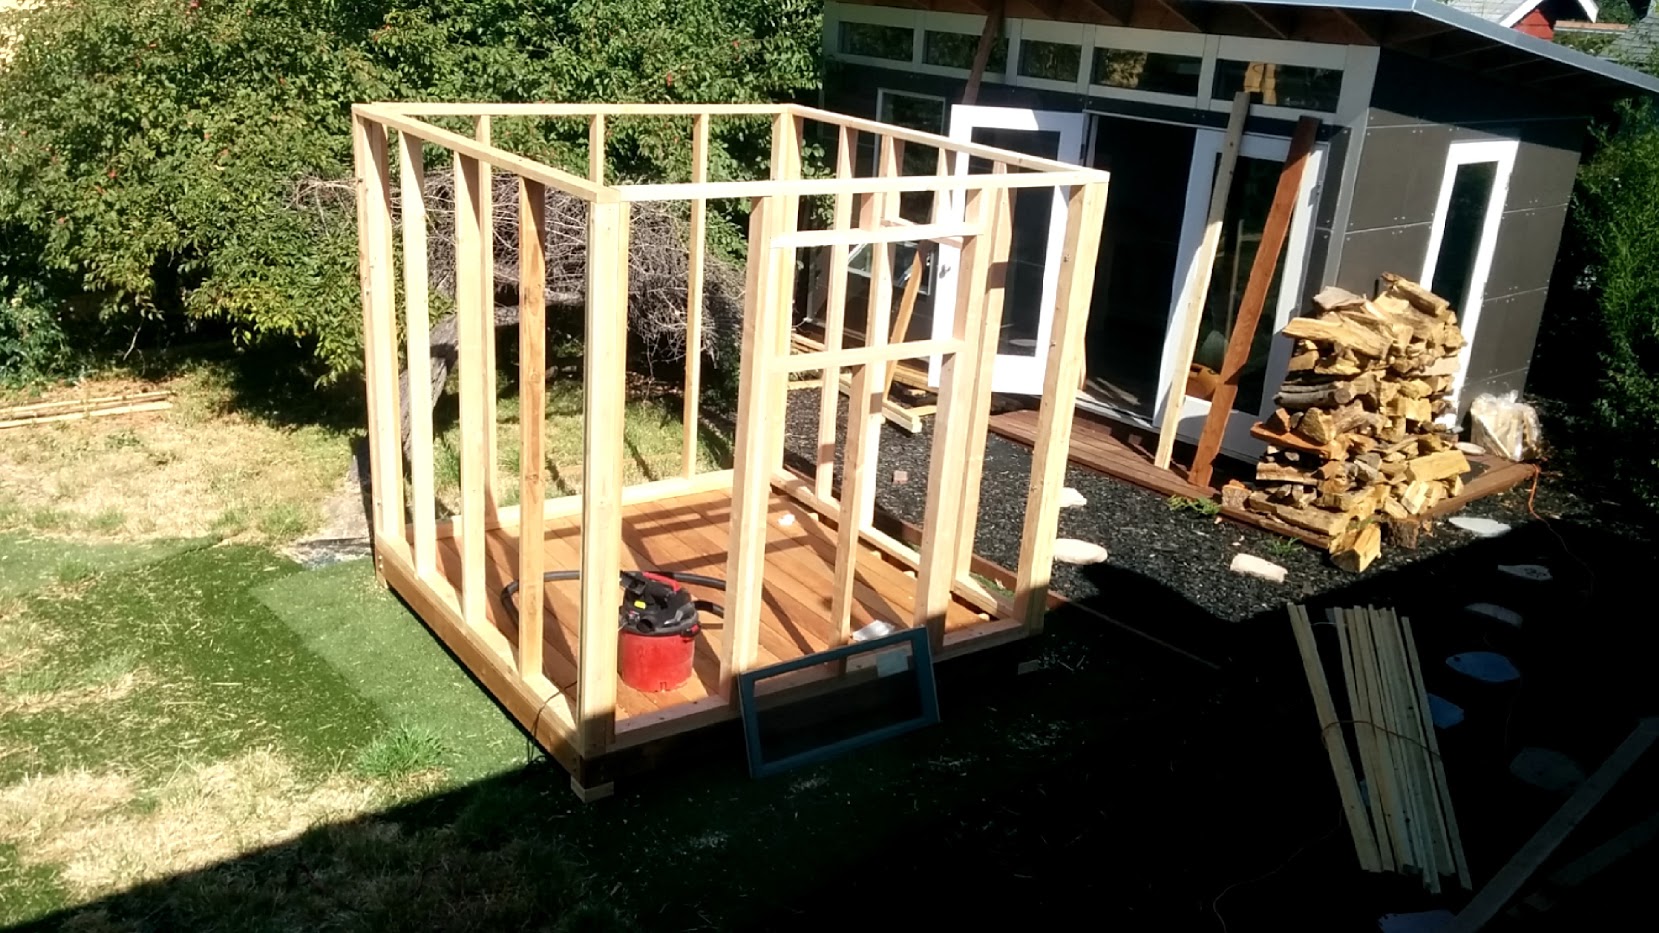
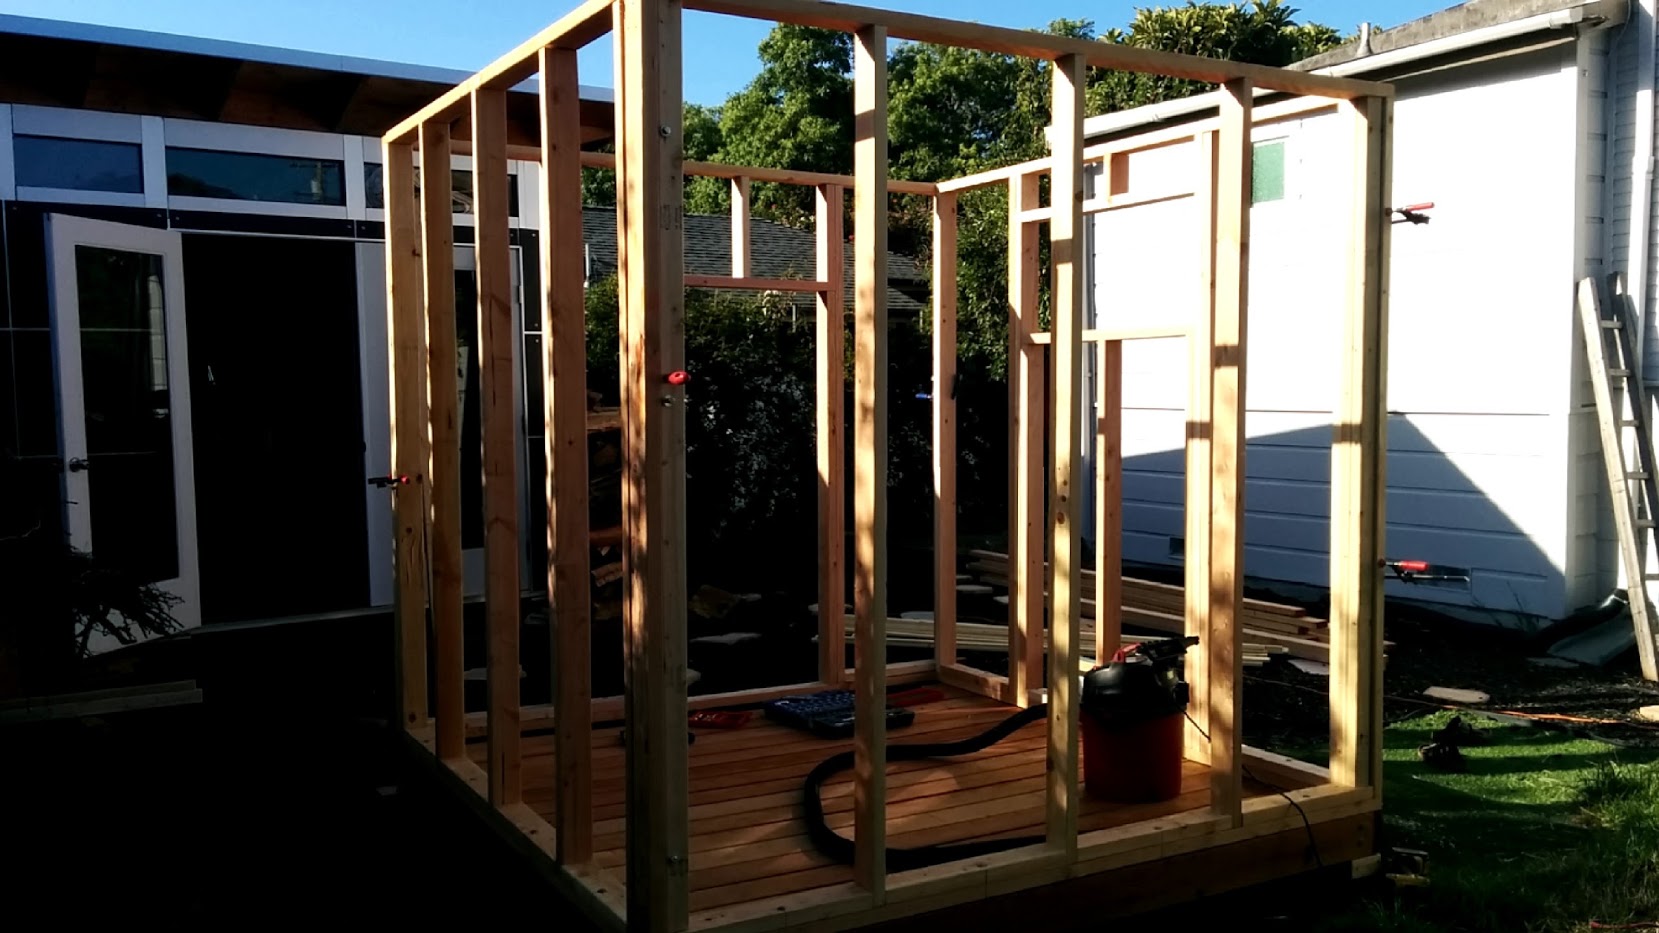
The walls are fairly conventionally framed out of 2x4s:
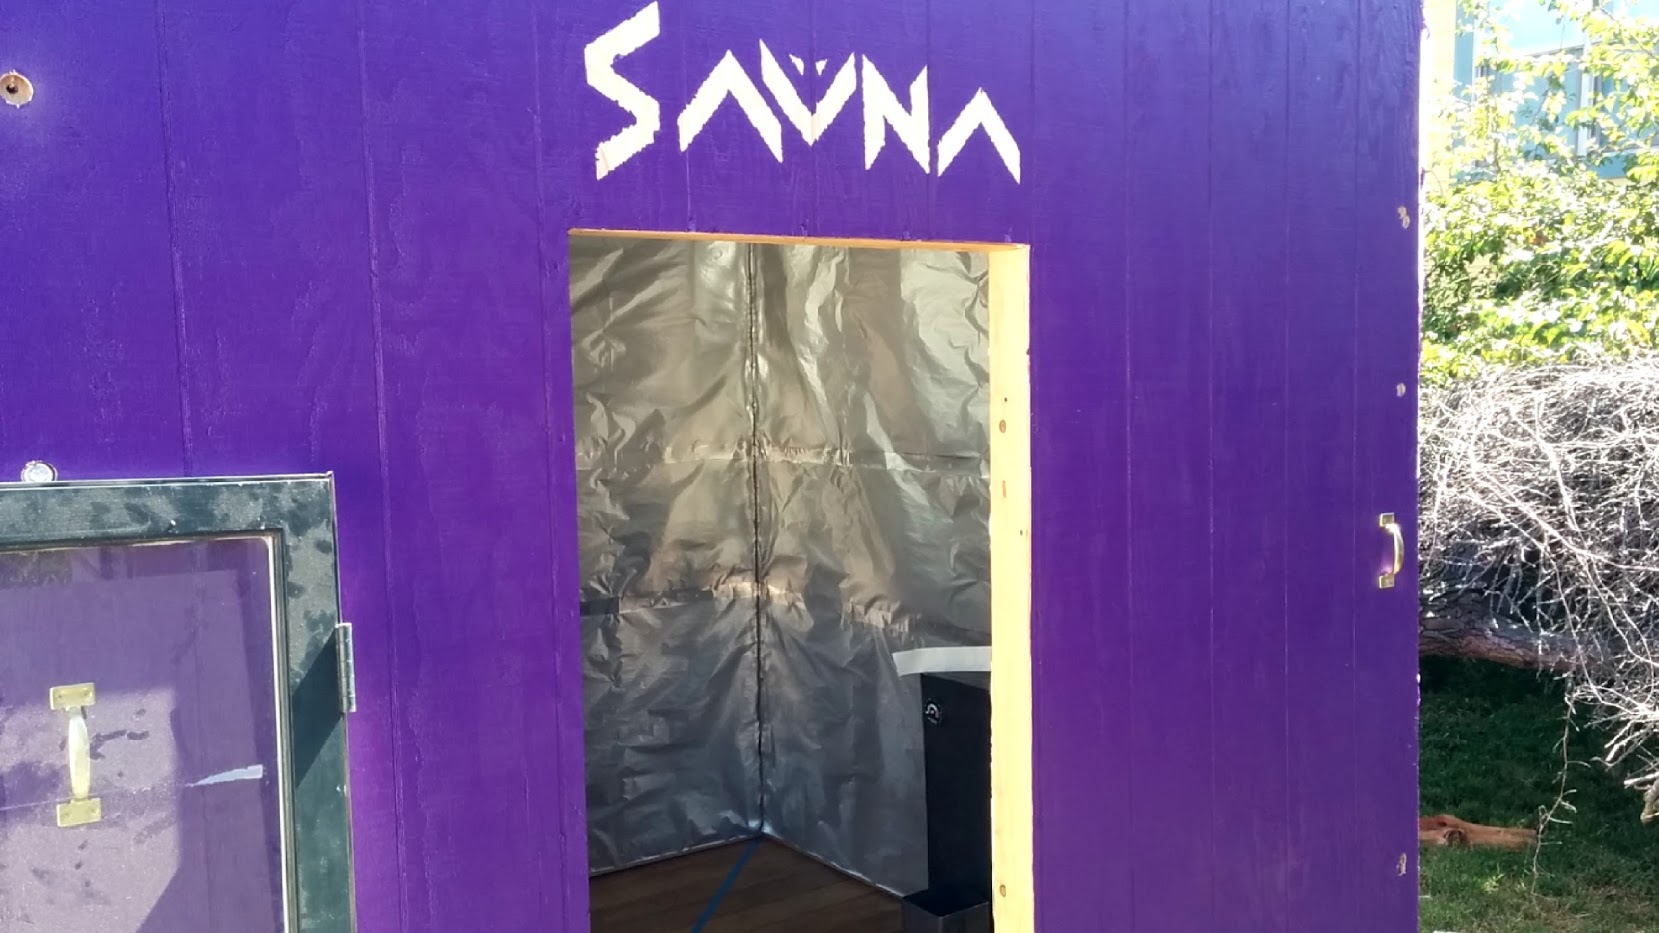
I used aluminum foil vapor barrier on the inside face of the walls. On top of the vapor barrier, I used this cheap, thin cedar planking. This was the most expensive part of the sauna, and I agnozed for a long time over the material choice. In the end, it works fairly well, however you can definitely tell when you're leaning against a part of the wall that's just cedar on top of vapor barrier -- there's a lot of give. It's much nicer to lean against the wall in a place where there's a stud, and it's pretty easy to find the studs with your back.
Inside, the walls are insulated with denium insulation. On the outside face, i used tyvek sheeting, and then the exterior walls are made of the thinest plywood I could find, painted with exterior-grade paint:
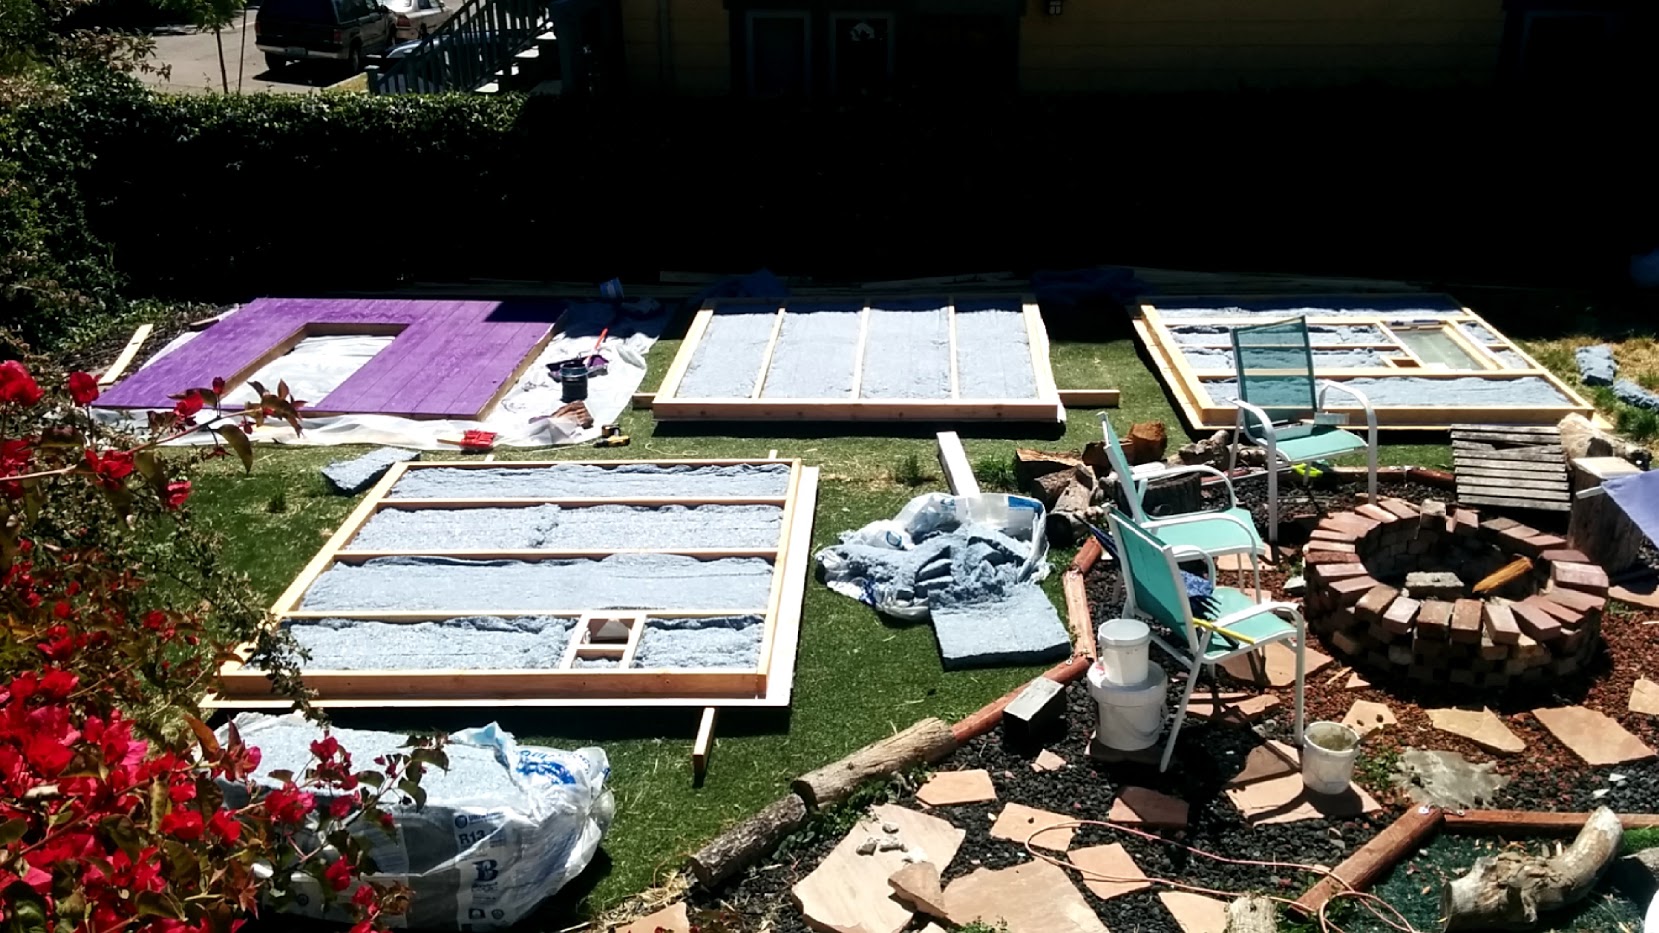
Here you can see the walls laid out on the ground, with the plywood, tyvek, and insulation. In the next shot, you can see the walls set up with vapor barrier, before the cedar is installed.
The walls themselves just sit on the deck, like so:
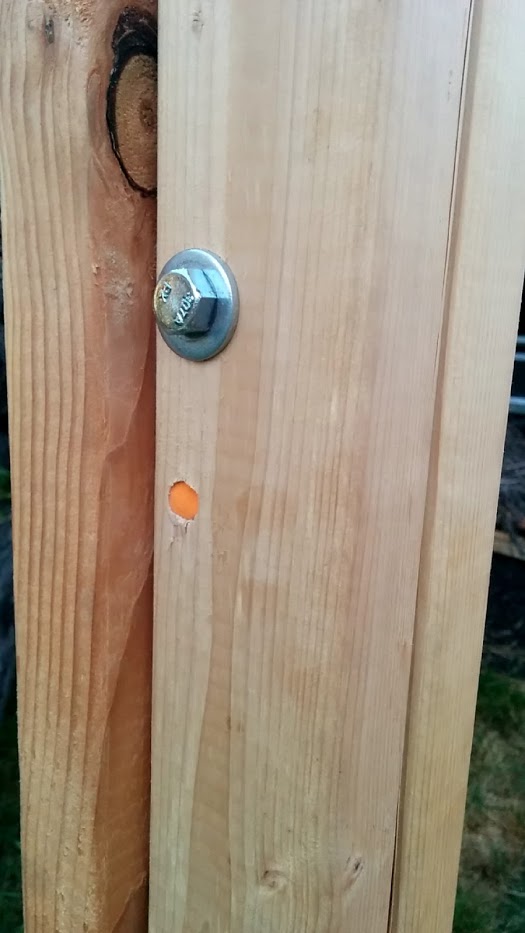
To keep them aligned, we drilled holes through the bottom plate of each wall and into the 2x6 redwood of the deck. We then installed bolts, serving as pegs, through the wall bottom plates. To sit the wall correctly, you have to manuever the wall until the bolt pegs fall into their holes. In some of the photos you can see the cabinet handles we added to the outside walls, to make this manuevering possible. The walls are heavy enough that this is an incredibly annoying, difficult, and dangerious task -- everyone always wants to hold the wall from underneath, but if you successfully align the pegs with the holes then the wall falls on your hand -- the worst part of the assembly process.
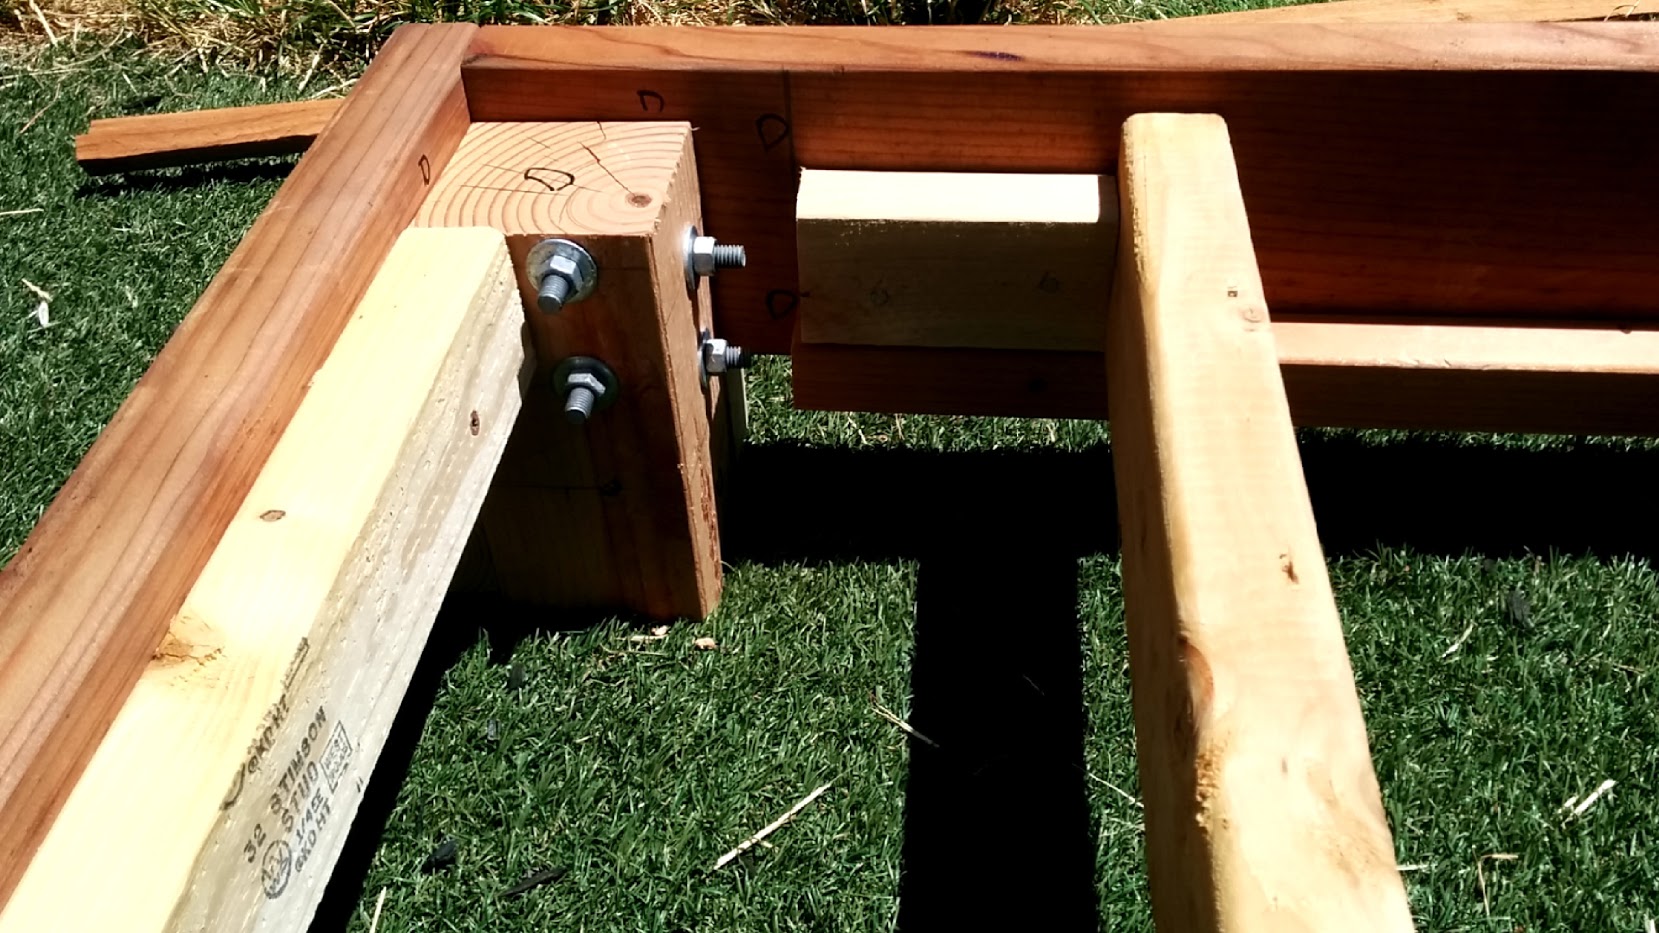
The structure that is formed when the walls sit with their pegs in the holes on the deck is already fairly rigid. However, to avoid torque on the 2x6s of the deck, we wanted to bolt the walls together, too. To do that, we installed tee nuts inside the wall. After putting two walls onto the deck, we would bolt the corner together; you can see that if you look carefully at the corners in the next photo.
The cieling was made from 2" structural foam. We taped two 4'x8' pieces together and then sandwiched it -- cedar planking on the inside, and two 2x3s on top. We trimmed the foam until it fit snuggly on top of the walls, inside the exterior plywood. Over the summer, the sauna had no roof (our contigency for rain during an install was to throw a tarp over the whole thing). I installed some galvanized steel panels over the building just in time for the first real rain of the season.
Layout and Benches
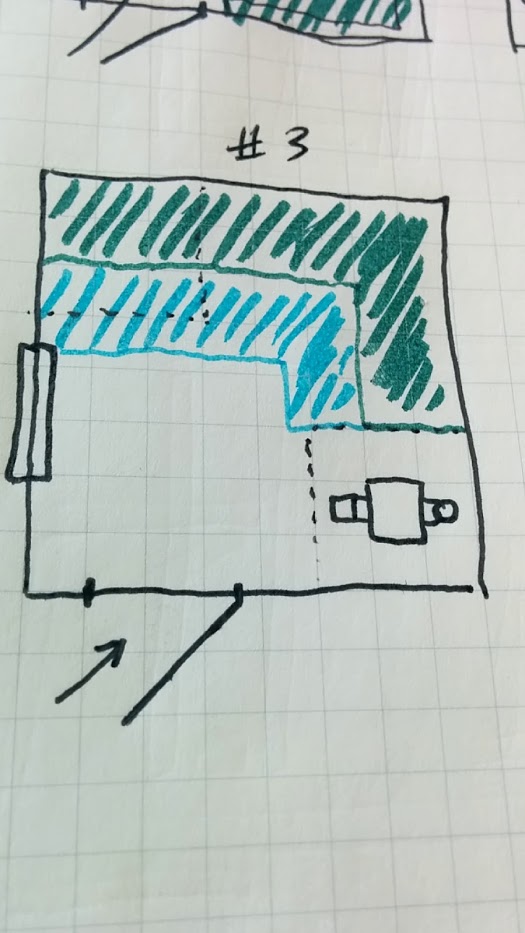
I drafted several potential layouts of the sauna on paper before building benches. This is the layout we settled on:
In many saunas, the benches hang from the walls, but we needed flat-pack walls free of hardware and flat-pack benches. We made the bench tops out of western red cedar 1x4s -- quite expensive.
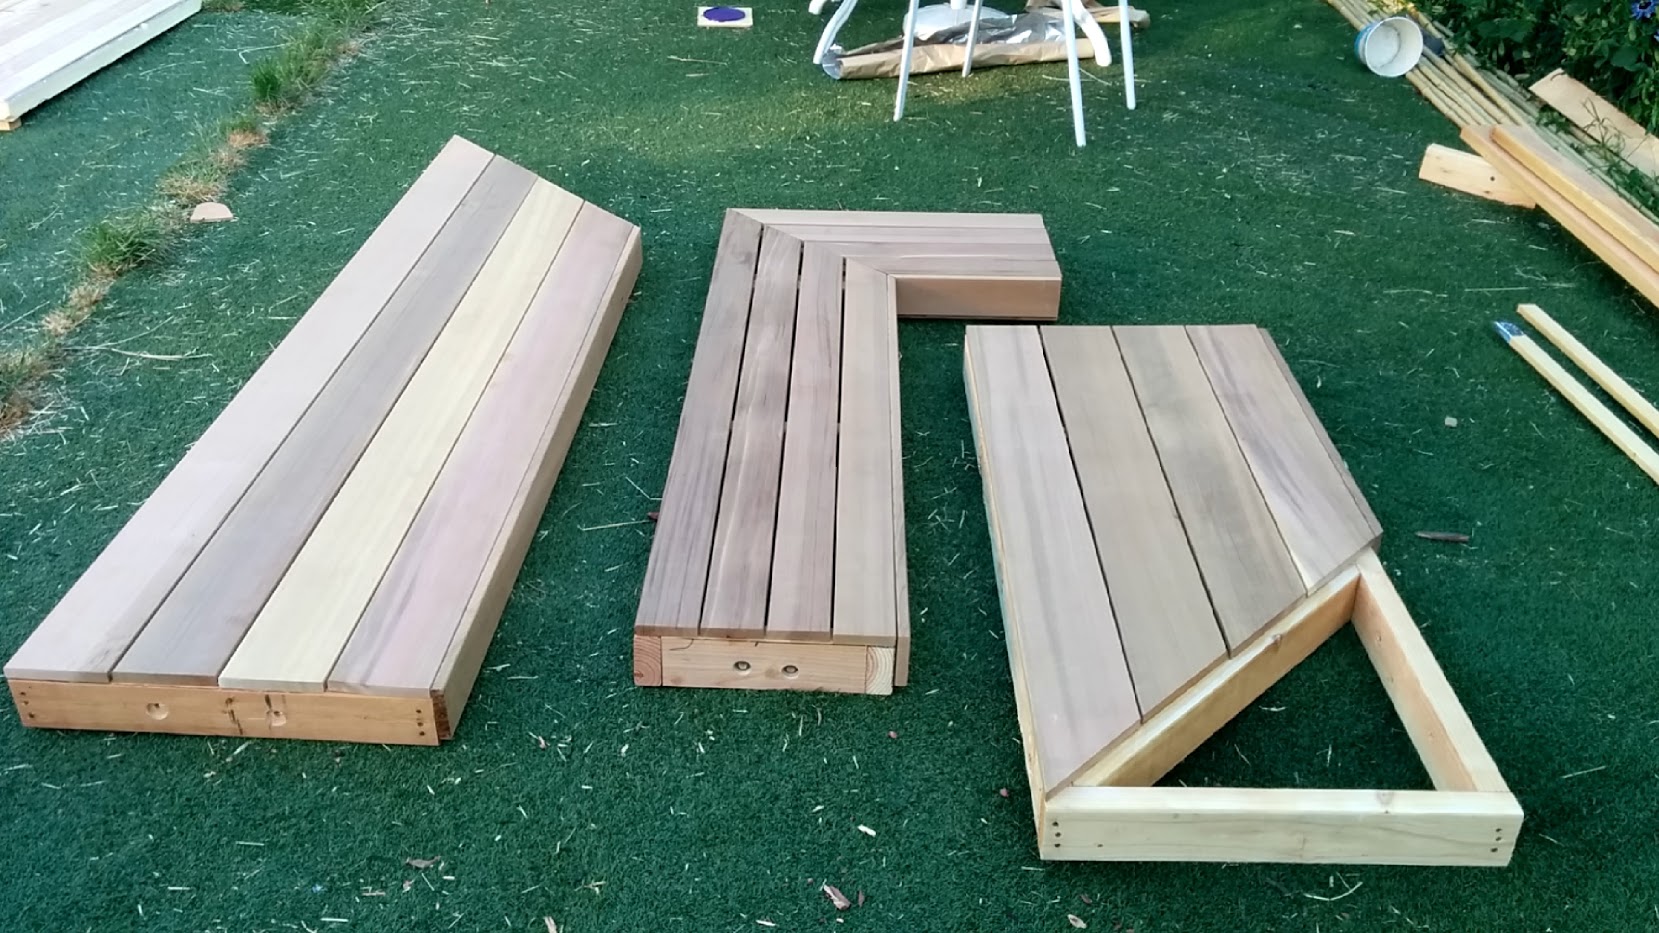
The structure beneath the cedar is just normal 2x4s. Weight is borne by rectangles made of 2x4s, which are bolted to the bench tops.
The Stove
I spent a lot of time deliberating over how to heat the sauna. Other saunas I've experienced in remote places (like at Burning Man) have been wet -- steam is manufactured using a giant propane burner and a pot of water, and piped indoors to heat the room. Most dry saunas are heated with electric stoves, but I wouldn't have the 220V hookup that's usually necessary. I thought about using propane indoors, but didn't want to risk carbon monoxide poisioning. I went through several fancy design iterations. One particularly insane idea involved heating a metal plate inside the sauna from the outside with a propane torch.
Eventually, I decided to fabricate a wood-burning stove. I modeled mine on the principles of rocket mass heaters to ensure good draft through the room.
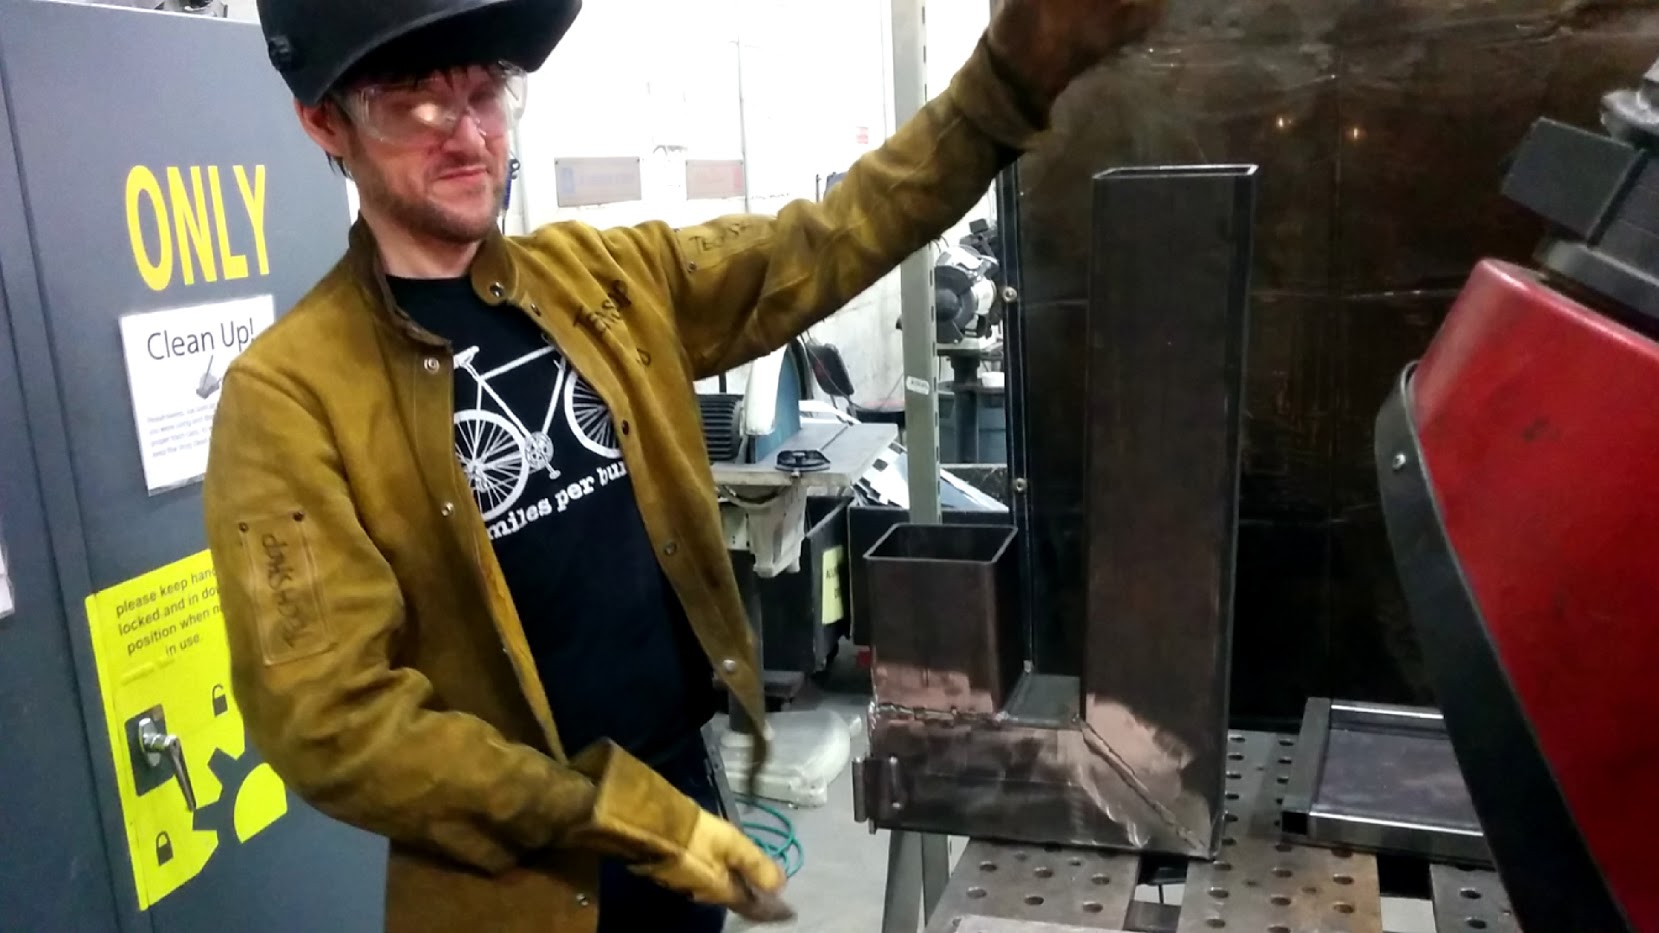
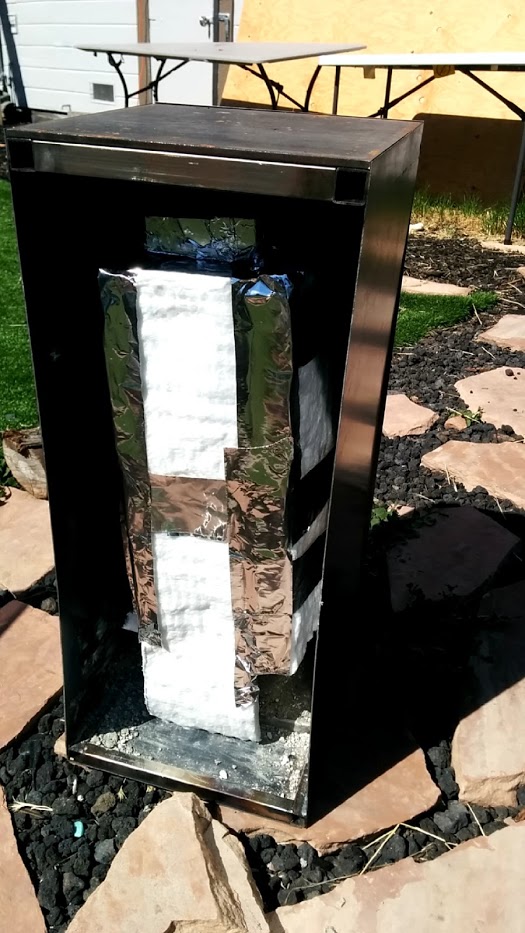
Here, you can see the J-shaped riser where the combustion happens. This was fabricated from scrap 5x5 mild steel. The riser was installed in a larger box which is the surface which actually heats the sauna:
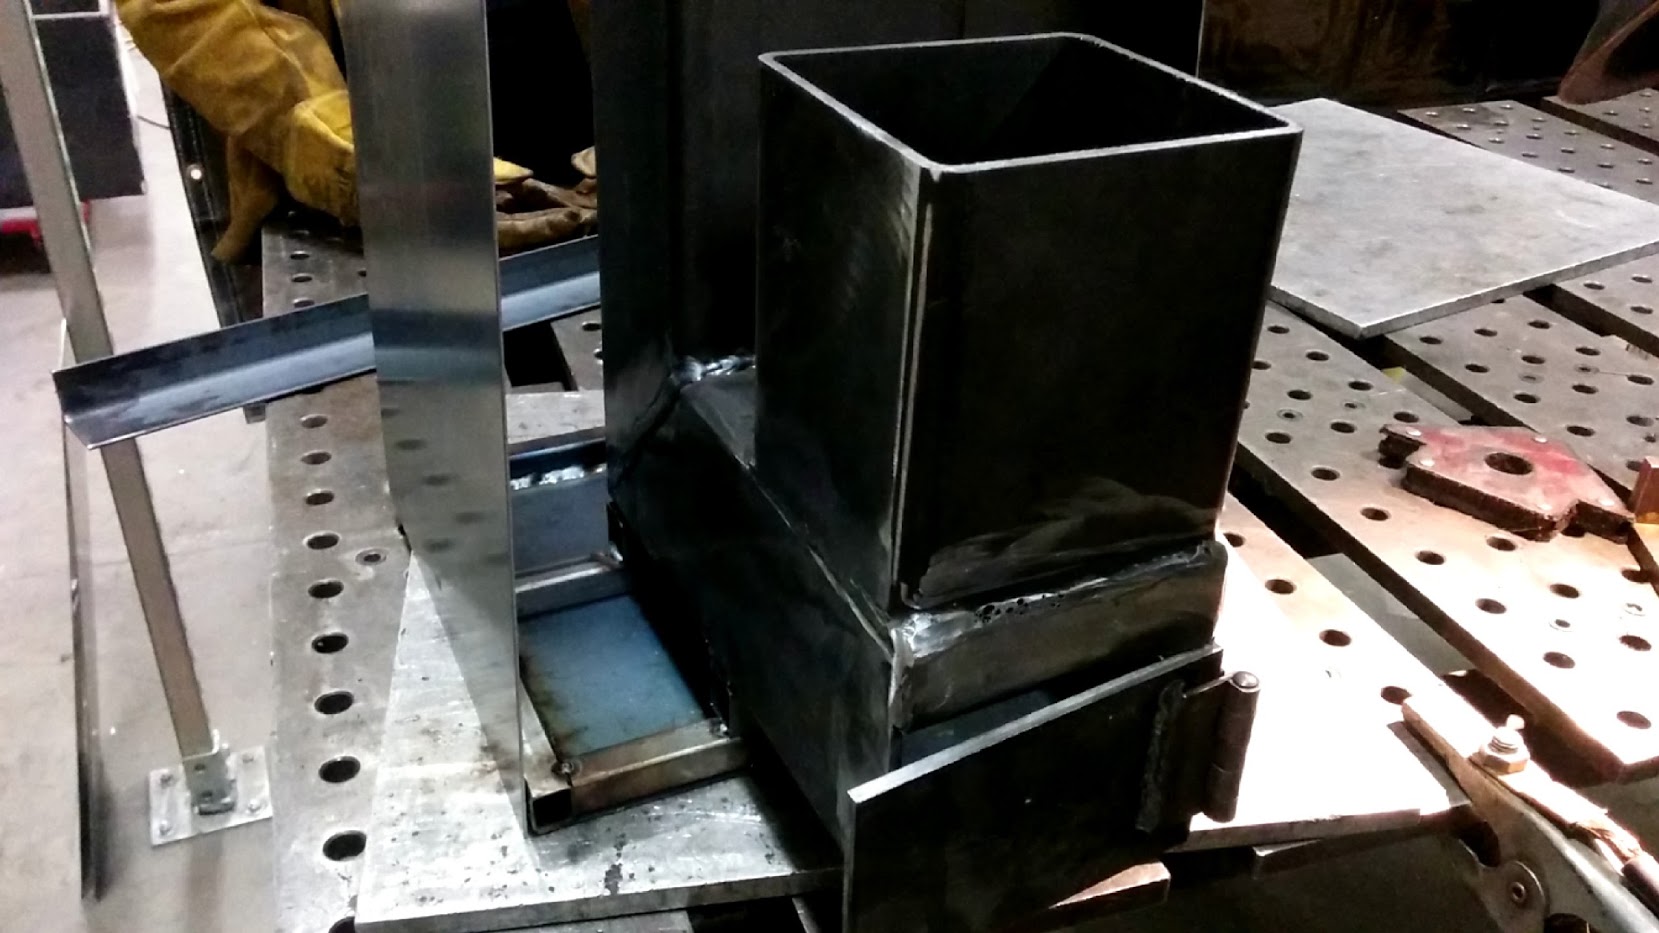
The inside of the barrel has some 1x1 tubing for structure, and the outside is made of 16ga plate. The top plate of the box, which recieves the brunt of the heat coming out of the exchanger, was made from a thick piece of plate. I initially tried to insulate the riser with a mix of portland cement and perlite, but I wasn't seeing the rocketing I wanted. Using 2" ceramic fire blanket created a much better effect.
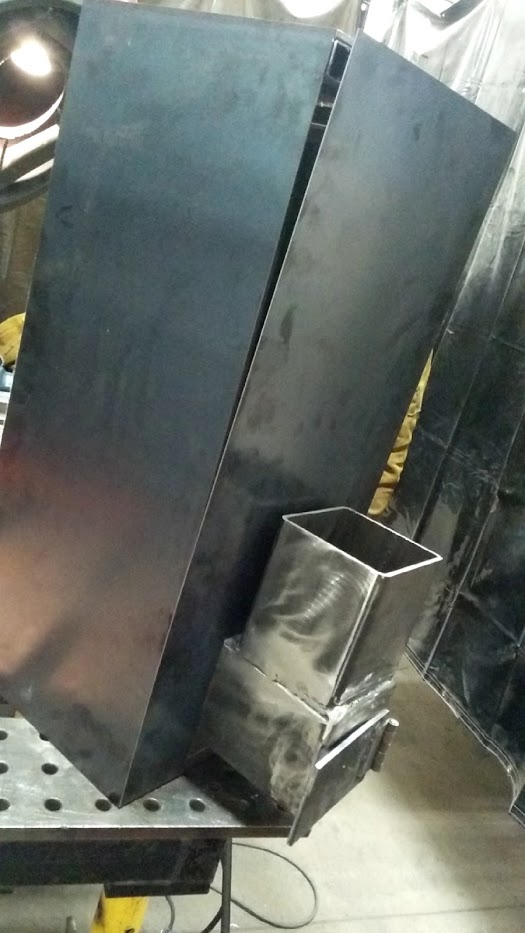
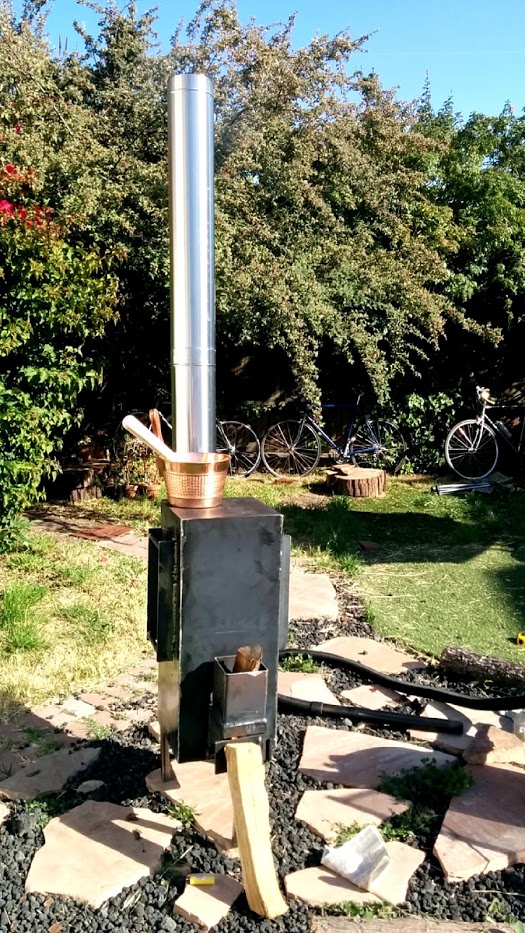
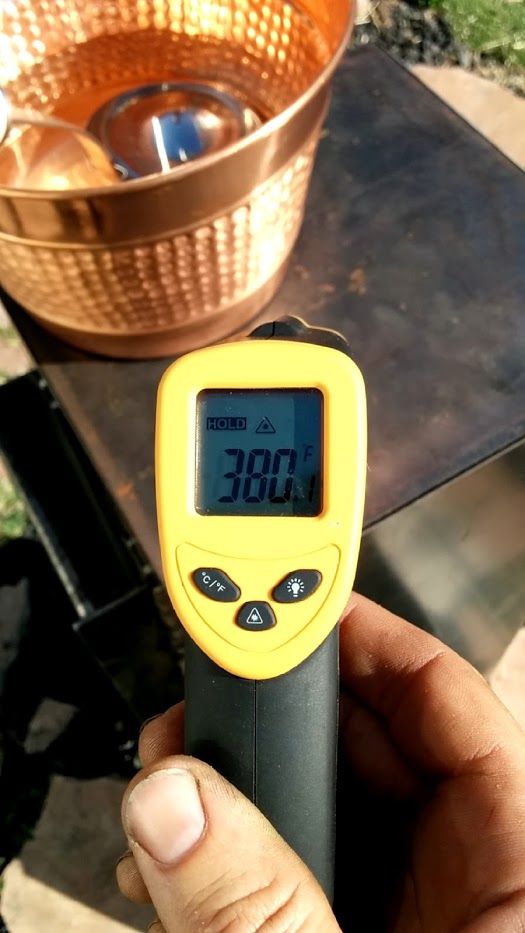
I created a 6" diameter exaust port by rolling the same 16ga plate. I used 3 90-degree elbows, two 4' long pieces, and a single 1' piece of single-wall stainless steel chimney pipe to vent to the outside. I used single-wall because i wanted the portion of the chimney inside the sauna to contribute to heating the sauna. As an aside, finding single-wall chimeny pipe in the Bay Area is quite difficult -- and it's quite slow and expensive to ship. I eventually got lucky with London fireplace in Mill Valley. Here's the stove undergoing testing in the back yard. You can see it got quite warm (although we've single learned to get it much hotter with proper feeding).
Running a rocket stove is pretty different from conventional stoves. It eats fuel very quickly, so it must be constantly fed. This is actually nice for an install at a party; if the operator wanders off or becomes incapacitated, the stove soon shuts itself off. Now that this sauna lives in my back yard, it's a bit of a chore to constantly run outside for more fuel.
It's also been a struggle finding the correct fuel to burn. Rocket stove communities talk about burning thin branches, but I don't have access to those in the city. At Priceless, I mostly burned scraps from construction and these fatwood firestarter sticks (we went through the whole 25 pounds in a weekend). I tried burning fuel pellets, but those clump up on the bottom and there's not enough air flow for combustion. Currently, I burn hardwood kindling I split with a hatchet, and add a stick or two of fatwood to keep things burning hot enough for a good sweat.
Sauna Design Verdict
Overall, the sauna works very well. We use it several times a week in my back yard. There are a few gotches with the design that I would iterate on further.
First, the stove. It works very well and is fun to use, but it's not really enough thermal mass to heat the room. Adding a bunch of river rocks on top helps a lot, but the top of the stove is flat, meaning I can't fit that many rocks. In a v2, I would add a hopper on top to contain several layers of rocks.
The top of the stove gets so hot that water I pour onto it beads off the surface and sputters off. I would also extend the walls up a bit, to keep those water beads contained until they fully evaporate. Also, the stove doesn't radiate very well -- if I didn't pour water onto the stove, the room would never get hot enough. For v2, I would create a more heatsink-like surface, with more surface area. Finally, I'm not sure how long the stove will last. Rocket stove forums claim that the high heat of the riser causes rapid oxidation and failure of the steel. I regularly see the portion of the burn tunnel that extends past the barrel glow red, meaning a temperature of at least 1200°F. I haven't yet seen any spalling inside the stove from these temperatures -- possibly because it's only in-use about 4 to 6 hours a week -- but I'm not optimistic about the lifespan of the stove.
The decking in the room works well as a floor -- it's easy to clean -- but the gaps between floorboards create most of the draft inside the room. There is a very strong temperature gradient between the floor and the upper bench. Covering the floor with lock-together foam squares would significantly improve insulation, but since the room gets hot enough I haven't bothered. However, better insulating the floor might reduce the intensity at which I run the stove, prolonging it's lifespan.
The walls of the sauna are the biggest design failure of sauna v1. It's easy to underestimate just how heavy a framed 2x4 and plywood wall is, especially when you have to load it onto a truck or carry it through a forest. At 8' x 7', the walls are also not particularly convenient to transport. For instance, box truck are usually neither 7' tall nor 7' wide. (Aside: you'd think I'd have learned my lesson here after building a boat that, at 16' wide, was wider than any boat launch in Chicagoland).
Also, the fasteners between the walls and the deck, and between the walls in the corners, didn't work all that well. The wall pegs were extremely difficult to line up with their slots on the deck -- it's hard to adjust a 200# wall 1/2 inch to the left when you have no good way to hold it upright. I used a lot of hidden fasteners because I worried too much about the exterior appearance of the sauna. In hindsight, nobody cares about that. In a v2, I would make the walls entirely out of foam sheets -- two 4'x8' sheets per wall, just as we made the cieling of the existing sauna. Transporting the cieling was always a welcome reprieve for the build crew after transporting the walls. To assemble a structure from the foam-and-cedar modules, I would use some kind of easily-visible exterior fasteners, maybe even just clamps.
Belden Spa
For the structure of the spa, I originally envisioned an organic dome in tension, made from pencil rod.

However, when Jered and I prototyped the design, it was unclear how to keep the tension from deforming the entire structure. In the image below, you can see that the tensioned overhead X wants to turn the floor plan into an oval rather than a circle.
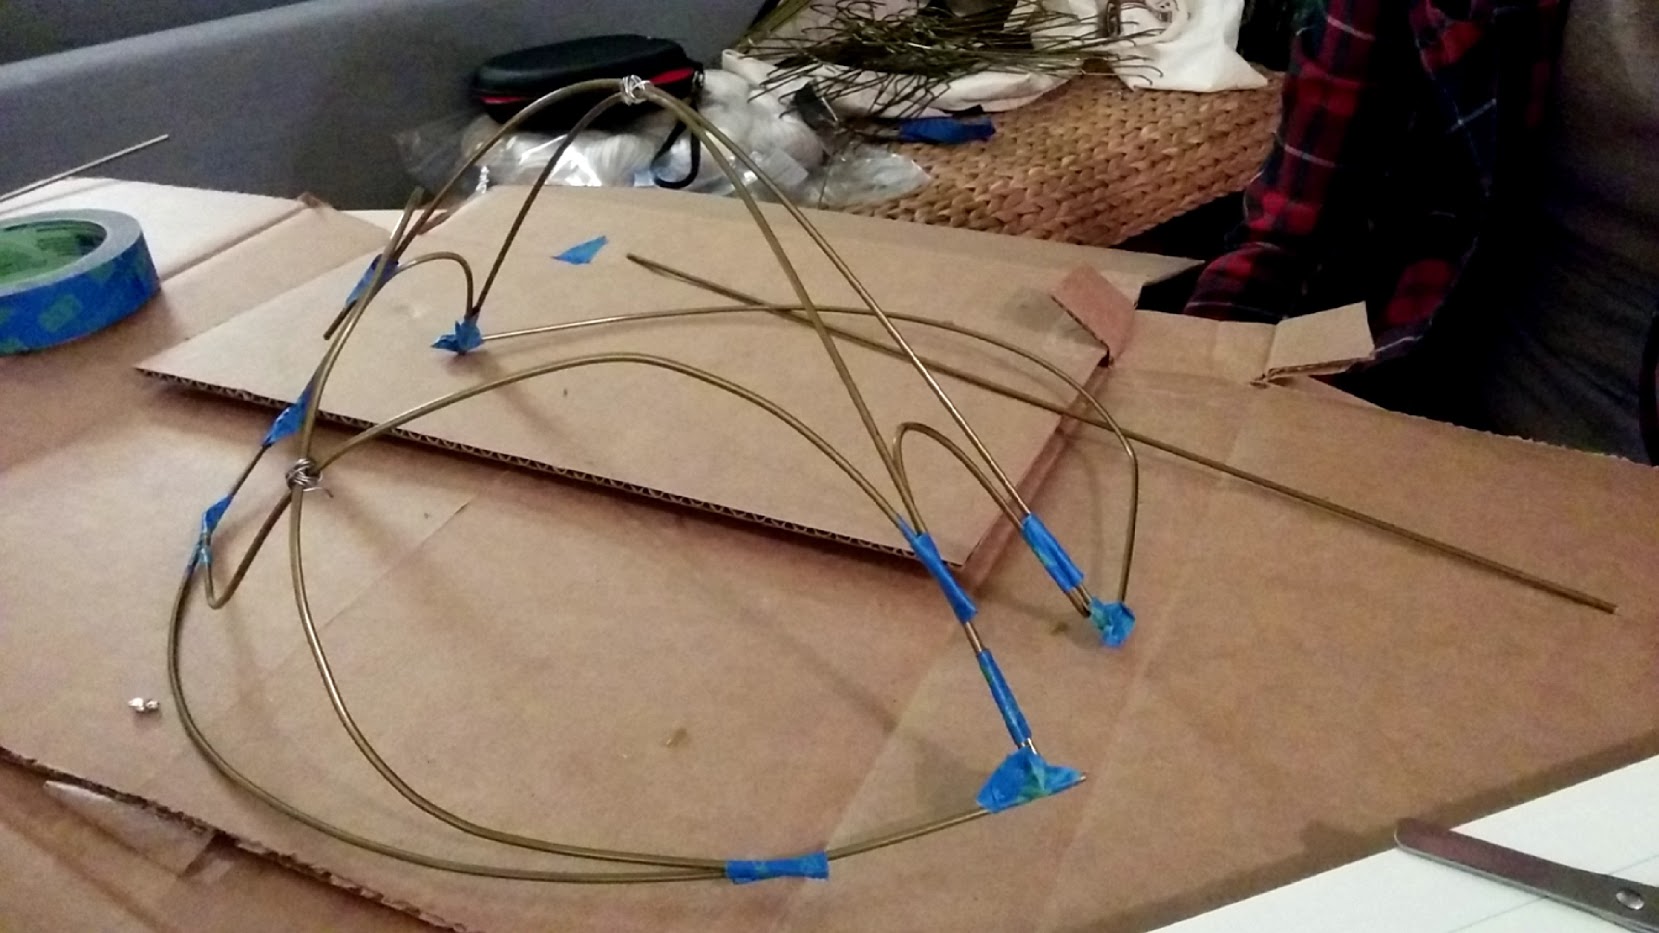
I'd still love to create a dome of organic shapes (to conteract the traditional regular geodesic dome shape), but it might be easier at a place like Burning Man, where rebar in the ground can counteract the tension and create a rigid base for the rest of the structure.
Next, we tried to build a stardome, but we had trouble sourcing the appropriate building materials. Maybe 6" diameter bamboo is easy to come by in Japan, but not in the Bay Area. I did buy a bunch of thinner bamboo poles. Because we had them, we attempted to use them. We prototyped a space made of several free-standing structures, arranged so as to inclose an area.
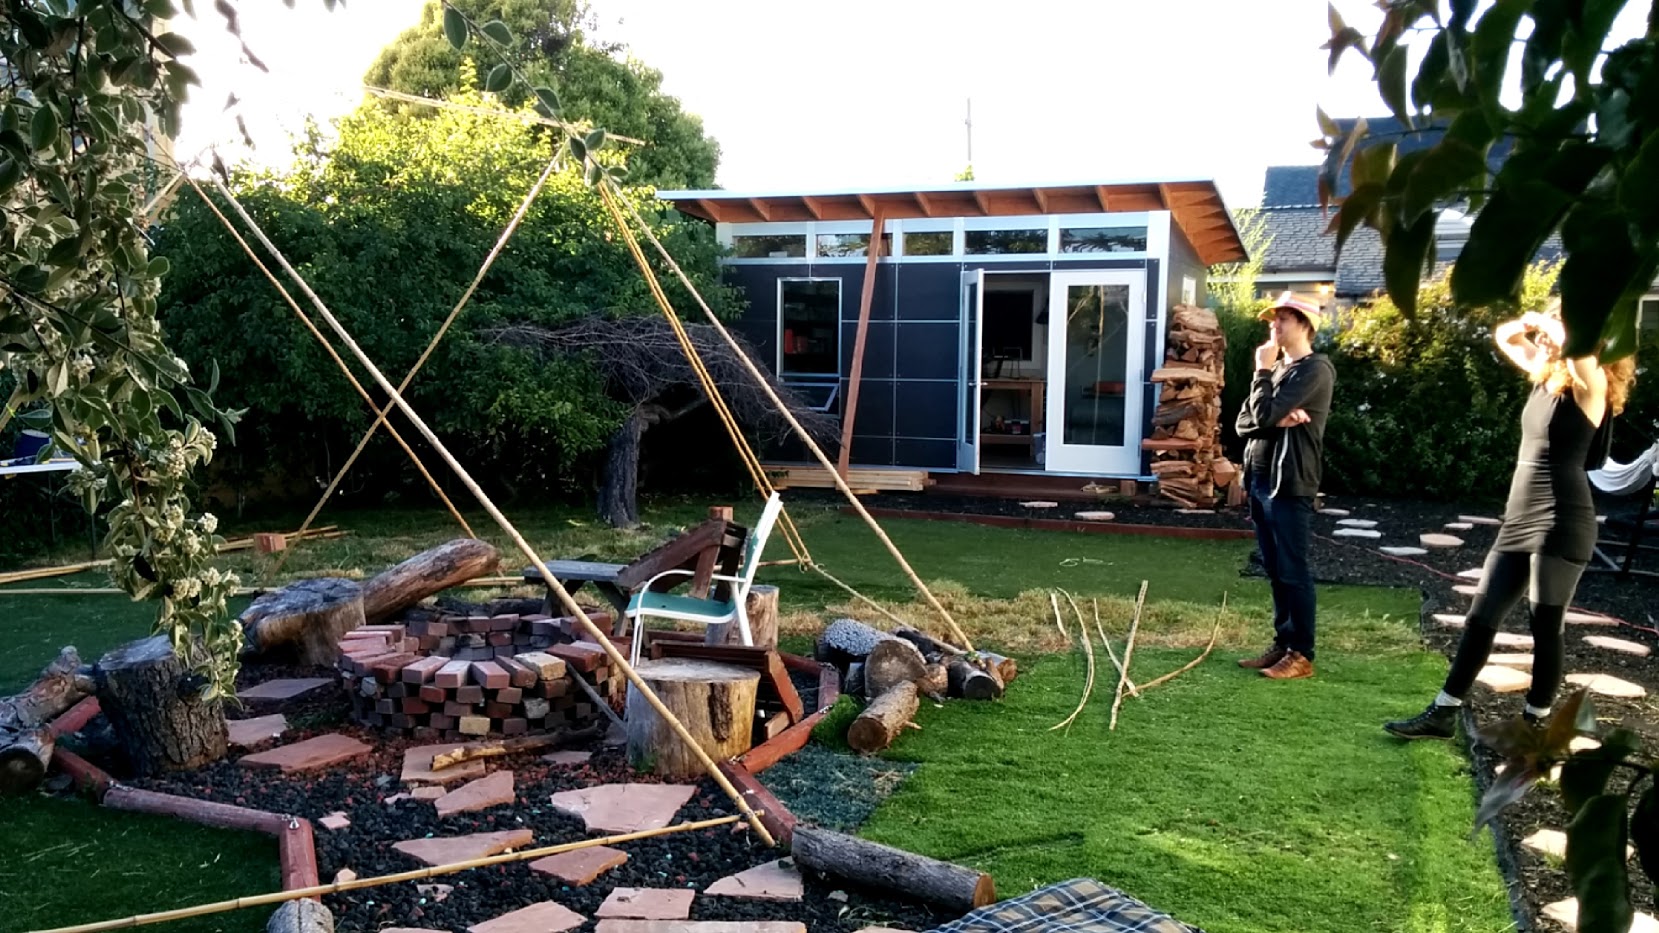
In the end, we decided that bamboo is not good structural material. It was too light, broke too easily, and bent too easily. It would not support fabric in tension without deforming.
At this point, we were running out of time and the sauna was consuming too much design energy. We decided to bring a bunch of fabric, some spools of paracord, a pile of 7' 2x3s (super-cheap at home depot), and a nail gun and just improve on the spot. We ended up with a pretty nice structure, but as per usual I have no photos of my actual install on-site. If anyone has photos of the Belden Spa, please contact me so I can put them on this page!