
Minimum Viable Air Quality Monitoring
Sep 2020If you, like me, live in the Bay Area, you may have woken up to something like this last week:
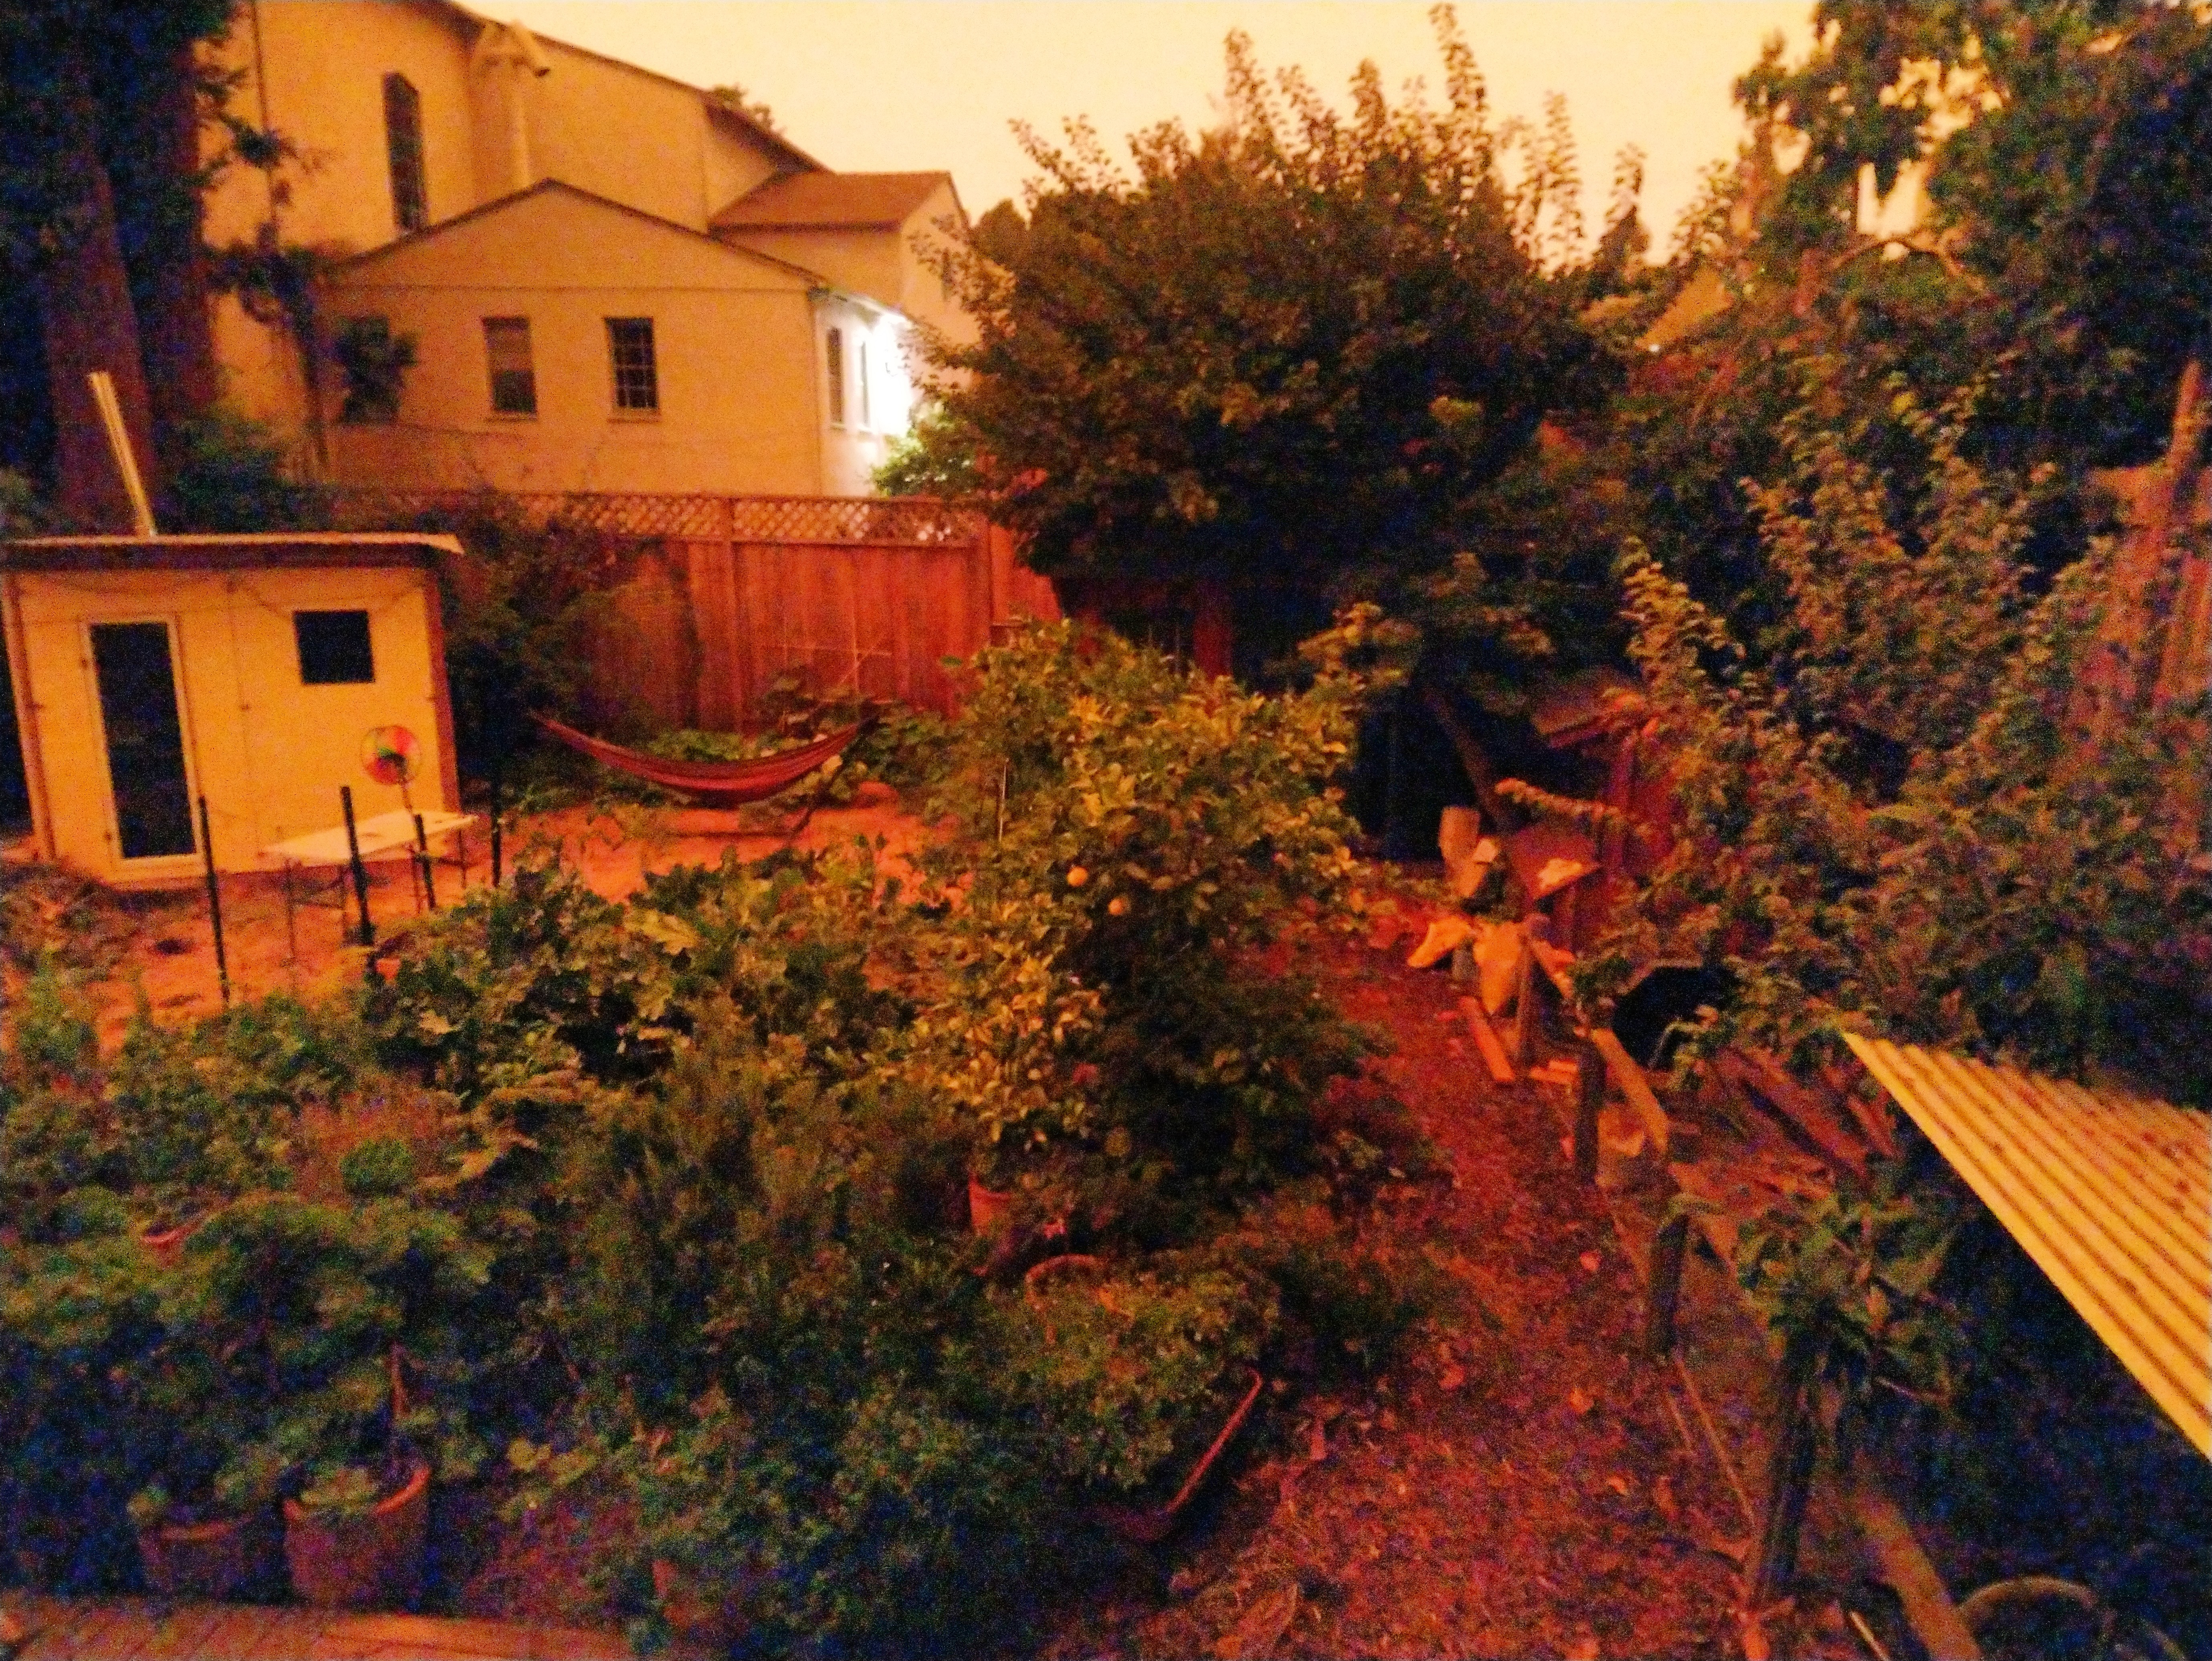
This is my back yard, but things looked just as dire in the house:
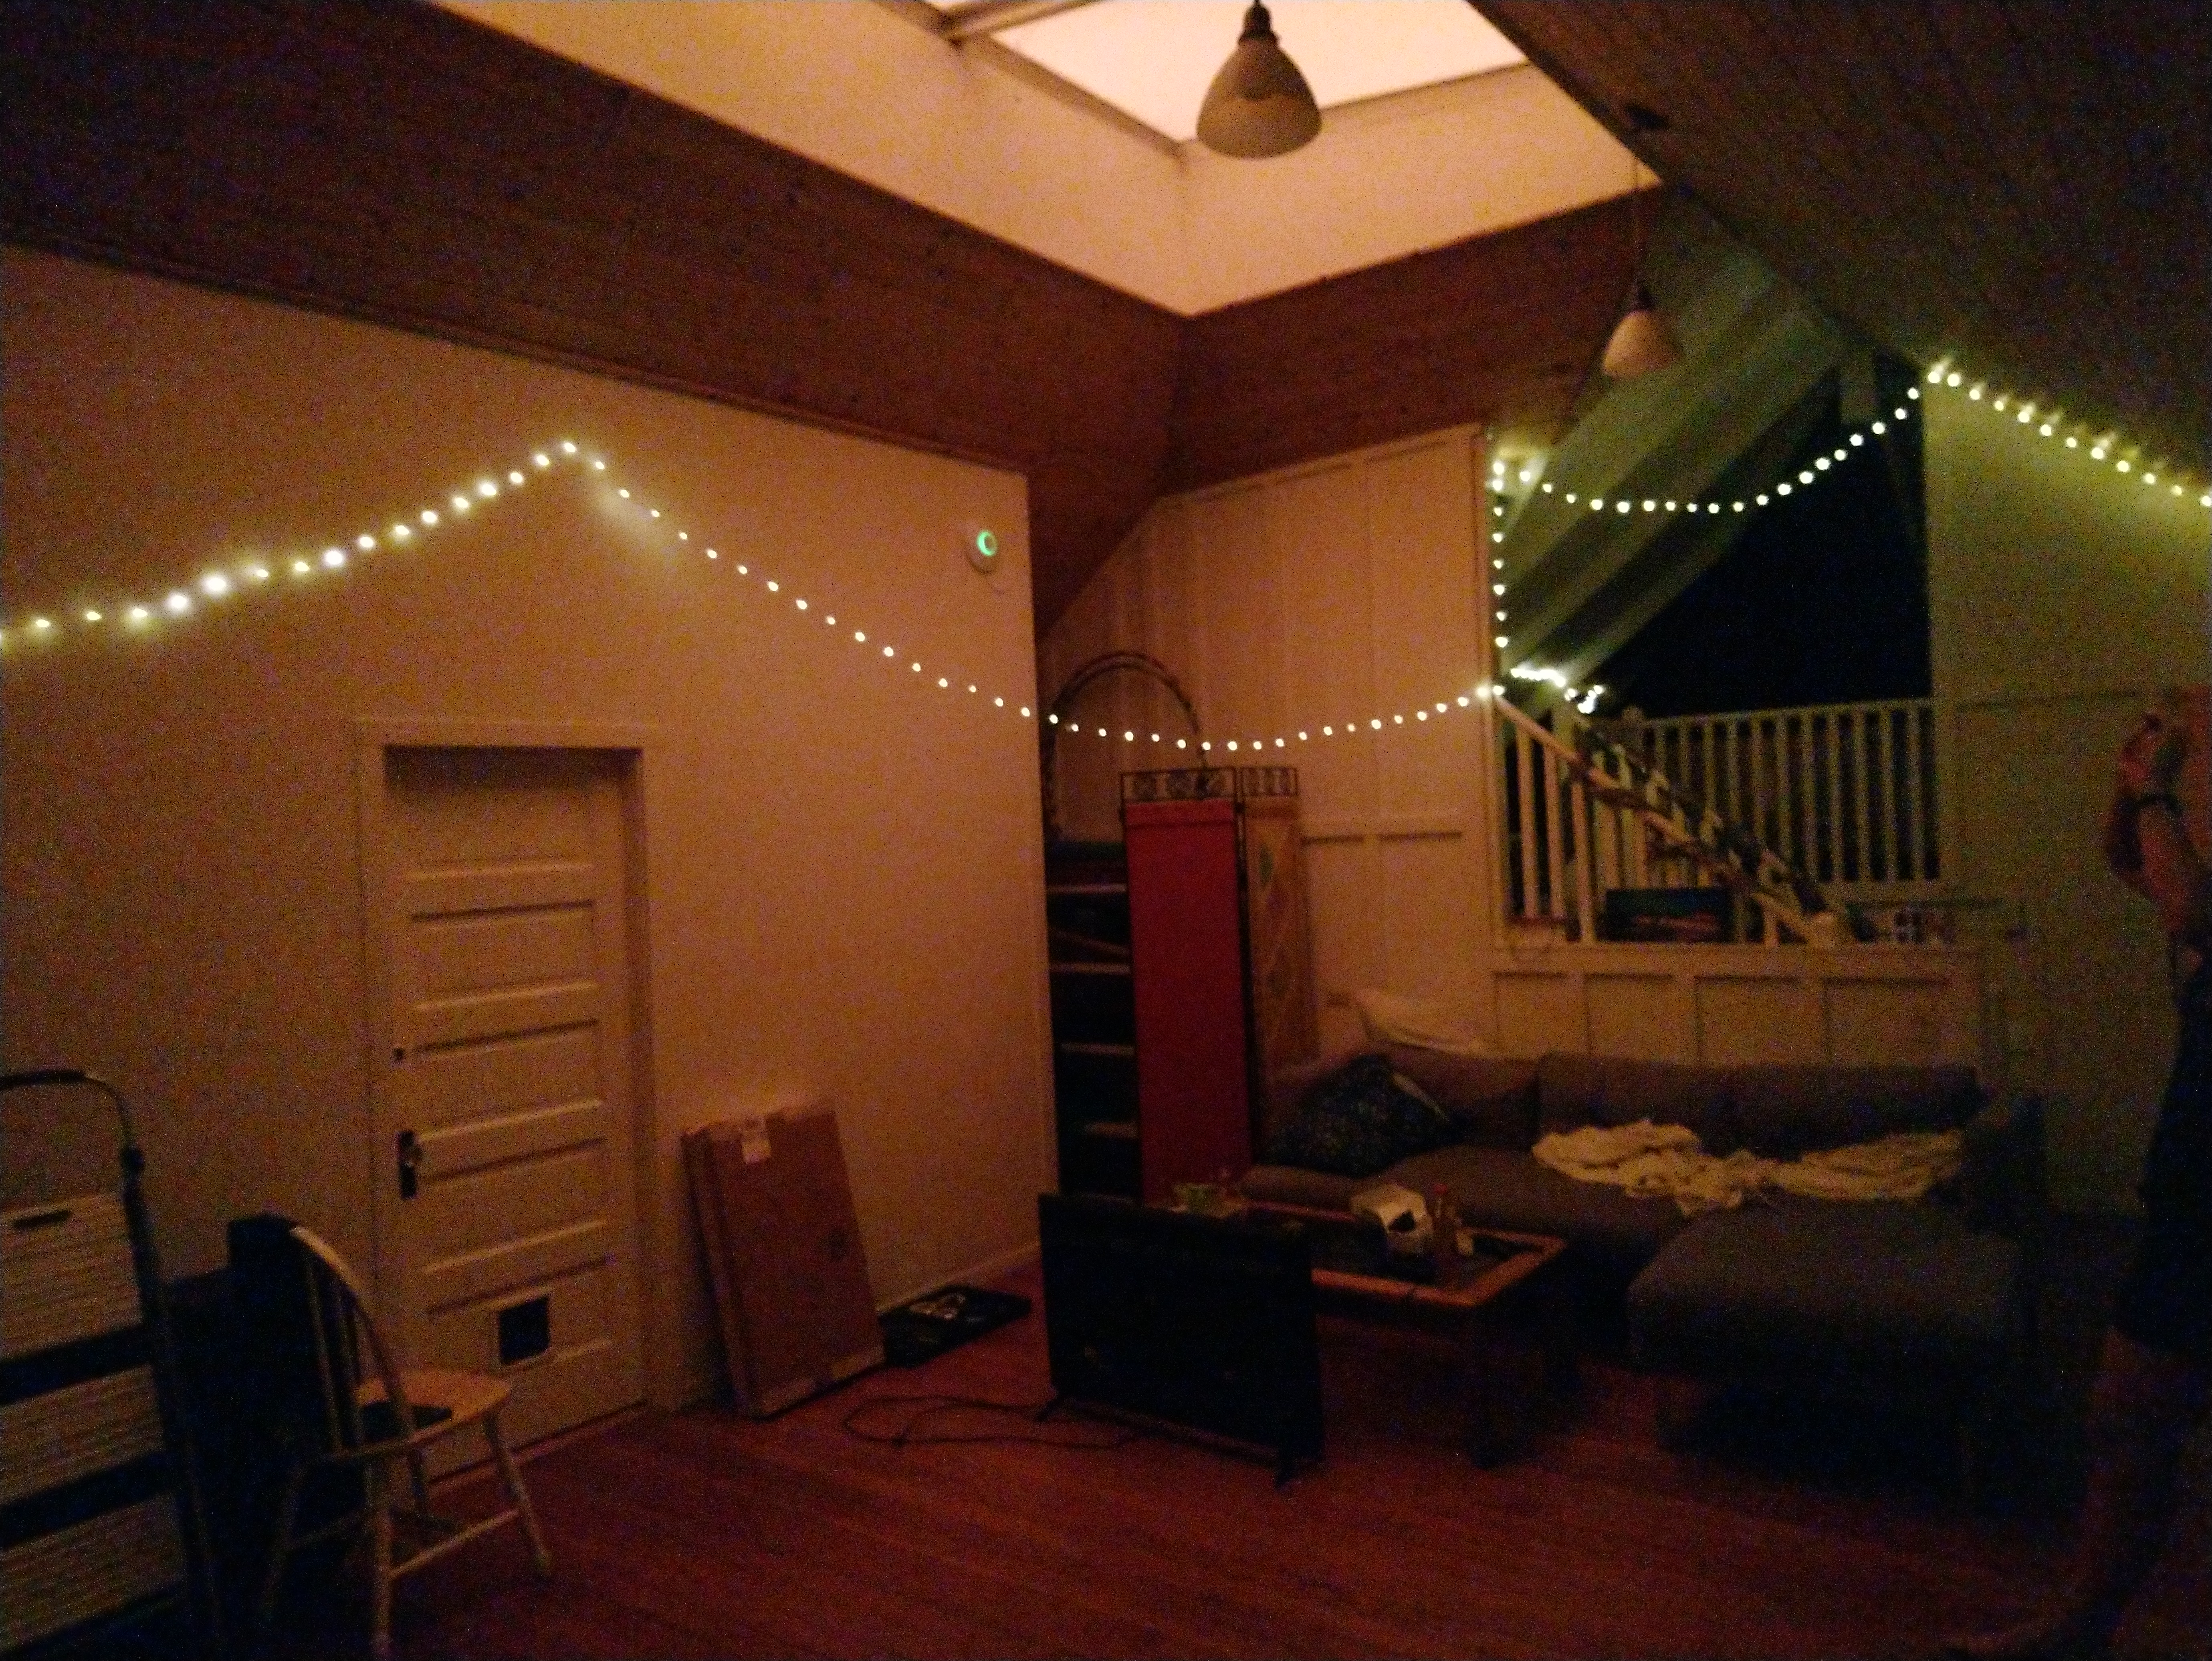
If you checked a website, like PurpleAir or AirNow, you would see scary numbers and dire warnings about staying indoors and avoiding the air outside. However, how is the air inside your house? Are you actually much safer?
Thankfully, answering this question has gotten cheaper and easier in recent years. Low-cost air quality sensors have been built into reasonably inexpensive hardware. The PurpleAir indoor sensor, for instance, is only $200.
The heart of that device is a plantower laser dust sensor which can be had on AliExpress for about $12. With PurpleAir, you're paying for more than just the sensor. That device includes a BME280 temperature/pressure/humidity sensor, a microcontroller that can access a WiFi network, GPS that helps localize the device on a map, all conveniently packed into a nice-looking device. You pay for integration of all that hardware, firmware to make it work together, and software that integrates the data on the back-end and gives you a nice map to view it on. You're also paying for hosting to allow PurpleAir to store your data and display it to others. So, by buying one, you're not only becoming better-informed, but you're also helping folks in your neighborhood be better-informed too -- a positive externality, for once!
However, if you're brave enough, there are advantages to building the hardware yourself. Getting several sensors inside and outside your house can help you understand more about the air you're breathing. It can help quantify interventions, like installing an air purifier or running a box fan. If you have a large house, you can see how quality differs throughout the house.
Also -- while for most readers of this blog, $200 is probably not a lot of money, it is a lot of money for most people. The folks who are most regularly affected by poor air quality are exactly those who cannot just blow $200 to satisfy their curiosity. Making air quality monitoring much, much cheaper can potentially make life much better for those people.
This post will help you build a minimum viable sensor that works with your laptop. By using a pre-existing computer, you can avoid having to pay for additional hardware like a microcontroller with WiFi. Your computer is probably already on WiFi, so configuration is also minimized.
You can also avoid sending data to a cloud. This is a double-edged sword. On the one hand, cloud hosting costs are eliminated. On the other hand, you lose the positive benefits of open data. Also, if you want visualizations, you have to make them yourself.
Anyway, on to the construction!
Hardware
The bill of materials for this project includes two things:
This should run you about $20 all-told. I also needed the following tools and supplies:
- soldering iron and solder
- heat shrink tubing and a lighter
- wire clippers/strippers
The PMS7003 sensors I had did not come with the little breakout board, and this device has very small pins. To connect to it, I used some 30AWG wire-wrap wire and a wire-wrapping tool. If you get a PMS7003 with a breakout and cable, you won't need this.
My first task was connecting to the PMS7003. Here's the pinout, from the data sheet:
You'll only need 4 wires -- for power, ground, serial Tx, and Rx. I stripped the tiniest bit of insulation on my wire wrap wire, tinned both the wire and the pin, and touched them together with the soldering iron (very carefully, to avoid bridging the pins).
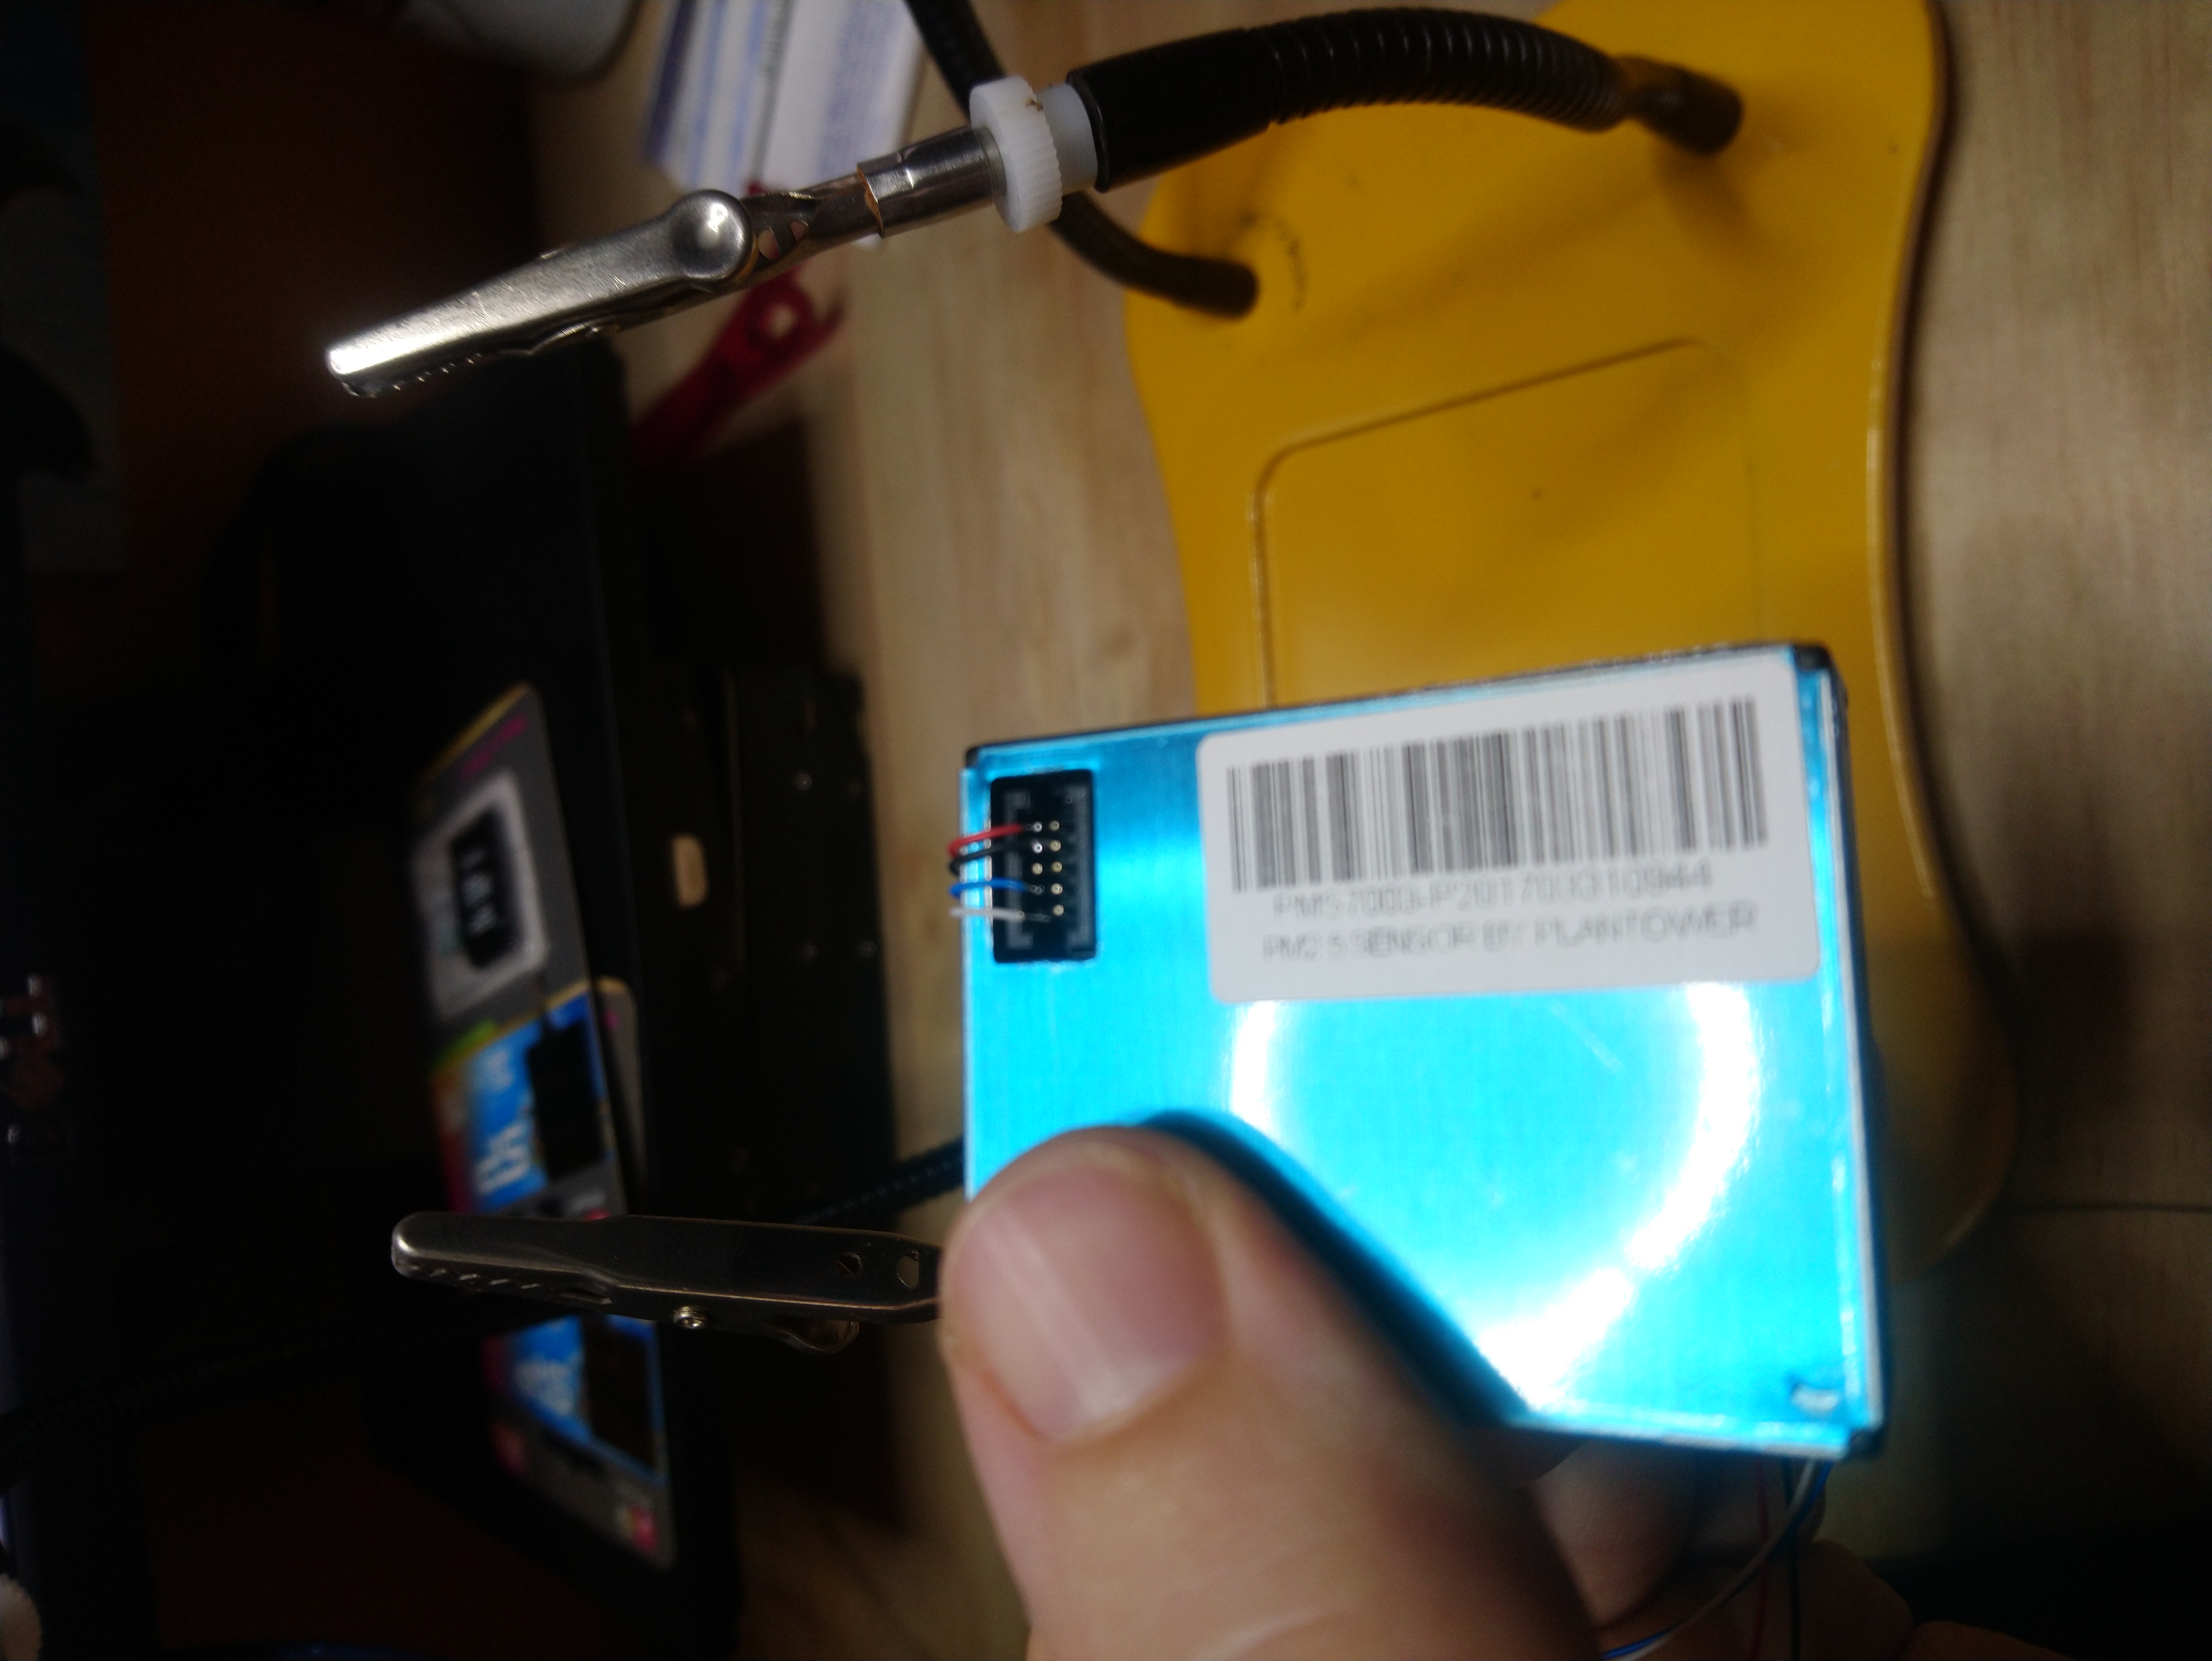
Here's a (blurry) photo with all 4 wires connected:
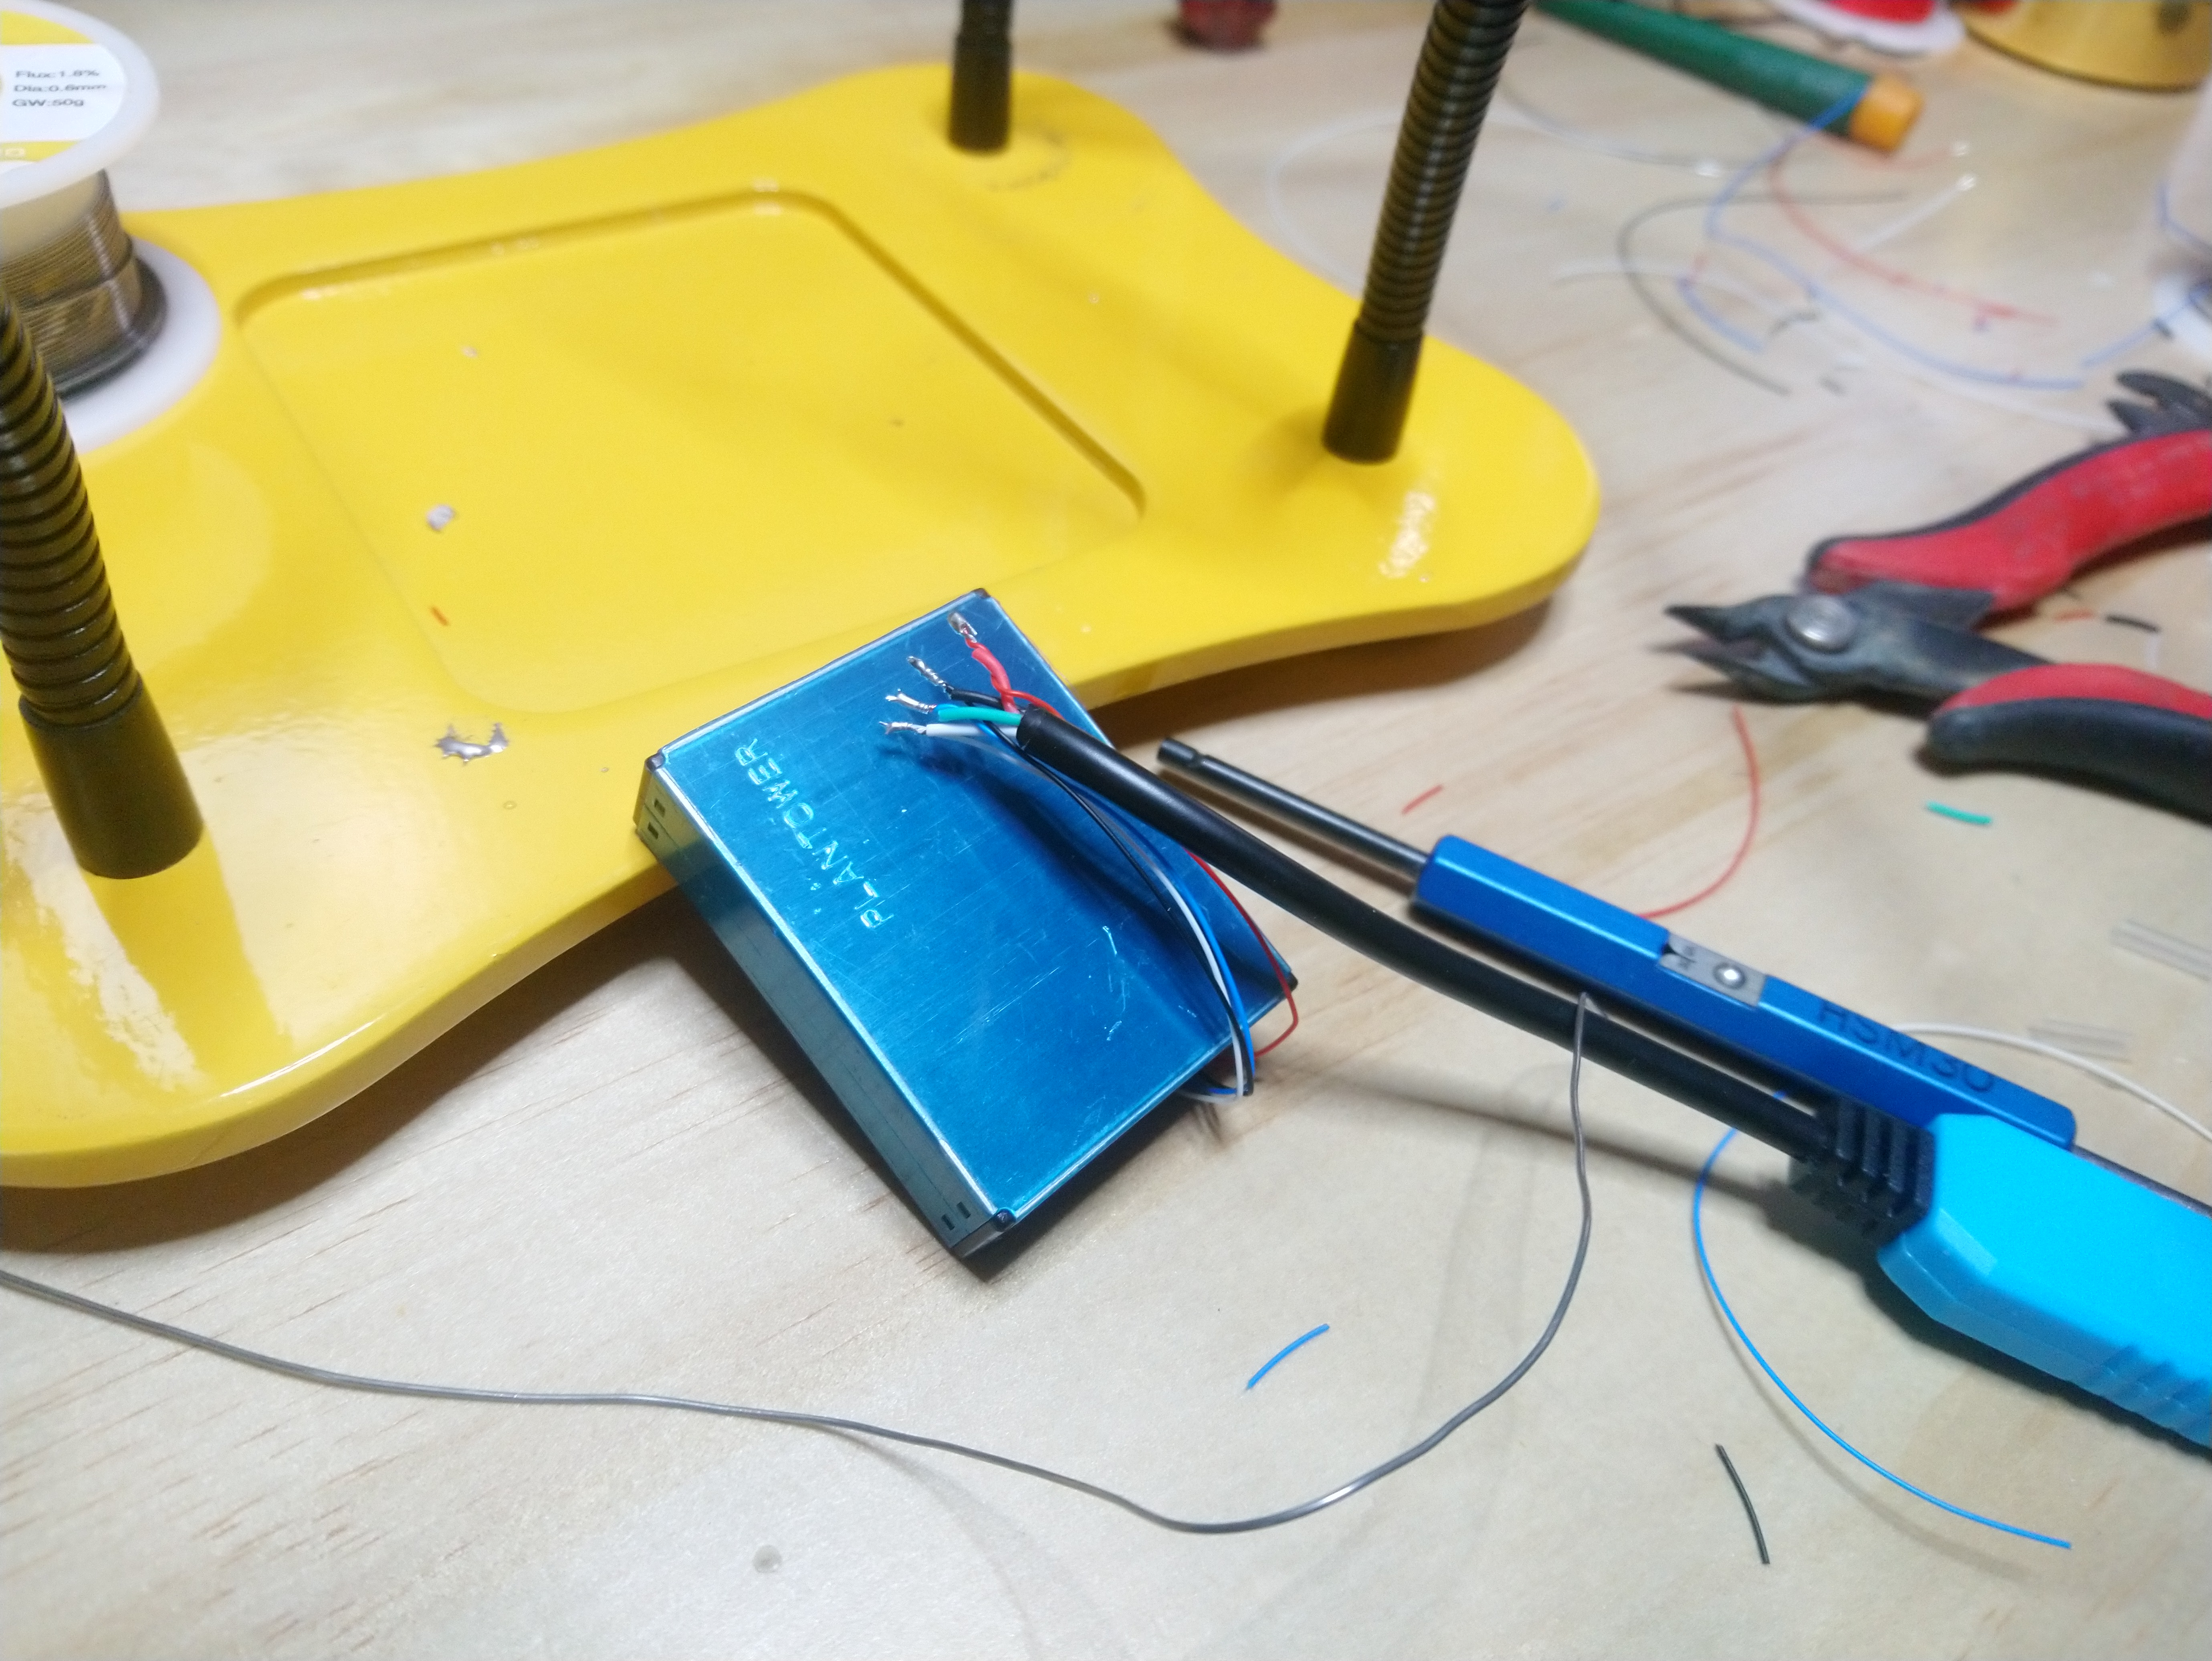
Next, I stripped my USB TTL cable and tinned the exposed multi-strand wires. Tinning just means touching the soldering iron to the wire and allowing some solder to flow onto the wire. This makes the wire stiff, so I can wire-wrap onto it using my wire-wrap tool.
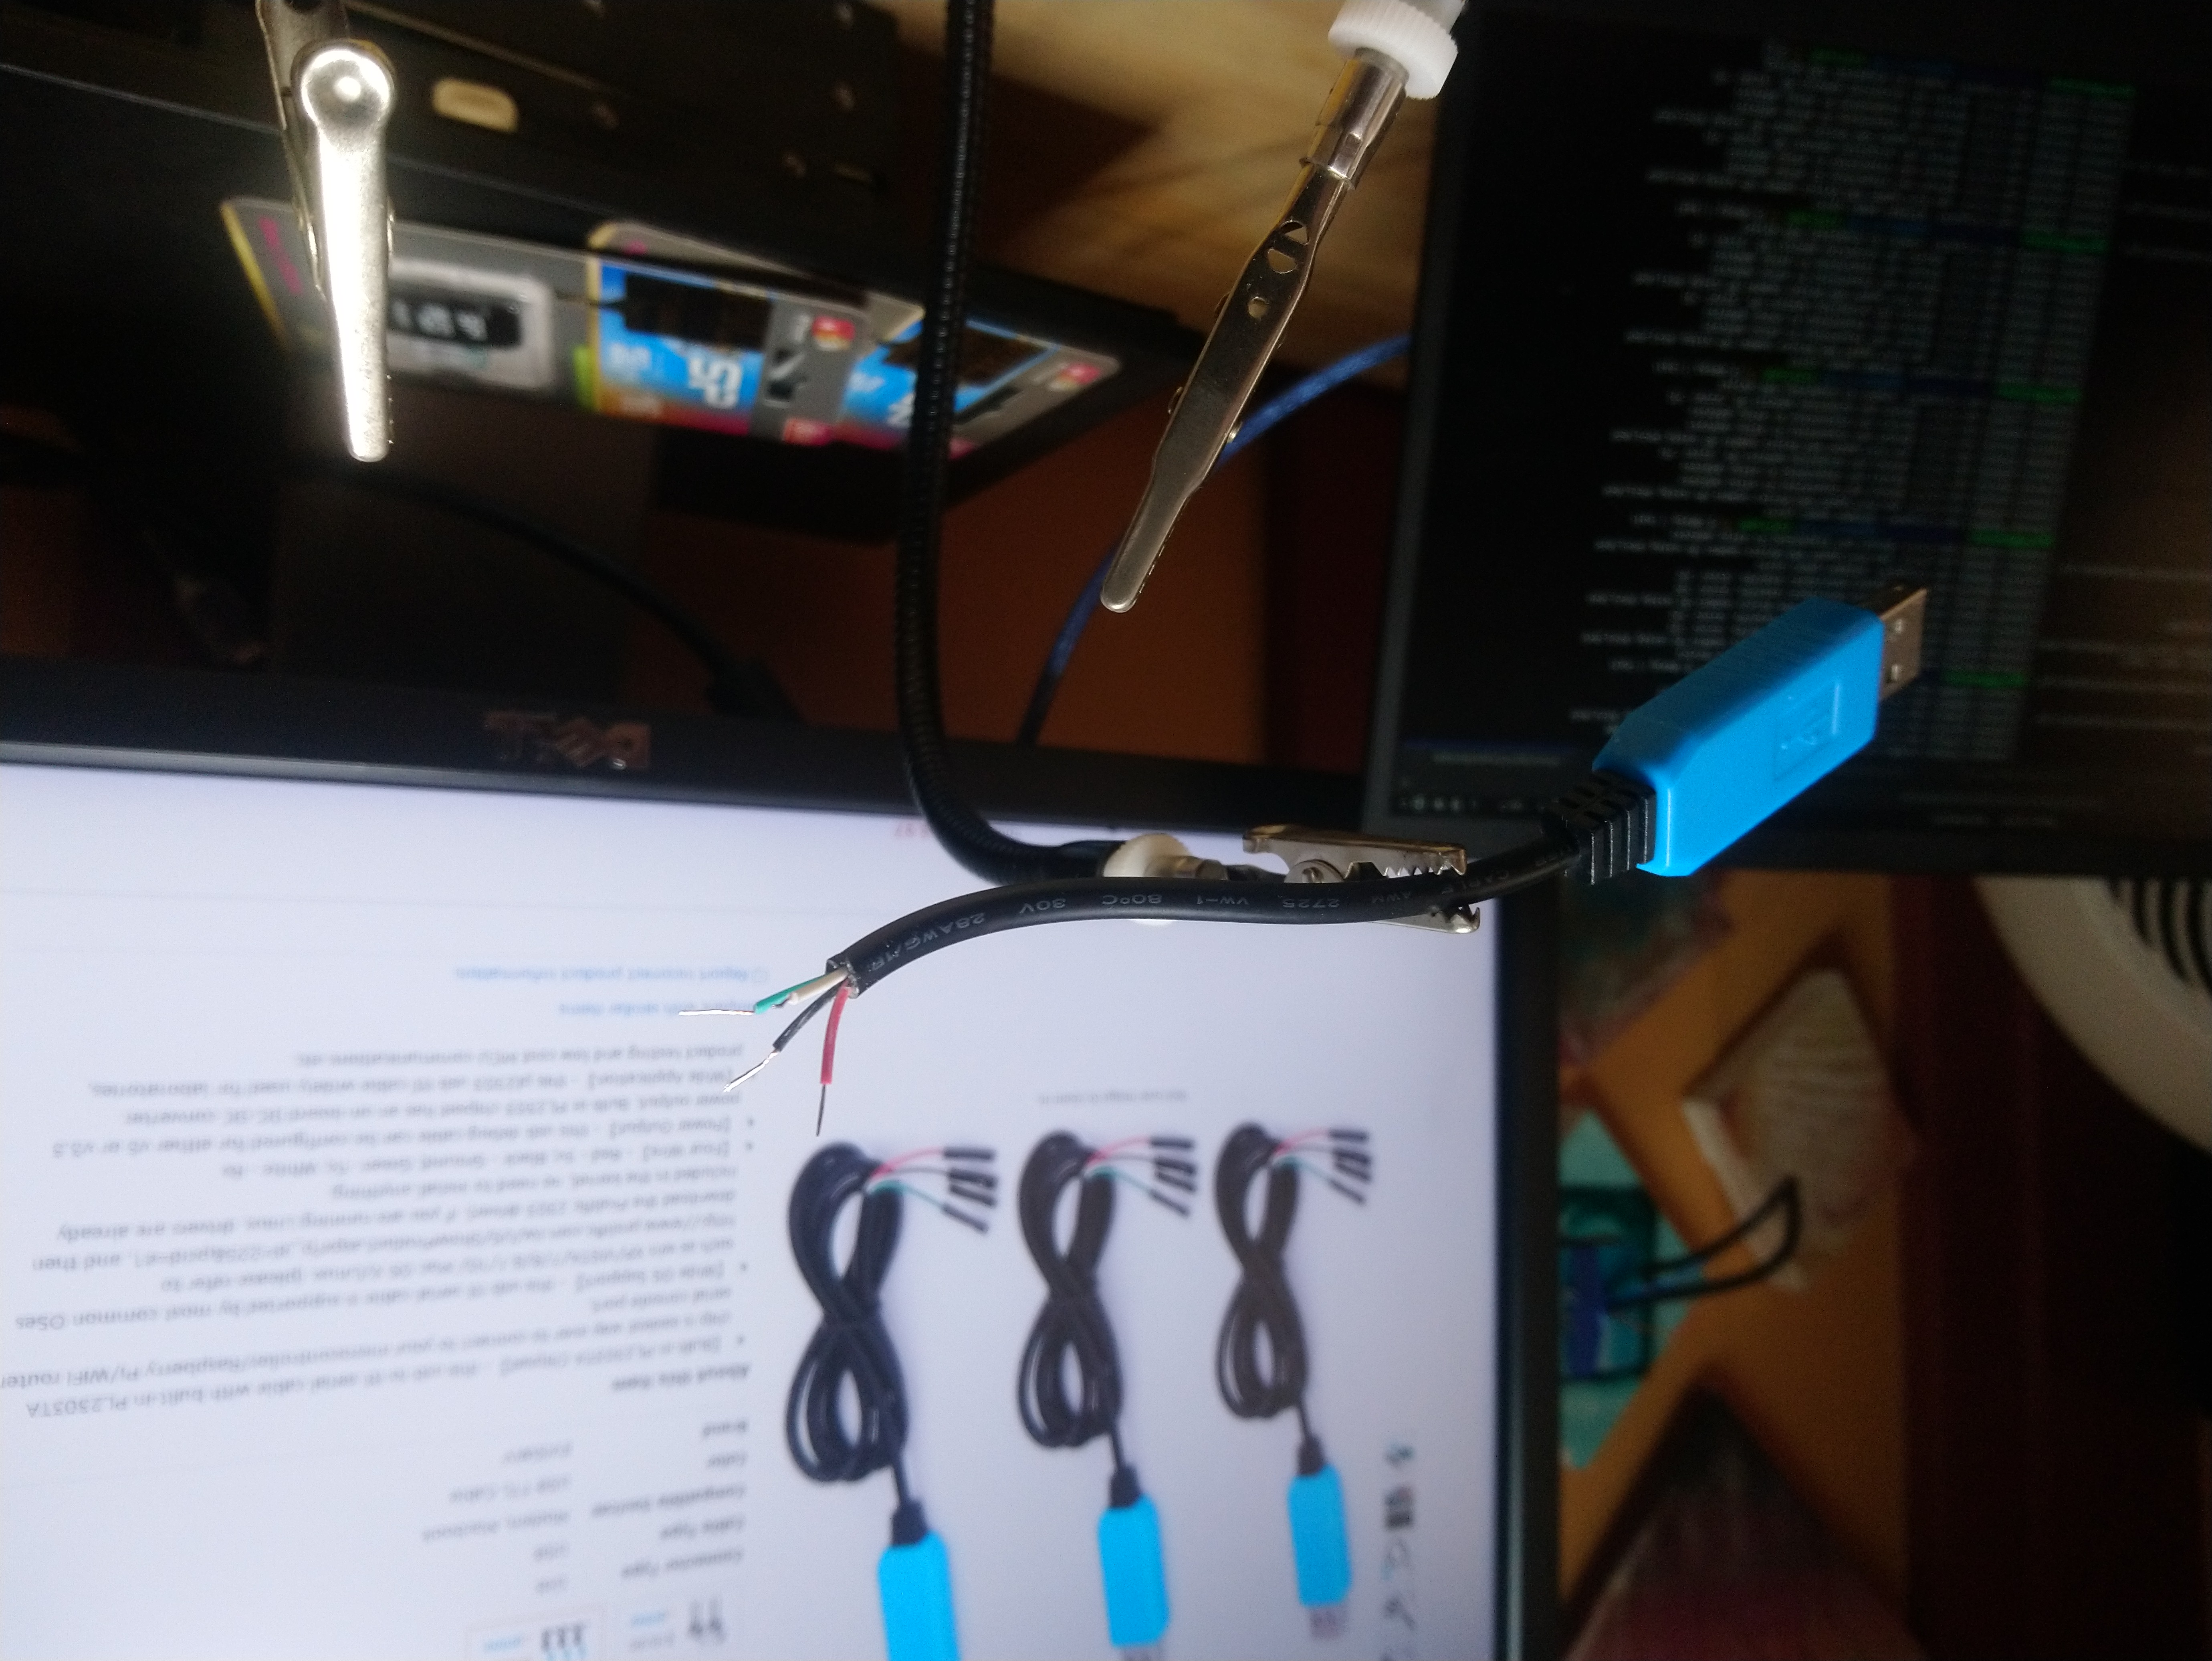
Next, I wire-wrapped the exposed, tinned wires.
Black and Red are for ground and power, and get connected together.
On my TTL cables, green is for Tx (transmit) and white is for Rx (receive).
You need to connect the Tx of the PMS7003 to the Rx of the TTL cable, and vice versa.
I made it easier for myself by making my white wire on the PMS7003 be the Tx pin (Pin9), so I could just do white-to-white:
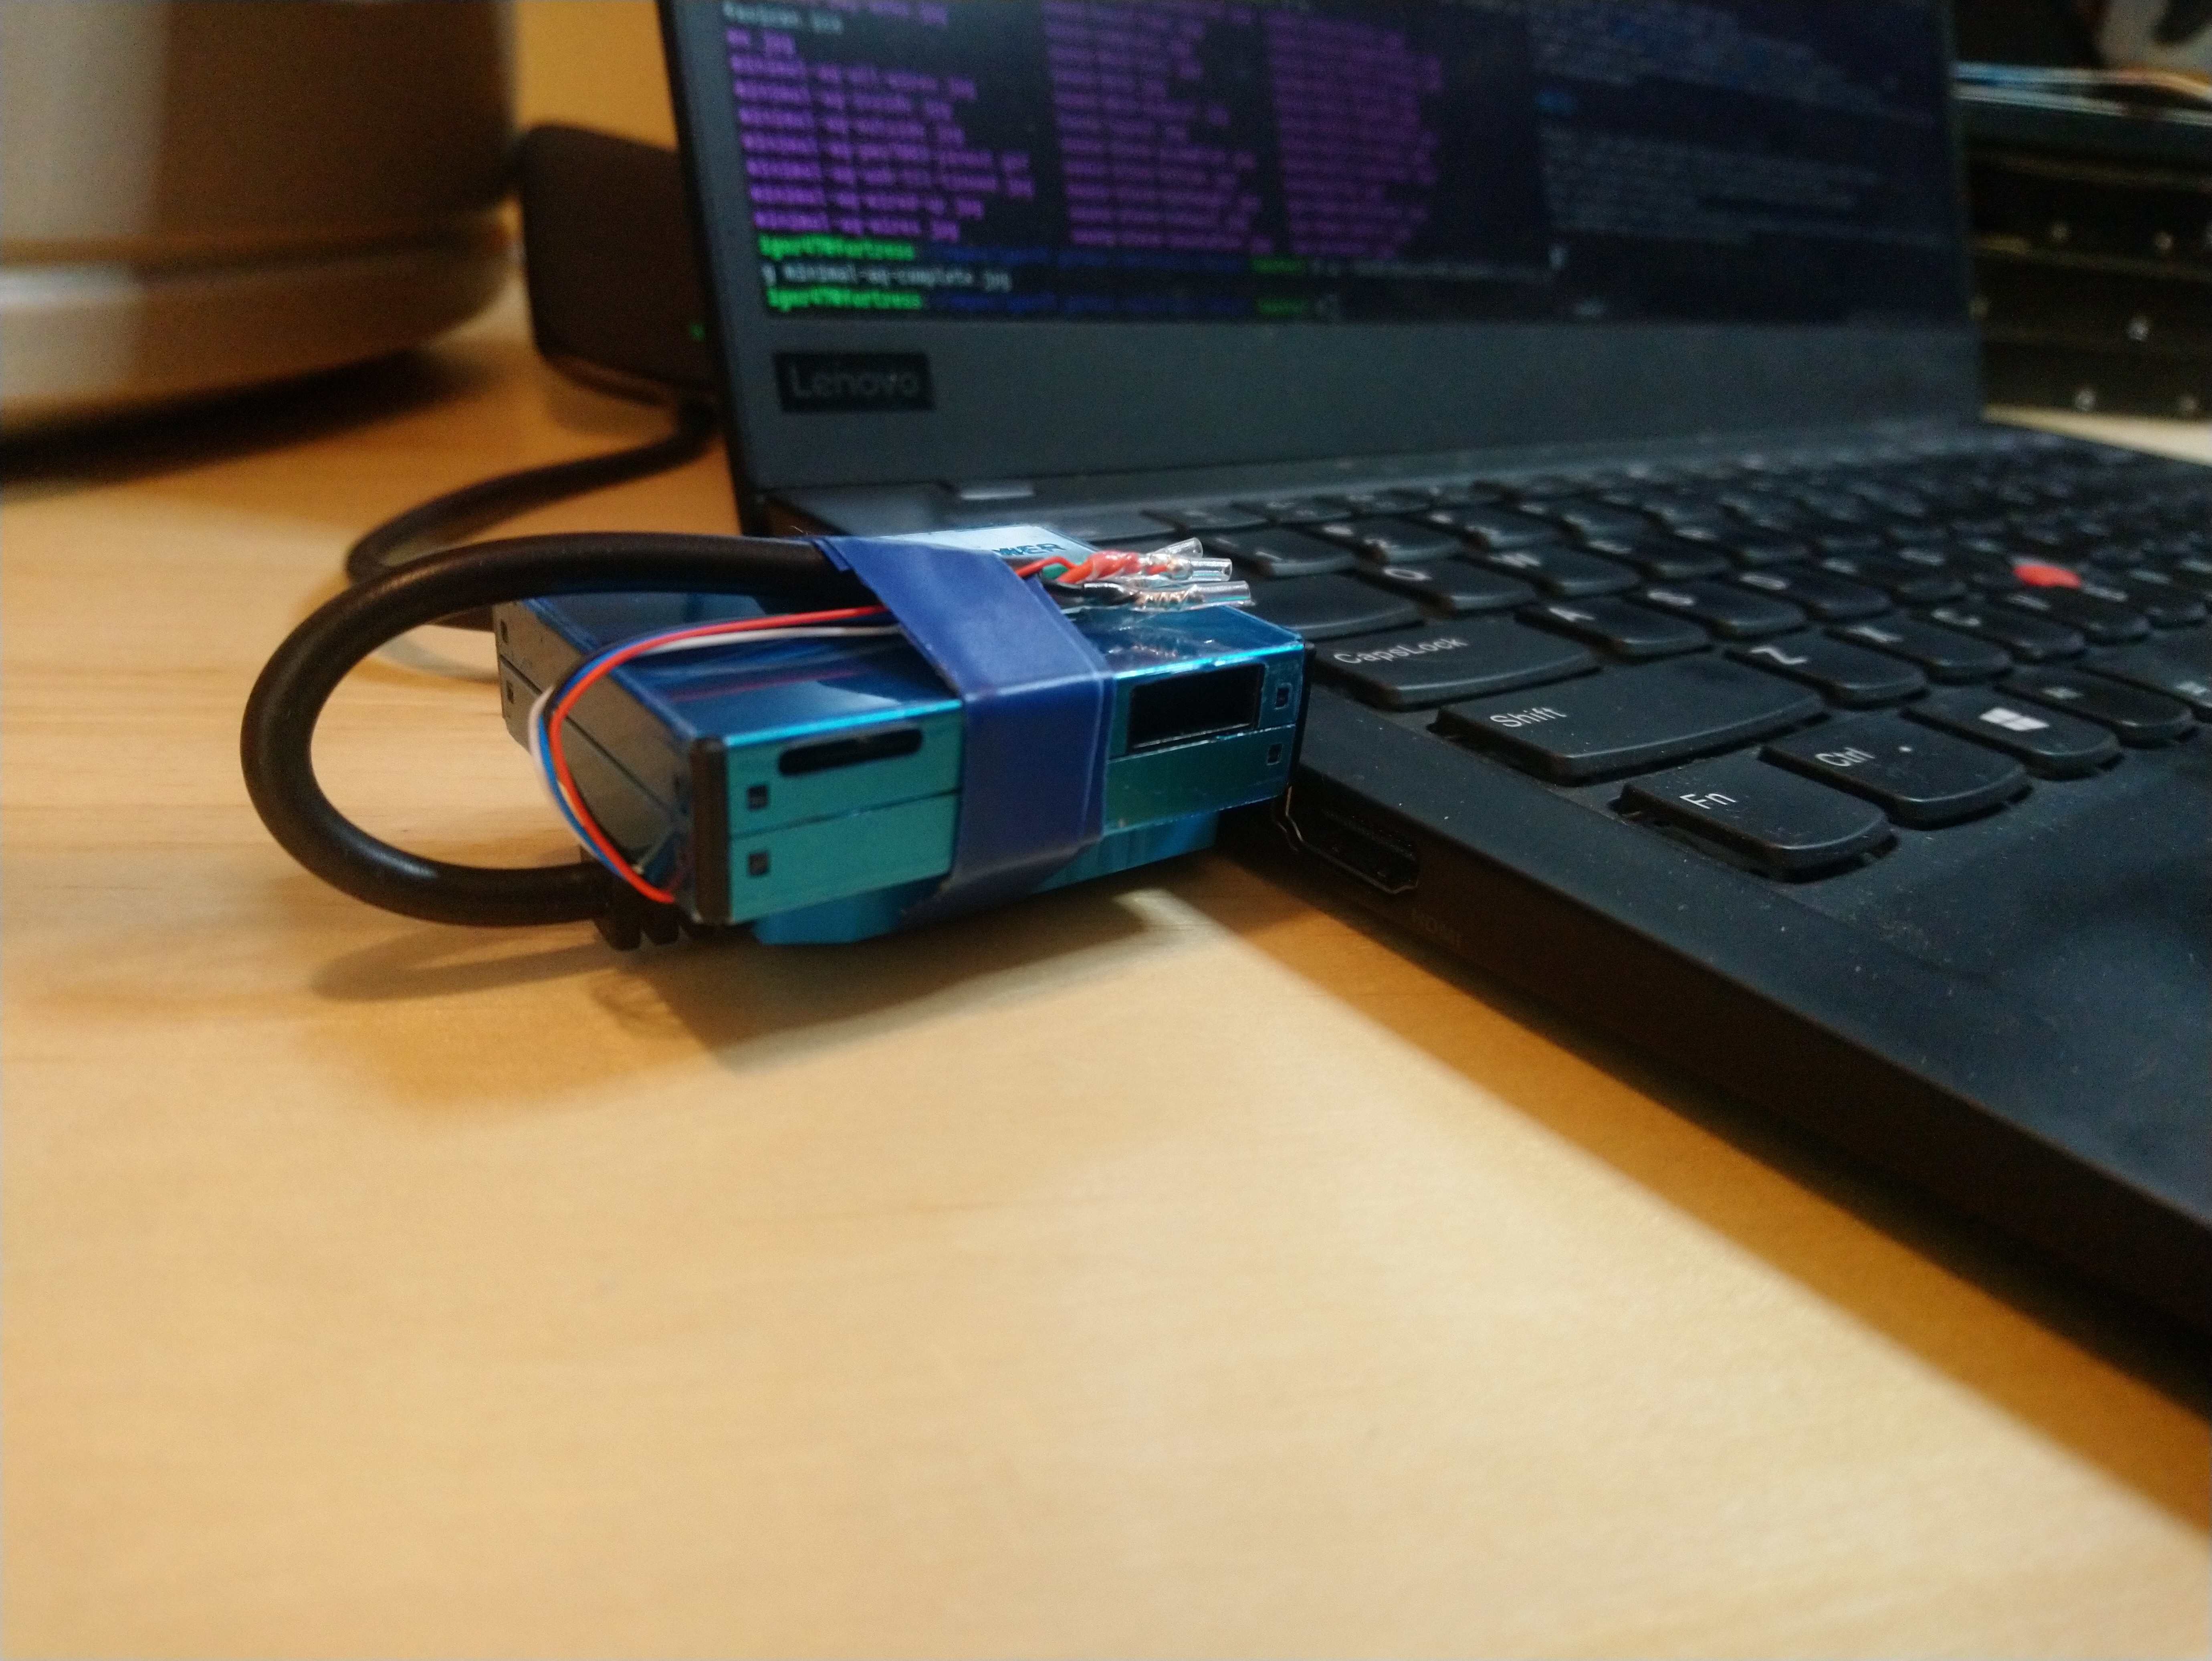
After wire-wrapping, I soldered the wires together (belt and suspenders!) Finally, I put some heat-shrink tubing over the wires and shrunk it using a lighter. I then taped the device right to the USB plug with electrical tape. Be sure to avoid covering up the air intake and expel ports on the PMS7003. Also, be mindful of USB polarity. The orientation that I have in the photo is probably the way your USB port is aligned on your computer, so the PMS7003 ends up on top of the USB plug.

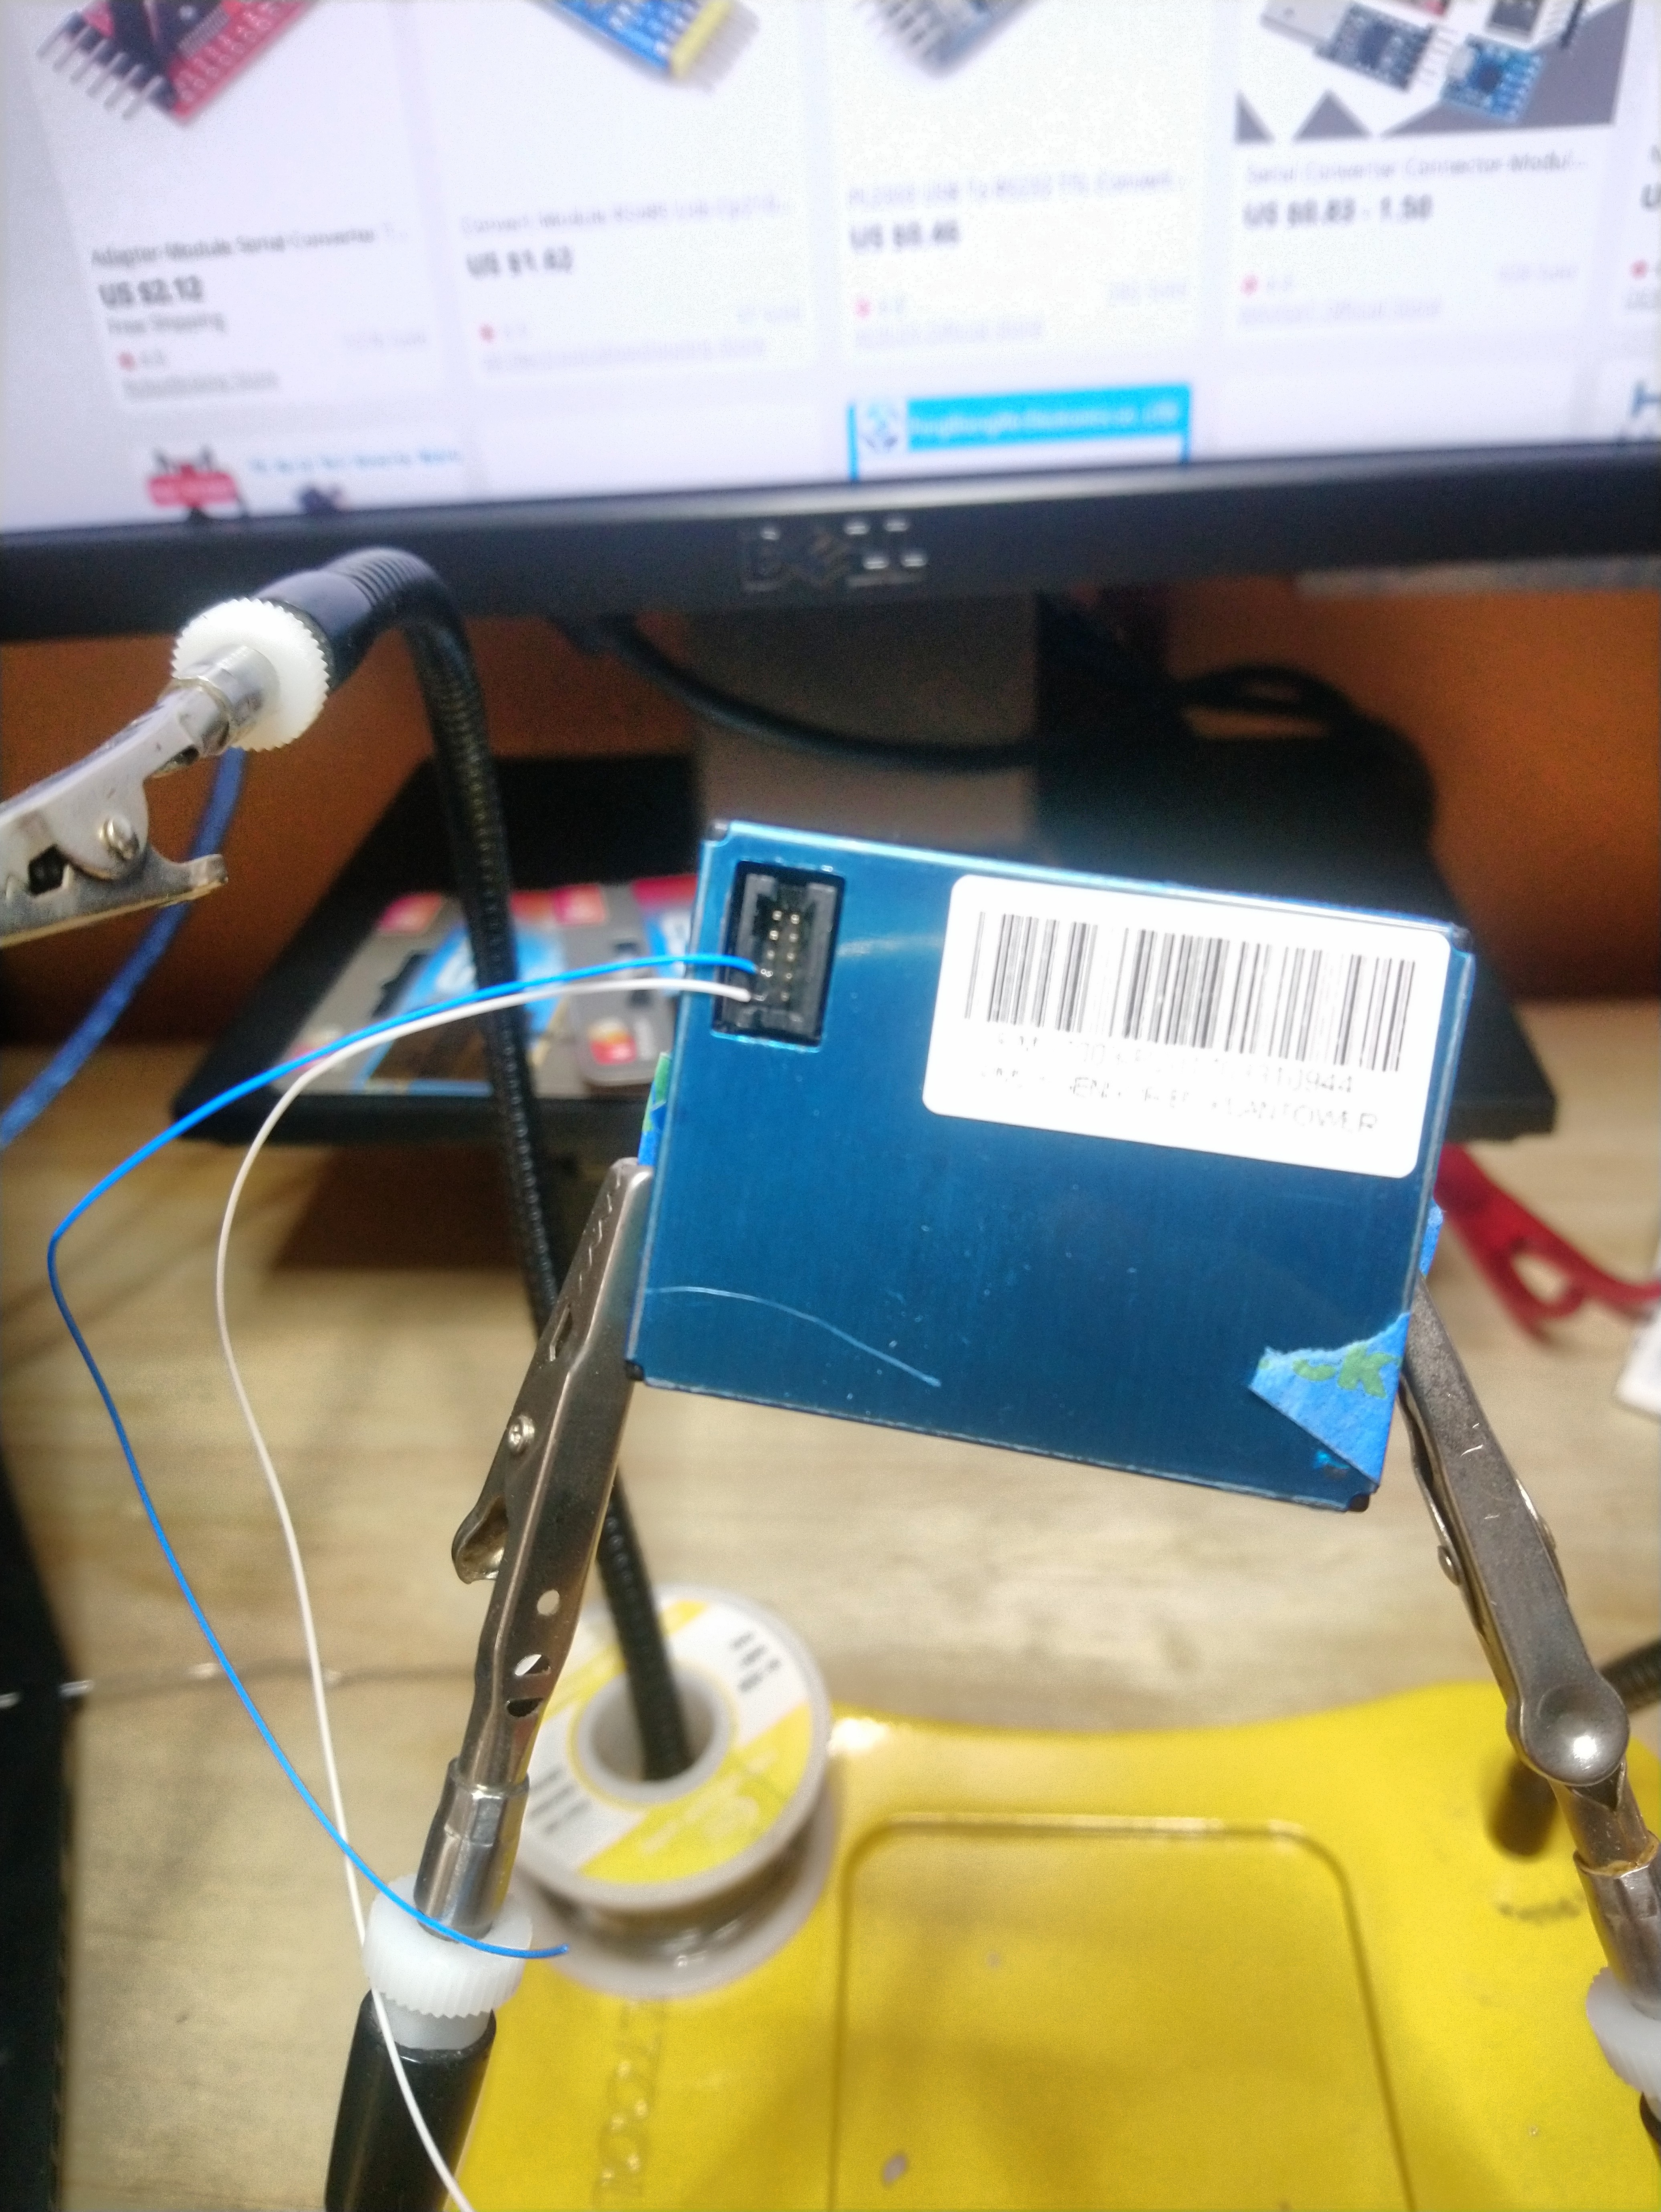
Here it is, plugged into my computer and ready for software integration:
Software
Next, you'll need some software to integrate with this hardware.
The cables that I got use the Prolific Technology PL2303 chipset.
This is already supported on linux; if you plug it in and run dmesg | tail you'll see something like this:
[1457958.125315] usb 1-2: new full-speed USB device number 38 using xhci_hcd
[1457958.281810] usb 1-2: New USB device found, idVendor=067b, idProduct=2303, bcdDevice= 4.00
[1457958.281816] usb 1-2: New USB device strings: Mfr=1, Product=2, SerialNumber=0
[1457958.281820] usb 1-2: Product: USB-Serial Controller
[1457958.281823] usb 1-2: Manufacturer: Prolific Technology Inc.
[1457958.283810] pl2303 1-2:1.0: pl2303 converter detected
[1457958.285306] usb 1-2: pl2303 converter now attached to ttyUSB0
Looks like it got recognized correctly, and is available at /dev/ttyUSB0.
On OSX, you will probably have to install a driver, but you can ignore the warning about restarting your computer.
On these machines, the device will probably show up at /dev/tty.usbserial.
While it has power, the PMS7003 will be outputting a continuous stream of binary data containing the particulate readings onto that TTY device. The data sheet specifies the protocol:
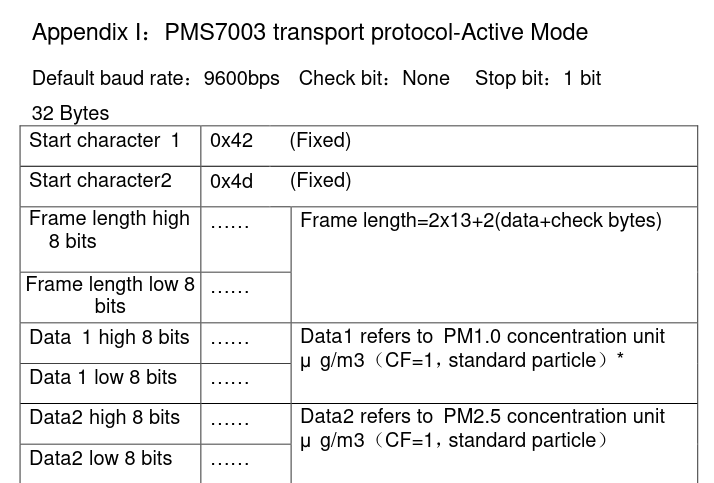
I recommend using my mini-aqi repo, which includes a Python implementation of this protocol.
You will need a recent python (I tested with 3.8.3; anything above 3.6 should probably work).
Run these commands to grab the repo, install the code, and begin reading data:
git clone https://github.com/igor47/mini-aqm.git
cd mini-aqm/
pip install poetry
poetry install
poetry run ./main.py
And you should see the output:
beginning to read data from /dev/ttyUSB0...
PM 1.0: 32  PM 2.5: 54  PM 10: 73  AQI: Unhealthy for Certain Groups
PM 1.0: 31  PM 2.5: 54  PM 10: 73  AQI: Unhealthy for Certain Groups
Here's a screenshot:

mini-aqm tries to print informative error messages.
If main.py exits immediately without printing any air quality measurements, read the error message and try to resolve it.
If you suspect a hardware issue, use a multi-meter to check for a short between pins.
Visualizations
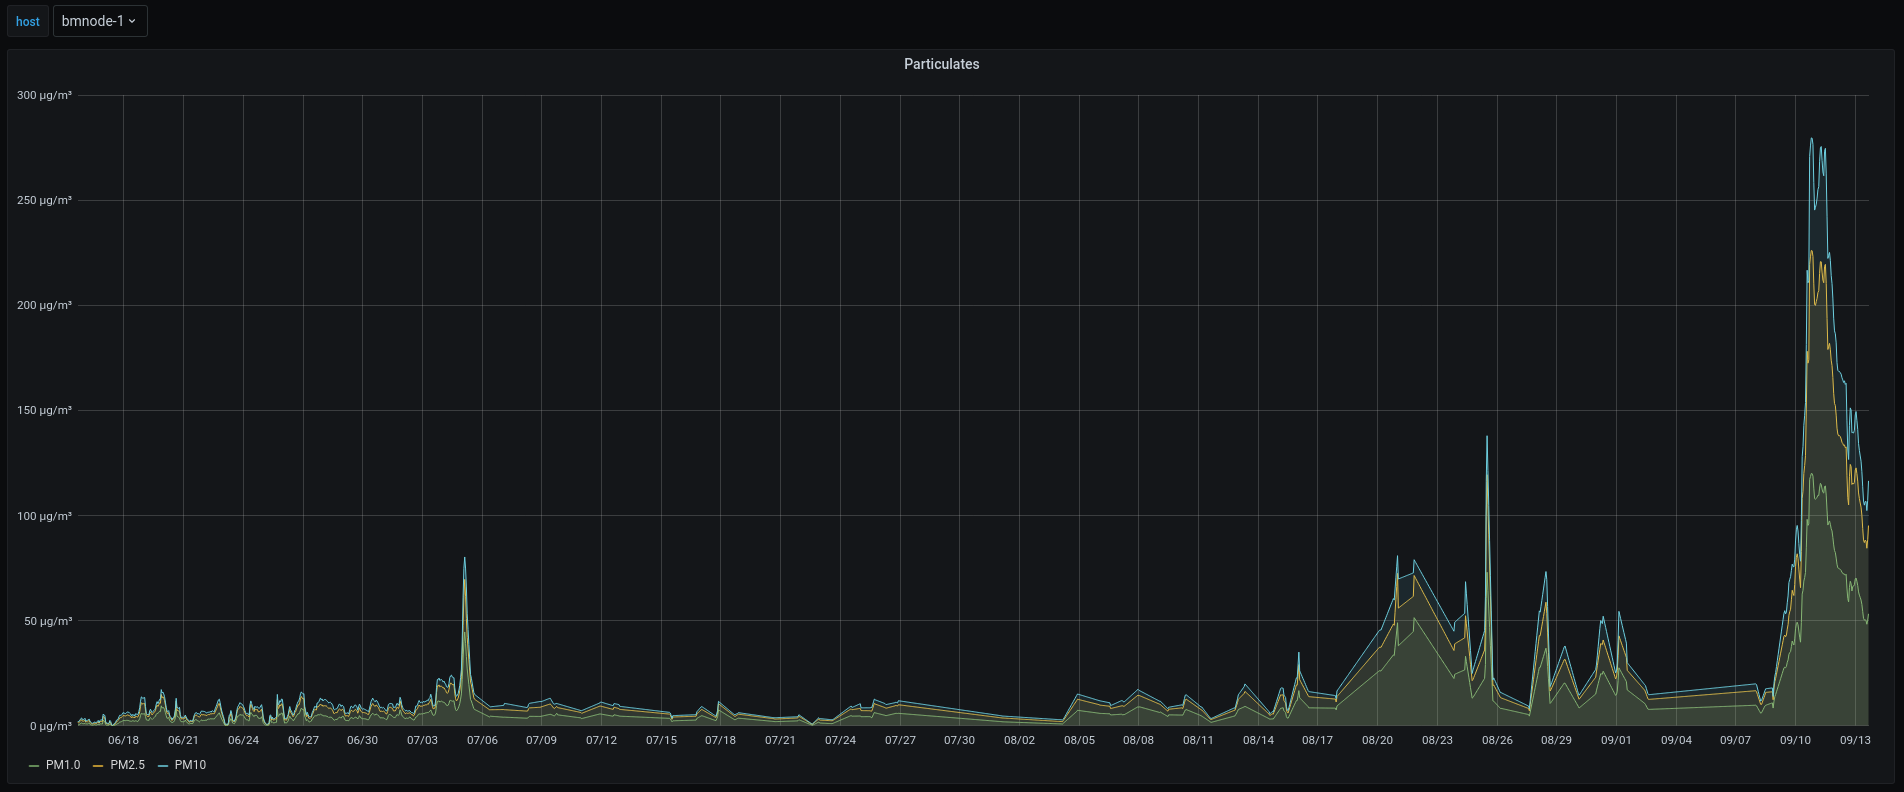
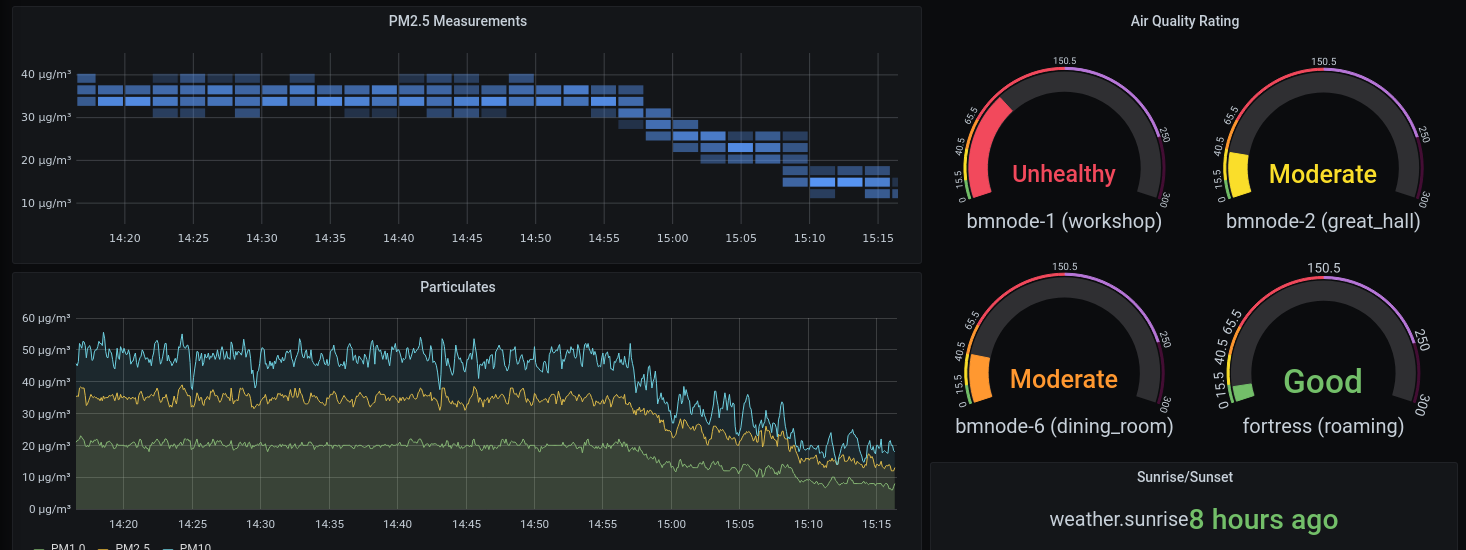
I am running telegraf on my laptop. I've configured telegraf to read data from the device and store it in influxdb, for graphing with grafana. Using this stack, here's a visualization of the past few months of PM data in my workshop:
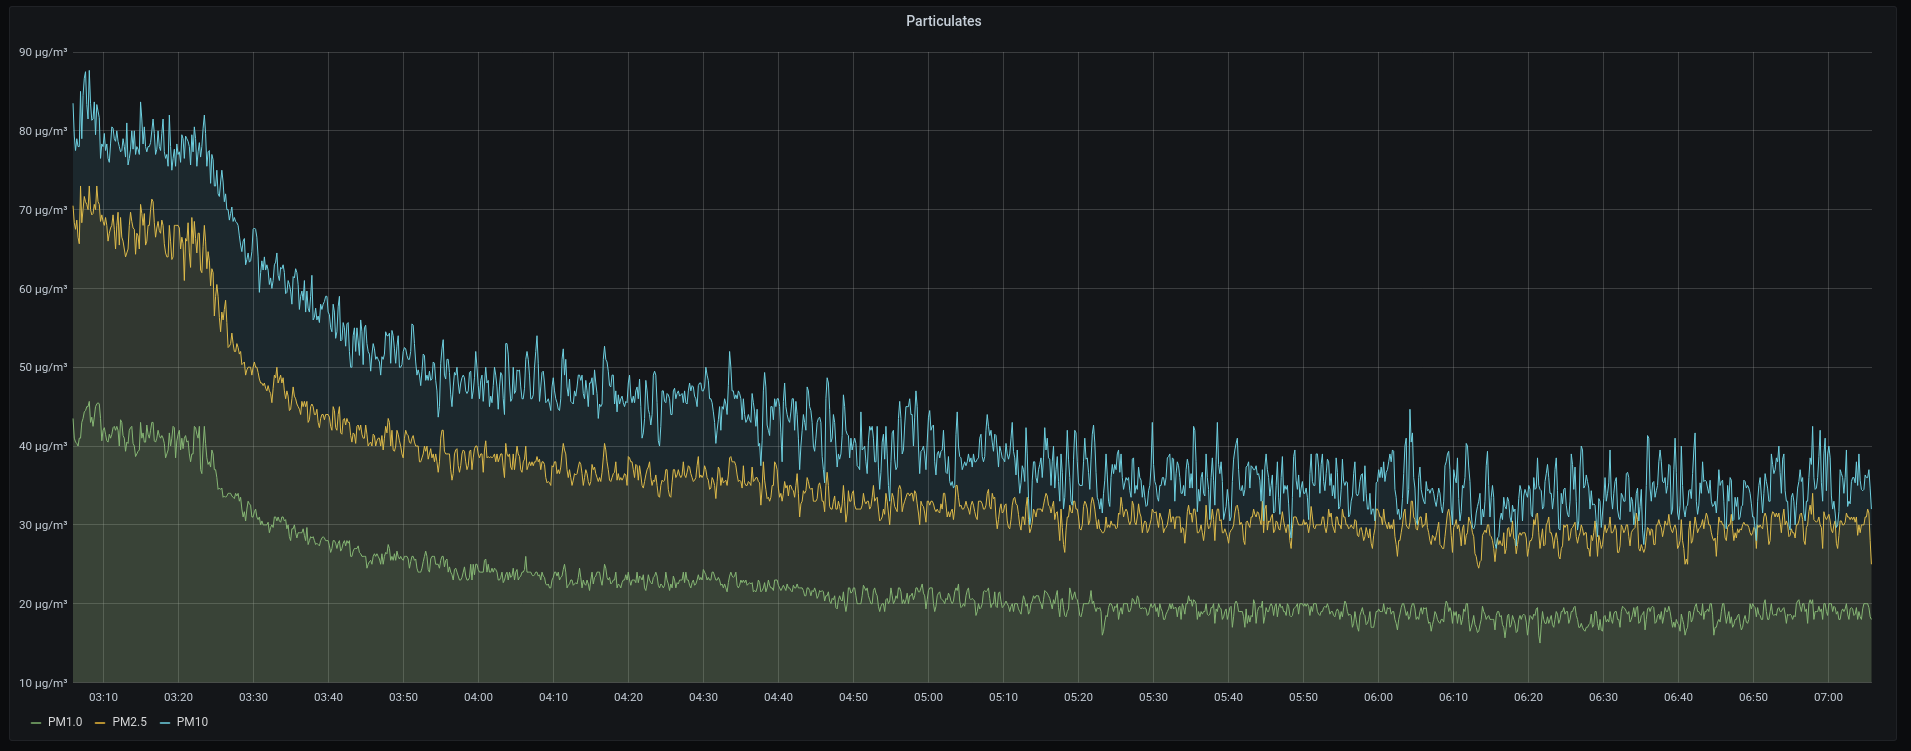
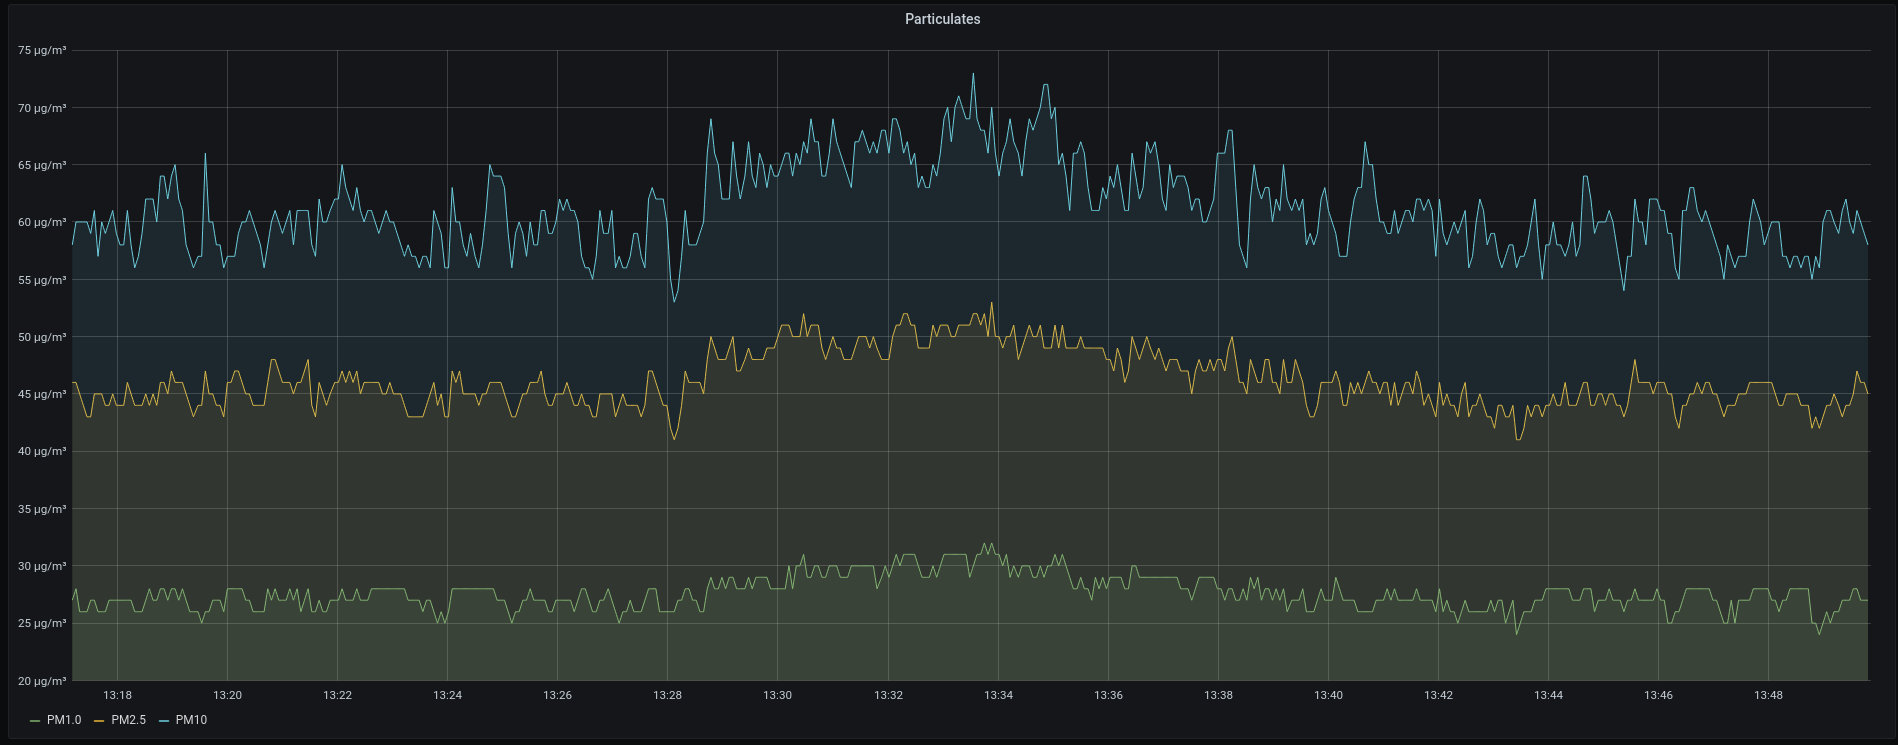
Using this setup, it's convenient to perform experiments and look at results. For instance, here is what happened with indoor air quality when we turned on our central fan system, which pushes air through two MERV13 filters:
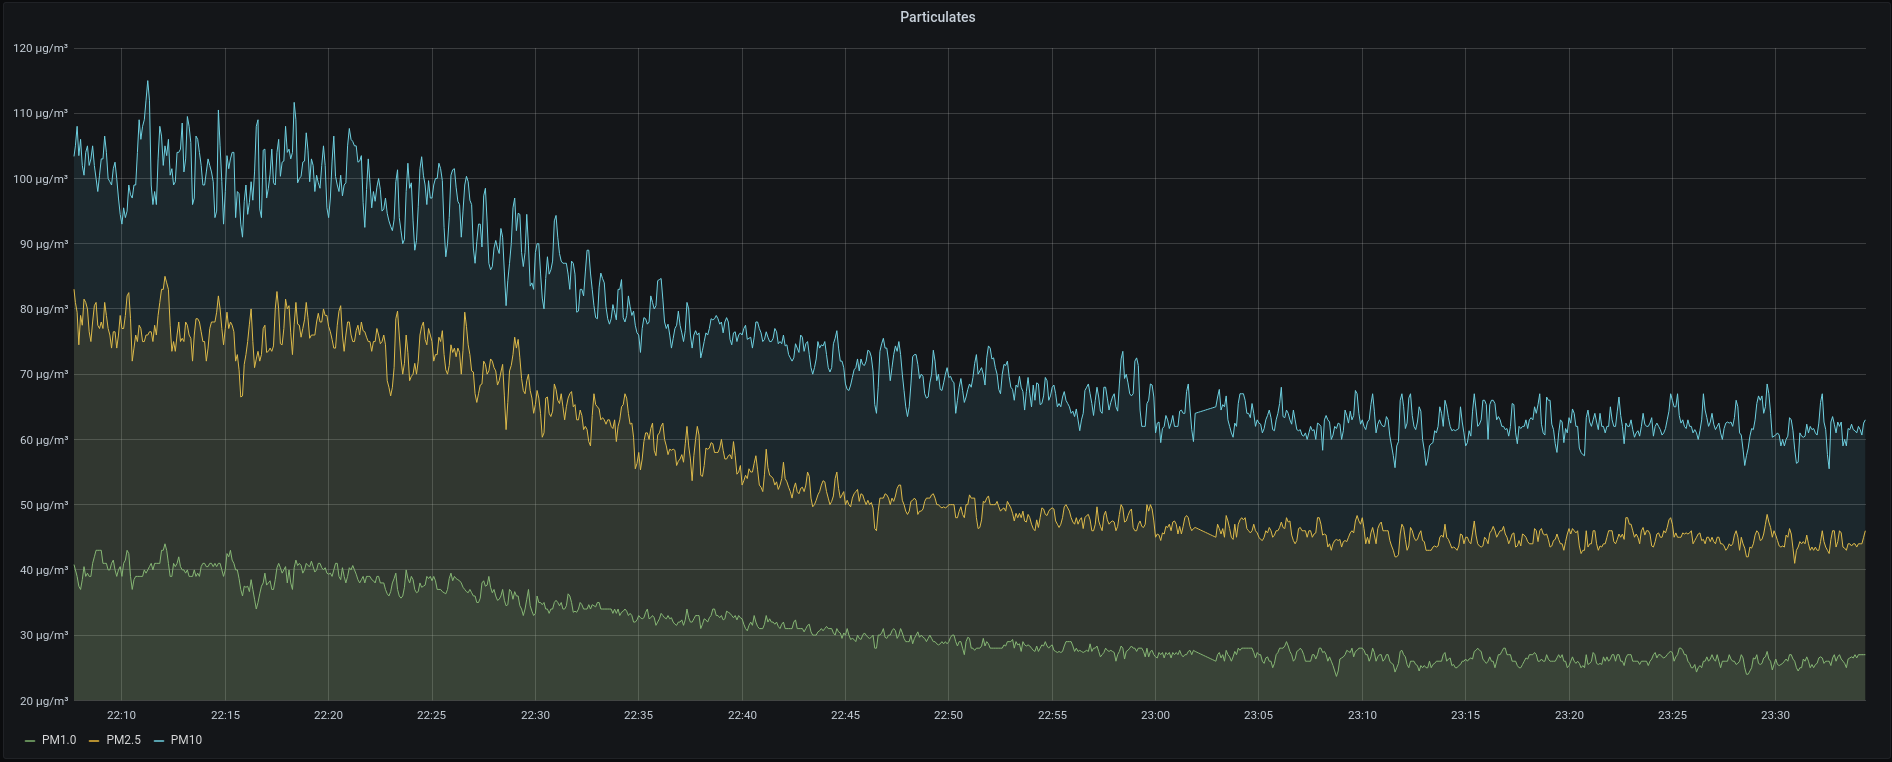
Here's where we take a box fan with a MERV13 filter and run it near the sensor:
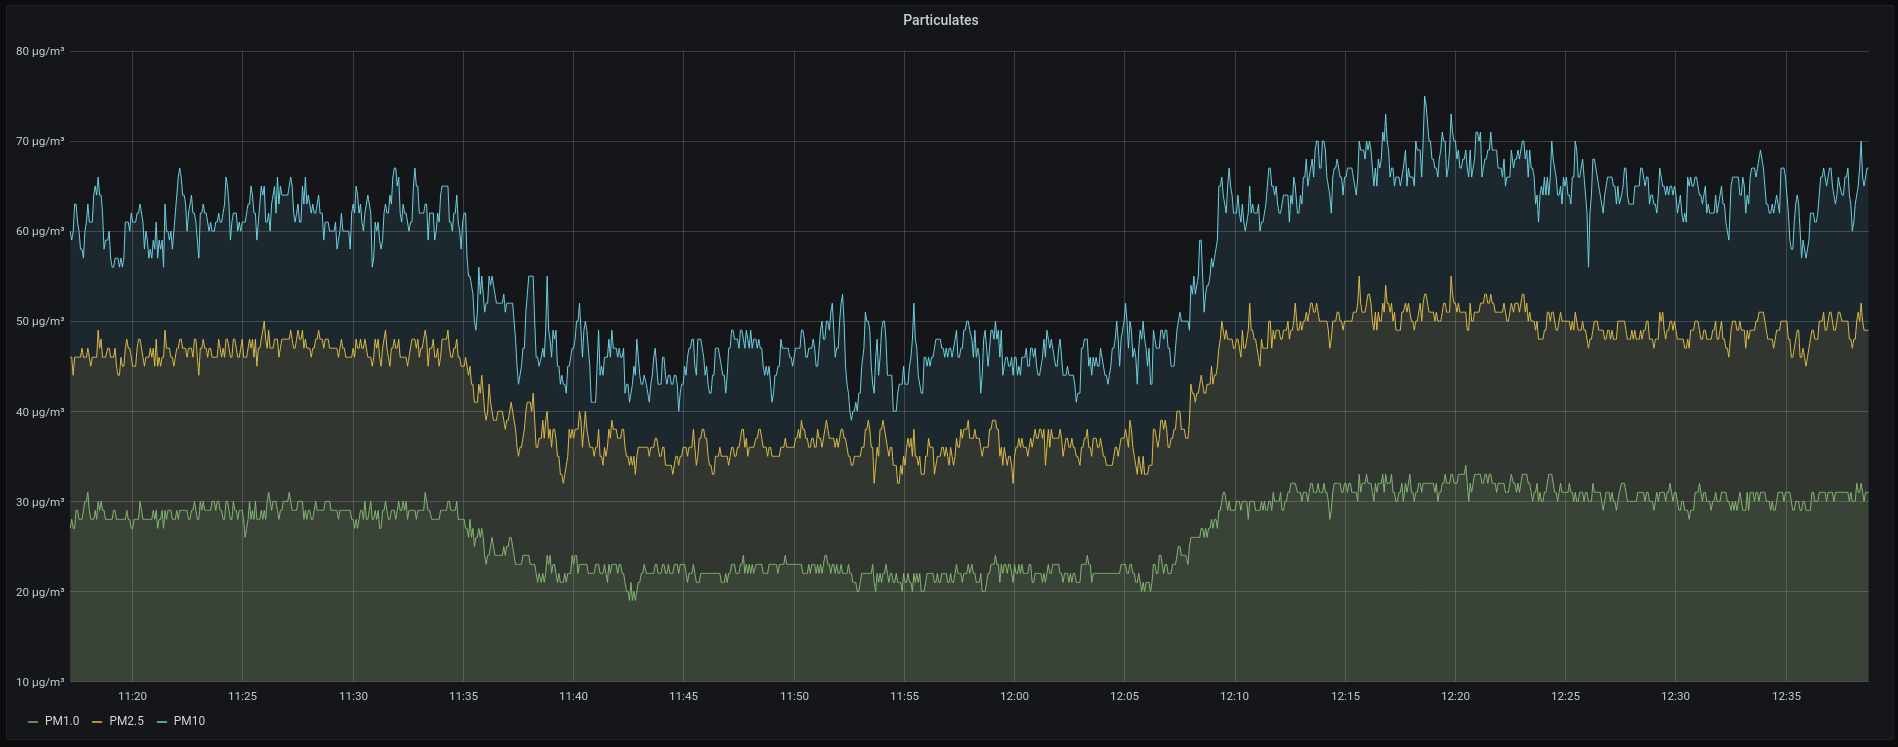
Here's what happens when we just point a normal fan at the device, with no filter:
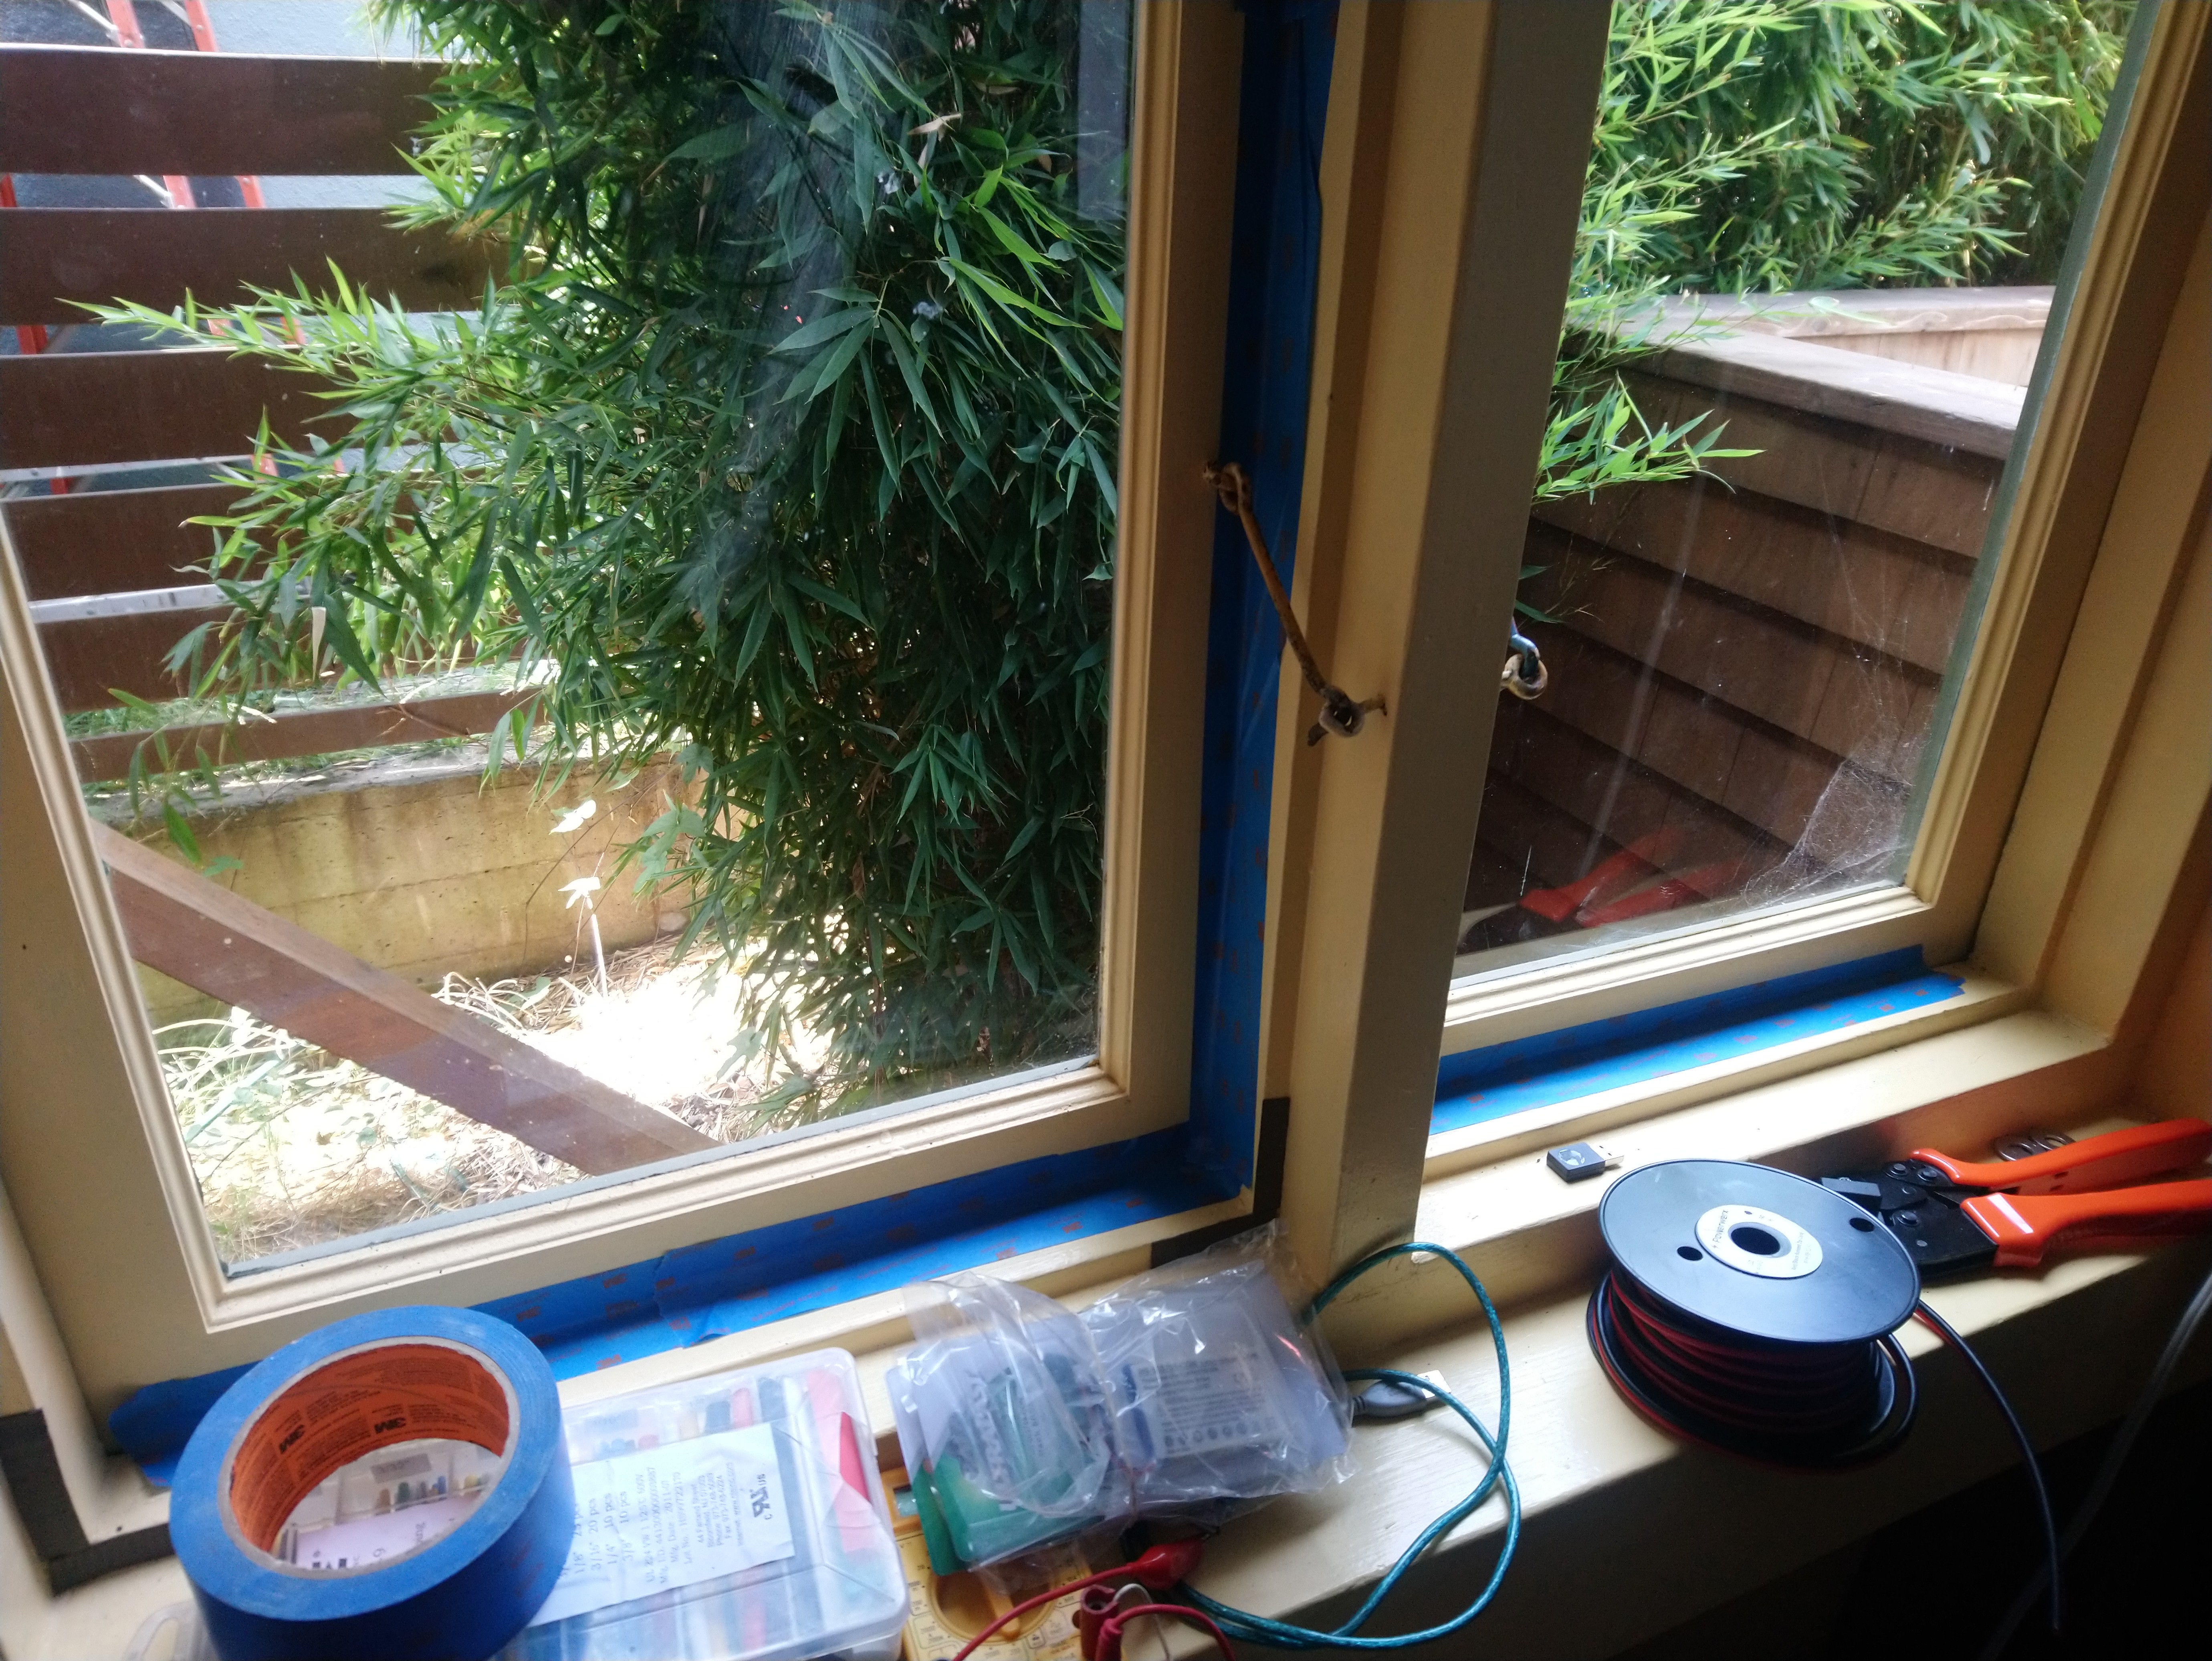
I noticed that the air quality in my bedroom was not great. The basement door is right outside my bedroom door, and is pretty leaky, so I started keeping my bedroom door closed. I also taped over my old, leaky windows with masking tape:
These interventions had a real effect!
Finally, it is possible to have good air quality. I'm currently sitting in my taped-up room, with doors closed, right next to a box-fan-with-filter:
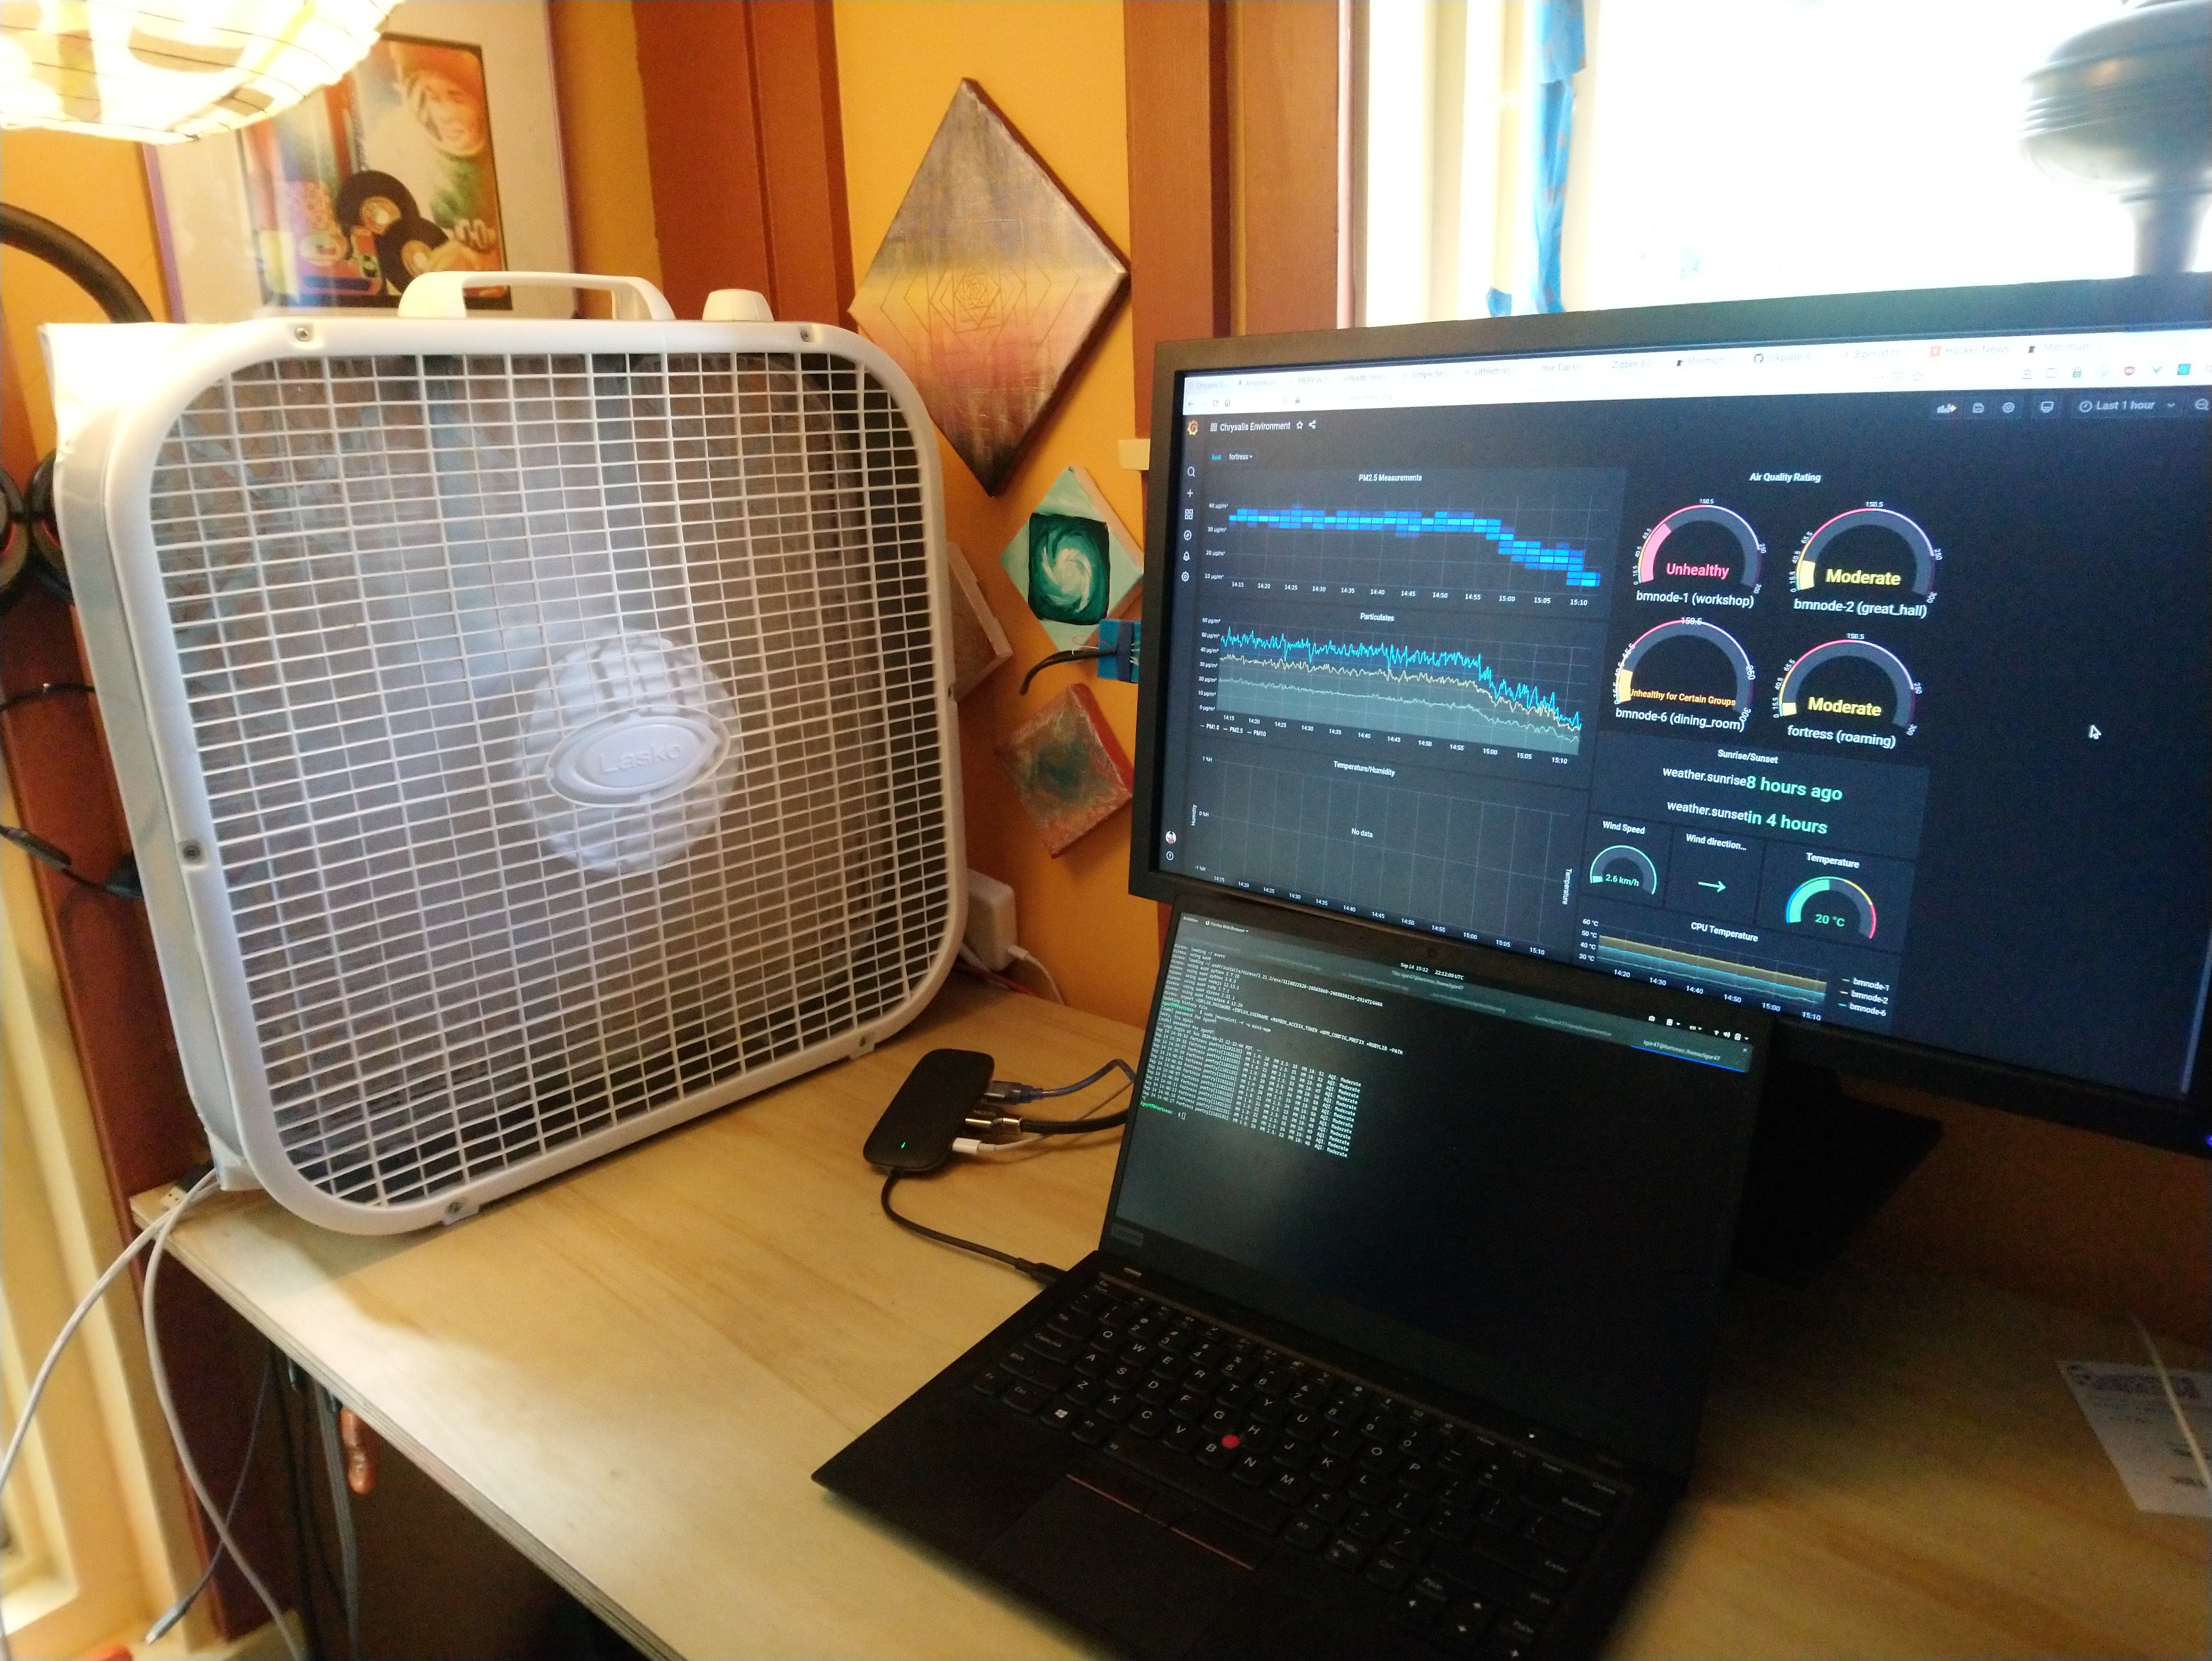
The results, with other rooms in the house and outside the house on my Grafana dashboard:
Setting up telegraf, influxdb, and grafana is beyond the scope of this post.
If you do go this route, however, the mini-aqm code is already writing a log of collected data into a measurements.log file.
You can run the collector while you're working on the visualization setup, and then import the "historical" data you've collected when you're done.
What's Next?
I'd like to help you breathe better air. Reach out if you need help building these devices, or have any questions at all. Also, if you're in the Bay Area, I have a few spare PMS7003 devices. If you'd like one without waiting for them to be shipped from China, please reach out, and I can leave one on my porch for you to come grab.